Author: Kat

  • What You Need to Know When Applying for Your UK Ancestry Visa

    What You Need to Know When Applying for Your UK Ancestry Visa

    If you were born in a Commonwealth country, chances are that you have ancestral ties to the United Kingdom (UK). If it were your grandparent/s that were born in the UK, the Channel Islands or the Isle of Man you may be eligible for UK Ancestry visa.

    The visa allows you to work and live in the UK for an initial 5-year period. Not only does this visa cover you moving to the UK, but this visa can be extended to your family members or dependants (including unmarried and same-sex partners).

    Disclaimer: This is based on my experience (I’m not a lawyer or immigration advisor) and you should seek professional legal advice if you are unsure. Go to GOV UK to check if there have been any changes to the visa rule & fees.

    UK Ancestry Visa Criteria

    The UK Ancestry visa is quite simple and only has 5 requirements. If you are:

    • Commonwealth citizen.
    • Age 17 or older.
    • Can and intend to work in the UK.
    • Can adequately support and accommodate yourself.

    And… As mentioned above, show your UK ancestral ties and provide proof that at least one of your grandparents was born:

    • In the UK (including the Channel Islands and the Isle of Man).
    • Before 31 March 1922 in what is now the Republic of Ireland.
    • On a British-registered ship or aircraft.

    UK Ancestry doesn’t apply for generations before your grandparents, so if your ancestral heritage was your great grandma that was born in the UK then you would NOT be eligible to apply. If one of your parents was born in the UK to see the article on applying for your ‘Right to Abode’ or alternatively you can apply for a UK passport.

    Before you start applying

    The earliest you can apply is three months before you plan to leave. Allow at least five to six weeks for the application process.

    As you required to fork out a lot of money to pay for the visa, IHS fee and have savings to support the visa application, I suggest you start the saving process as far in advance as you can.

    I finally put together my UK Ancestry Application and explanation around the questions! Make sure you head over to get the details. 

    Not sure what else you need to organise before you move? Be sure to visit my list of things to organise before moving to the UK.

    UK Ancestry visa financial requirements

    When I applied for my UK Ancestry visa application I was told that I needed to provide 3 months of bank statements showing that I had more than £1,600 in my account.

    The GOV.UK website no longer specifies what the financial requirements are to meet the UK Ancestry visa. This is frustrating when you are trying to plan to save and provide the right evidence to be successful.

    However, you should have savings in your bank account for at least 3 months before applying.

    Visa Cost

    The UK has now added an extra NHS charge to all nationalities applying for UK visa and this is an extra £624 per year. As the UK Ancestry visa is valid for 5 years the total cost will be £3,120 for the NHS fees plus the normal fee of £516.

    Check here for the latest fees.

    Applying Yourself or Using a Company for Your UK Ancestry Visa?

    At the time I applied for my visa the application appeared complicated and I didn’t want to muck it up, so I found a company to help me. I used Visa First, filled out the questionnaire and sent it off with all the relevant documents.

    Since going through the process with a company and learning about the application it turns out it was easy! When my sister decided she was moving over I quickly and successfully helped her with the application.

    My advice is not to let the forms scare you! It is an easy process.

    Still keen on using a company then I would recommend using my friends at Britbound.

    Just to give you an extra bonus to start your adventure, Sarah at Britbound is giving you 10% off visa package! Just use the code KATSGONEGLOBAL.

    Do I Need Original Documents for my UK Ancestry Application?

    I find lots of threads asking whether the documents must be originals or copies can be supplied. Personally, I always provide originals for my application just in case they wish to see the originals and I did provide original documents for this application.

    Only a few application centres require you to post your documentation and generally handed back to you on the day so there is less risk of these being lost in transit.

    I have known people to provide copies of their documents and be successful. Additionally, others that have had a justice of the peace verify the documents are genuine.

    In UK Ancestry document it says that documents must look genuine and that originals must be provided when translated.

    Documentation Required for Ancestry Visa Application

    Recently I got my hands on the latest checklist of evidence you may require for your application. I’m so excited to be able to share this with you!

    All documents provided with an application must be in English which will need a full translation that has been independently verified. 

    Please note this should be tailored to your application and the answers you provide. If you are unsure please check with UKVI or look at a company like Britbound to help you out.

    Passport, Identity and Residency 

    • Valid Passport or travel document.
    • Evidence of your permission to be in the country where you are applying from, if you are not a national of that country i.e. a valid visa or a VEVO printout or letter from DIBP (based on Australian residency).
    • Other identification documents i.e birth certificate or national identity card.

    Evidence of Current Employment or Studies 

    • If you are currently employed, evidence of your employment and the total income stated on the application form like a letter from your employer, payslips, tax returns/ business registration documents and business bank account statements. I included my employment contract to support employment and finances. 
    • If you are studying then evidence to support this like a letter from your university or school and other proofs of studies. 
    • If you were previously studying then evidence of qualifications obtained like a certificate of award, academic reference or transcripts. I didn’t provide any of my qualifications but I know recent applicants that have, for example, documents to support they are an Australian Account. 

    Evidence of Finances

    • Evidence to meet the cost of the trip and monthly income, as stated on the application form, for example, if someone is paying for you then you need bank statements of the person paying for the trip, providing maintenance to the applicant in the UK or if it’s you paying then your own personal accounts to support this (which you should have anyway 🙂 with the below bullet).  
    • A bank statement which meets the requirements as stated in the points-based policy guidance relating to your UK Ancestry application. 

    I provided three months of bank statements. Bank statements should be printed on branch-specific letterhead with the contact info for the branch where it was printed.

    If not, each statement should be stamped and/or signed. If they won’t do that, a letter from a branch manager confirming their authenticity and correctness will suffice.

    Evidence of Property and Assets

    • If you own any property or assets then you will need either mortgage statements, property deeds, tenancy agreements, accountants letters or land registration documents.  

    Evidence of Travel, UK Accommodation or Sponsorship 

    • Evidence of your travel arrangements so flights, accommodation bookings or travel agent documents. 
    • If you have a UK sponsor then you will need a letter of invitation from the sponsor, evidence of the UK immigration status, evidence of the sponsors accommodation and finances. So basically passport/visa’s, bank statement and tenancy agreements or mortgage.   

    Evidence of Intent to Work

    • Resume/ CV (to prove that you can and intend to work in the UK)
    • Other evidence to consider:
      • Printouts of registration emails from UK job sites e.g. Reed, London Jobs, Indeed.
      • Communication with recruitment agencies.
      • Job Applications. 

    Just to note you don’t need to secure a job before applying for the Ancestry Visa. The requirement is that you only need to show the intent to work which is why I used my resume as supporting information. 

    Evidence of UK Ancestry 

    • The birth certificate of your parent (only the parent of the grandparent you’re applying through).
    • The birth certificate of your grandparent.
    • Marriage certificate (to support heritage if unclear).

    If your UK Ancestry is easy to identify via the birth certificate then you will only need to provide the birth certificates, for example:

    • Your current surname matches your parents’ name on their birth certificate
    • On your grandparent, you can track your parents’ connection with their maiden name or surname.

    If you can’t track the ancestry via the birth certificates then you will need to provide marriage certificates or adoption papers to prove the requirement. 

    I remember being a bit bewildered at all the documents required and had originally thought I needed to get my mum’s birth and marriage certificate; my grandparent’s marriage certificate.

    The marriage certificates weren’t needed for my application and added another expense to the process. At least I now have copies if I ever need them.

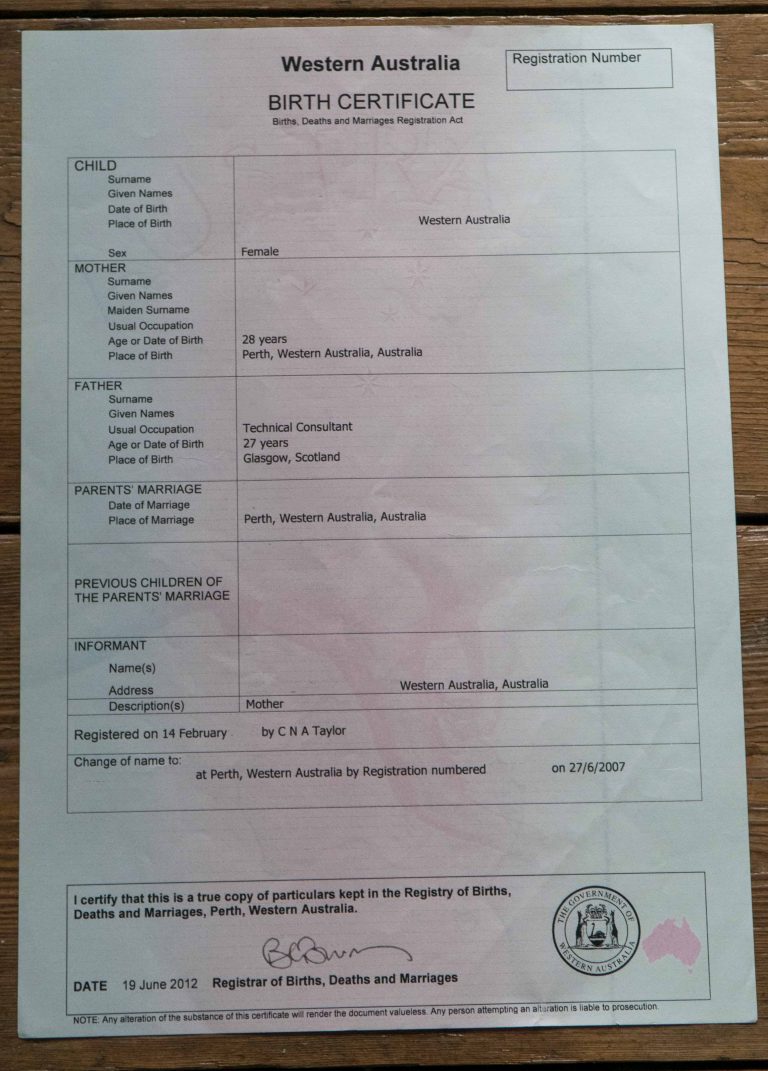
    Example of WA Birth Certificate for UK Ancestry Application
    Example of WA Birth Certificate for UK Ancestry Application

    What if I Don’t Have my Grandparent’s Original Birth Certificate?

    This is a common problem that people face when trying to apply for UK Ancestry visa. I was faced with this when I was applying for my visa as my granddad died when my mum was 13 years old and she did not have any copies of his birth certificate.

    There’s a different process for British, Welsh, Scottish and Northern Ireland certificates. Here is a list of the departments to get certificates for each of these countries:

    For British and Welsh Grandparents

    It is possible to order a copy of a birth, death or a marriage certificate on the General Register Office (GRO) website. You’ll need to register on the website to order a copy of a birth, adoption, death, marriage or civil partnership certificate for England and Wales. At the time of writing, certificates cost £9.25.

    For Scottish Grandparents

    As my granddad was Scottish I used Scotlands People to buy my granddads birth certificate. They even sent it to Australia! Which was fantastic and I didn’t have to apply in person. Go to Scotlands People and use the search indexes to find your grandparent (which is free). At the time of writing each certificate cost £12.

    For Northern Irish Grandparents

    You will need to go to the NI Direct website. It will allow you to order a copy of your grandparent’s birth, adoption, marriage or civil partnership certificate for Northern Ireland. At the time of writing a certificate costs £15.00.

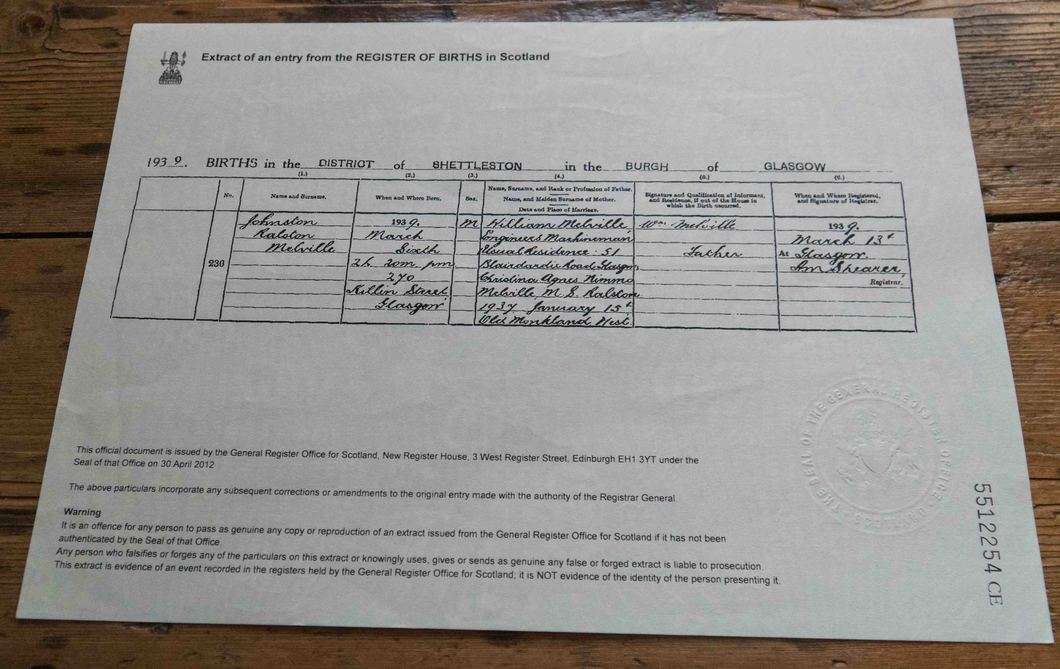
    Example of an Official Scottish Birth Certificate

    Example of Scottish Birth Certificate for UK Ancestry Application
    My granddad’s birth certificate that I provided during my UK Ancestry application.

    There are quite a few questions on whether you can provide copies or require an original birth certificate for the application. 

    As you can see in the photo it says that it is an extract of an entry from the Register of Births in Scotland. The certificate also has an embossed stamp, a unique number and states that it is an official document from General Office for Scotland. You will need to take an original copy or photocopy of the official birth certificate. 

    The company that I used for my Ancestry visa actually questioned me if this was an official copy. I ended up calling General Office for Scotland who assured me that this is an official government copy and was accepted as evidence in my application, my sister’s application and my mum applying for her UK Passport. 

    Fill Out and Submit Application

    The UK Ancestry visa is moving to the new application process so to apply you need to go to the gov.uk website. Depending on which country you are applying from the gov.uk website will direct you to the right place.

    psst.. I have finally put together a post explaining the questions and answers I put for my UK Ancestry Application. 

    Complete the online application, pay and then you will receive your booking confirmation for your biometric appointment. 

    There is only a set amount of appointments opened so keep trying every day or so. If you struggle to get an appointment they now have walk-in days. For Perth the walk-in days were twice a week and cost an additional $95AUD so check with your visa centre what days they run walk-in appointments. 

    With the new biometric resident permit (BRP) you will no longer get the full visa in your passport. They provide you with a temporary 30-day vignette visa until you collect the visa for a post office in the UK.

    In the application, it will ask you to choose a post office to collect your BRP from. I suggest choosing a central post office in the city or near your accommodation to make the collection easy!

    For more information about applying in Australia and New Zealand, read the articles below:

    Prepare Your Documents 

    Before your appointment ensure that you have the following documents ready to take with you:

    • The printout of your online application form
    • The copy of your biometrics appointment information
    • All supporting documentation (birth certificates, passports, resume, bank statement showing fund and any other evidence).

    Biometric Appointment 

    Next your biometric appointment! Exciting. Take along all the documents, application and booking confirmation.

    The visa application centre will take your “biometric information” which is fingerprints and a photo. At the appointment, they will scan your documentation and hand the documents back to you.

    Once your application is processed they will then post your passport back with your visa. If you have paid the $95 (based on Australian costs) you will get to keep your passport and they will issue the visa on the day. 

    UK Ancestry Visa Processing Time

    On average you will receive a decision on your visa application within 3 weeks of lodging your application but this may vary depending on your country of residence.

    You can check the guide processing times to find out how long your visa will take to process in your country. 

    Other Useful Information

    What is a 30 Day Vignette Sticker?

    Instead of getting a vignette with the full granted leave, the Immigration Department now issue what’s called a 30-day vignette sticker. It’s based on your planned arrival date, for example, I’ve put that I am arriving in the country on the 8th of August then I have 30-days from this date to collect my visa. 

    It is very important to make sure you choose your intended travel date carefully and it is what is represented on the application form when applying for the visa. 

    You will not be able to travel to the UK before this date. The permit will only be valid as of the intended date of travel if you cannot travel on between these dates then you will need to apply for an extension.

    Can I Apply for a Vignette Extension?

    Yes, it is possible to get a vignette transfer (extension). There would be an additional cost to your application and country dependent.

    There is another online application form to be completed similar to that of your initial visa application.

    The British High Commission will then provide you with a new 30-day permit to accommodate your new proposed travels.

    Even though you will be issued a new entry date this will not change your visa start date. If you plan on applying for permanent residency at some point you will need to factor this into your decision as if it’s longer than 180 days in a rolling year your will need to apply for UK Ancestry extension.

    Here are the details provided by the Visa and Immigration Department on transferring of a visa and you can find the latest fees here.

    Steps to Transfer Vignette

    1. To apply go to https://www.gov.uk/transfer-visa
    2. Then you will need to select “transfer your visa to a new passport online if you’re outside the UK”. It’s a little confusing the terminology they use but it is the correct choice for replacing the vignette.
    3. Complete the application form – it’s basically applying for a new visa the information they request 🙁
    4. Pay the fee
    5. Arrange your Biometrics appointment – unfortunately, with every visa change you need to go for another biometric appointment. I’ve had mine done 3 times now!
    6. Upload the relevant documentation (Proof of Maintenance, same criteria as before for UK Ancestry Visa)
    7. Attend your Biometrics
    8. Post your passport – You can keep it if you wish to pay additional fees.
    9. Wait for the return of your passport with your new entry vignette.

    What’s a Biometric Residence Permit (BRP) Card?

    Biometric Residence Permit (BRP) is your actual visa and basically looks like a drivers licence. It holds all your immigration status and entitlements while you are in the UK.

    Being a part of Facebook groups I occasionally see people lose their BRP on things like a night-out or silly travel incident, please, please, keep your BRP safe. It doesn’t cost too much to replace, it’s just a pain… A new BRP costs £56 if you apply by post, however, the processing time is 8 weeks and in person will cost more. 

    More Moving to the UK Articles

    Have you applied for an Ancestry Visa? What was your experience?

  • What You Need to Know Before Going to Russia

    What You Need to Know Before Going to Russia

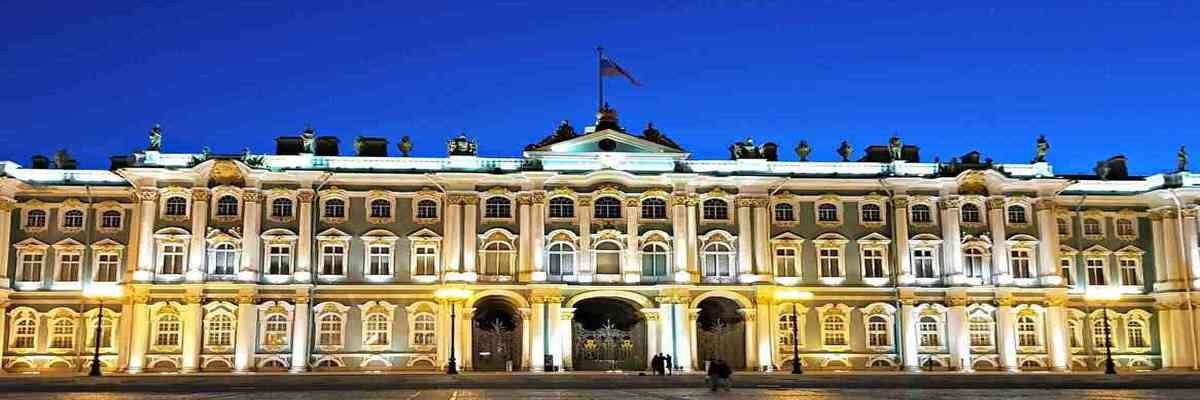
    Before travelling to Russia, there are important things to know to make your trip smooth and enjoyable. With stunning attractions like the Hermitage, the Kremlin, Kazan Cathedral, St Isaac’s Cathedral, Church of the Saviour on the Spilled Blood, and St Basil’s Cathedral, it’s no wonder Russia is becoming a tourist destination.

    In this guide, I have outlined 18 key things to consider before your trip.

    1. Check if you need a visa

    Russia does require you to have a visa unless your country is listed in the “visa-free regime” Check more here for details about “visa-free regime” countries or if you are arriving by cruise or ferry.

    Cruise or ferry passengers can stay in Russia for 72 hours without a visa if they have booked tours through officially licensed companies. This includes:

    • St Petersburg
    • Kaliningrad
    • Vladivostok
    • Sochi
    • Vyborg
    • Korsakov (Sakhalin Island)
    • Novorossiysk
    • Arkhangelsk,
    • Zarubino (Primorsky Krai)
    • Murmansk.

    Allow a month minimum to obtain your visa. The recommendation is to apply for your visa before booking flights and accommodation, although you need to list your host company, dates and at least need to know where you are interested in staying. They have recently introduced an e-visa scheme for some countries, to find out more information check out UK visa service centres guide.

    2. Register Upon Arrival in Russia

    The process of registering on arrival dates back past the Soviet times to ensure you were not occupying valuable Russian soil without authorities’ permission. The registration used to be a little stamp in your passport on a paper attached to your visa and/or on the new migration card (if it was given to you) before 2007 which needed to be registered within 72 working hours.

    It has been a little more modernised since 2007 and is now a special piece of paper that confirms your registration has been submitted. It’s not meant to be your obligation and should be done by the accommodating party. However, if it’s not registered within seven working days upon arrival, you could be fined, deported (although deportation is unlikely) and denied entry to Russia for up to 5 years.

    Our hostels provided us with the piece of paper we needed for our registration upon arrival. If they don’t provide this, chase your accommodation to provide this!

    3. Everything is in Сyrillic Writing unless it is Tourist Related

    All the writing is in Cyrillic which can make it interesting for those who are used to the Latin alphabet. I personally cannot read Cyrillic so this made it a little challenging to navigate and read menus at restaurants that didn’t have an English menu.

    There are a few signs with English translations but some cities don’t have them at all. This of course, can make it a little frustrating for a tourist.

    When I was travelling around google maps offline, a tourist map of the city or a phrase book/notepad which has necessary words like “exit” Выход, “entrance” вход, “restaurant” ресторан, “pharmacy”аптека, “bank” Банка and “metro” метро.

    Our first experience of eating out at a restaurant where no one spoke English was a fun experience. We ended up randomly guessing what to eat on the menu. That is a little challenging when you are a vegetarian hoping for a non-meat dish!

    The little icons looked like they would be burgers and pizza. My boyfriend thought he was getting a cheeseburger and ended up with plum dumplings. My sister thought she would end up with some kind of burger and got a chicken tuna sandwich. I got exactly what I thought I would, a margarita pizza!

    Even though it was much to my amusement the others didn’t get what they wanted, my boyfriend enjoyed his plum dumplings. My sister, less so. She really doesn’t like tuna.

    If you not so game at randomly selecting food then most restaurants in the tourist area will have English menus available. Just check the menu before you sit down.

    4. English isn’t spoken too often in Russia

    English is not as widely spoken in Russia as it is in many other popular tourist destinations in Europe. In Moscow, we found that English was less commonly spoken than in St Petersburg. Here are the best phrases to learn that will help you on your trip to Russia:

    Hello Здравствуйте (ZDRAHST-vooy-tyeh)
    Thank you Спасибо (spuh-SEE-buh)
    Yes Да (dah)
    No Нет (nyeht)
    Goodbye До свидания (duh svee-DAH-nyah.)
    I can’t speak Russian Я не говорю по-русски (хорошо). (yah nee guh-vah-RYOO pah ROO-skee [khah-rah-SHOH])
    Do you speak English? Вы говорите по-английски? (vyh guh-vah-REE-tyeh pah ahn-GLEES-kee?)
    Good morning Доброе утро (DOH-bruh-yeh OO-truh)
    Good evening Добрый вечер (DOH-bryh VYEH-chuhr)
    Where is the toilet? Где туалет? (gdyeh too-ah-LYEHT?)
    Vodka водка (VOHT-kah)
    Water вода/ой (vah-DAH / vah-DOY)

    For all the tourist attractions we went to, we found that everyone spoke a little English so it was easy enough to buy tickets. Although, some museums did not translate from Russian to English and we skipped a couple of attractions because of this.

    5. Best Currency to Exchanging Money for Roubles

    The best currencies to exchange in Russia are US Dollars and Euros. Other currencies do not get a very good rate.

    Only change money at banks, hotels and airport exchange bureaux. It is an offence to change money from street traders. Most major banks and currency exchanges will sell you Roubles as well.

    6. Debit/Credit Cards are not widely accepted

    There are places in Russia that will accept debit/credit cards for purchases and there are some that don’t. Debit/credit cards are becoming more popular and undoubtedly it will soon enough be much more widely accepted.

    You can get money out from ATM machines where I was in Moscow and St Petersburg, and you could also get money from major banks.

    I recommend you keep some cash on you at all times, particularly if you are going to eat out or accept any goods or services ahead of purchase so that you don’t get caught out not being able to pay.

    7. Public Transport is the Best Way to Get Around Cities like Moscow and St Petersburg

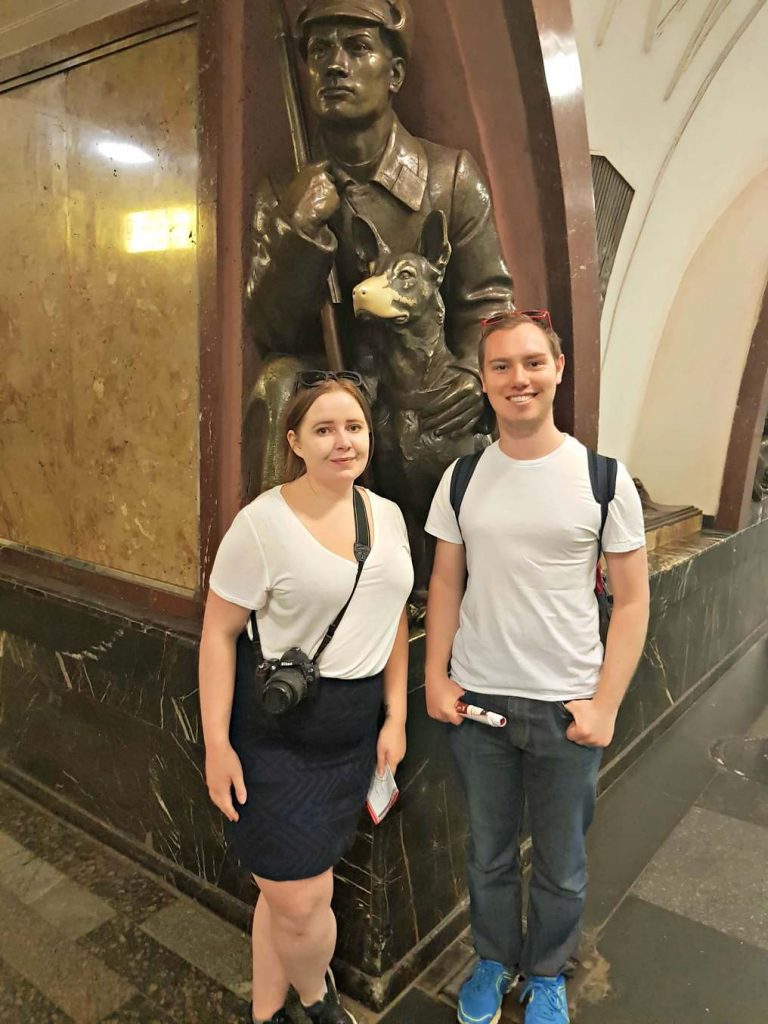
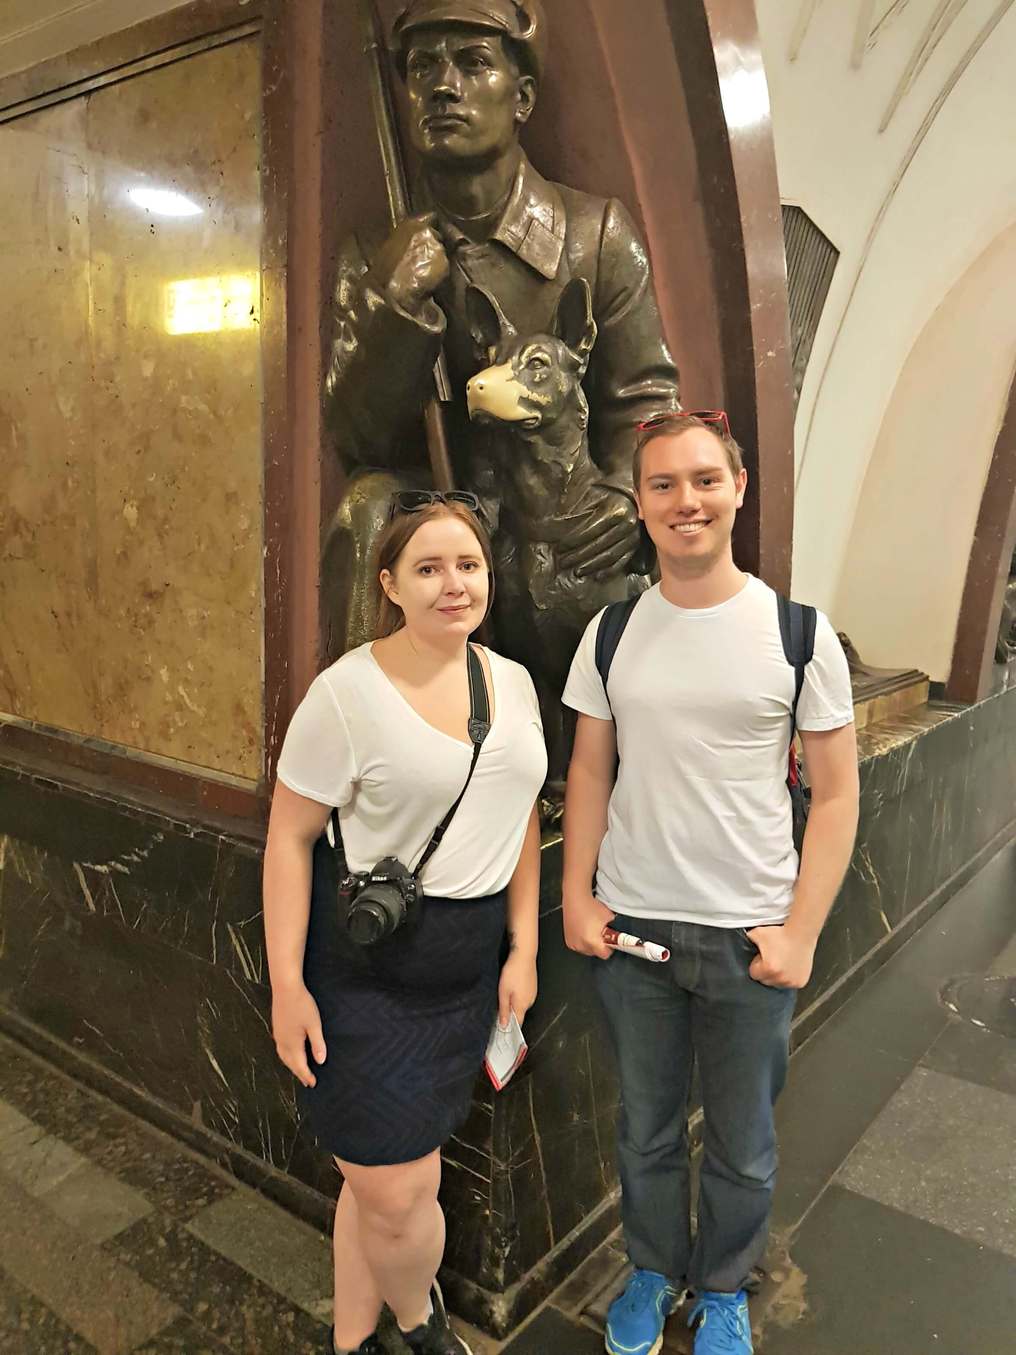
    Ploshchad Revolyutsii Metro Station Man with his Dog
    Ploshchad Revolyutsii Metro Station Man with his Dog

    Public transport is the best way to get around in most cities, especially the larger ones equipped with a subway system. The Moscow Metro is known as one of the world’s most efficient and cheapest underground transit systems. I would have to say the Moscow Metro is also one of the most beautiful. The stations are tourist attractions in their own right. Read more about how to complete a self-guided tour of the Moscow metro station during your visit.

    In Moscow, our accommodation gave us an English version of the metro map, which was handy for navigating the metro. However, where and how to buy tickets won’t be included in the map, so make sure you know how to do this activity.

    7. Don’t Drink The Tap Water

    It is not uncommon even to open the tap to see some brown water coming out for a little while and not the highest quality of water. If small amounts of tap water are consumed, it won’t hurt you so brushing your teeth with the water will cause harm. It could cause an upset stomach or growing illness in your stomach at most.

    When you are in Russia, drink bottled or filtered water. If you are ordering water at a restaurant and don’t want carbonated water, ensure you say that you want water without fizz or gas.

    The accommodation we stayed at is Moscow, and St Petersburg installed a filter solution so their water was safe to drink and saved us money. Alternatively, boiling water from the tap can make it safe to drink.

    9. Plan an Itinerary

    Russia is a big place with lots to see especially if you are only covering Moscow and St Petersburg on your trip. Planning is key to make sure you cover the highlights, allow for museum and attraction closure days and time to cover some of the sheer sizes of the sights.

    Creating your own DIY itinerary is the best way to explore Russia. Not only creating does creating your own DIY itinerary allow you to have flexibility but it is cheaper than a tour.

    If you are planning to go to Moscow and St Petersburg, here are some ideas:
    The Ultimate Guide on How to Spend Four Days in Moscow
    St Petersburg 4 Day Itinerary

    10. Be mindful of prices

    Russia does tend to have tourist and local prices so you will generally be paying more than the locals do. Museum tickets is an area you will generally see the prices difference against Russians. If you claim to be a Russian they will ask to see your passport or proof that you are a Russian resident.

    It is still cheaper than other European destinations but the key to being careful with prices in Russia is making sure you understand what the cost should be especially for restaurants, cabs or buying souvenirs.

    If you are lucky enough to be a student then using your student ID can save you money at museums and other attractions. Restaurants also have deals called ‘business lunches’, which are great value for dining out.

    11. Be Prepared for the Weather

    The weather in Russia is hard to predict and is generally very changeable. Places can be known to having 4 seasons in a day or just be extremes of hot and cold. Even the Russian locals do not know what to expect from the weather.

    Not being from a cold country myself, I am not sure I could handle the extreme cold of Russia during the winter. If travelling during the winter, it’s more important to protect yourself from the wet, rather than the cold. As bigger cities will be warmer the snow will melt quicker and turn into mush than regional areas. Make sure if you are travelling during winter that you bring the right shoes. Had I gone there in winter I would have taken my snow boots.

    When we visited Russia, it was during summer and we were very lucky with the weather! Only 2 days that rained out of the 8 days when we were there. The temperature was similar to a London summer and we just packed light clothes along with a jacket plus some umbrellas and good walking shoes like sneakers.

    Summer weather in St Petersburg Russia
    Summer weather in St Petersburg Russia

    13. Take Off Your Shoes When You Enter Someone’s Home

    Be prepared to take off your shoes when you enter someone’s house in Russia or even your accommodation. Slippers are usually offered to guests when they come to visit. It was a rule at our hostels that we took our shoes off and they offered us disposable slippers to wear around the hostel.
    I think it is a mix of comfort and cleanliness due to the weather which can drag dirt through the house via your shoes.

    14. You Can’t Buy Alcohol from a Store After 11 PM

    Rocket and Bishops bar in St Petersburg
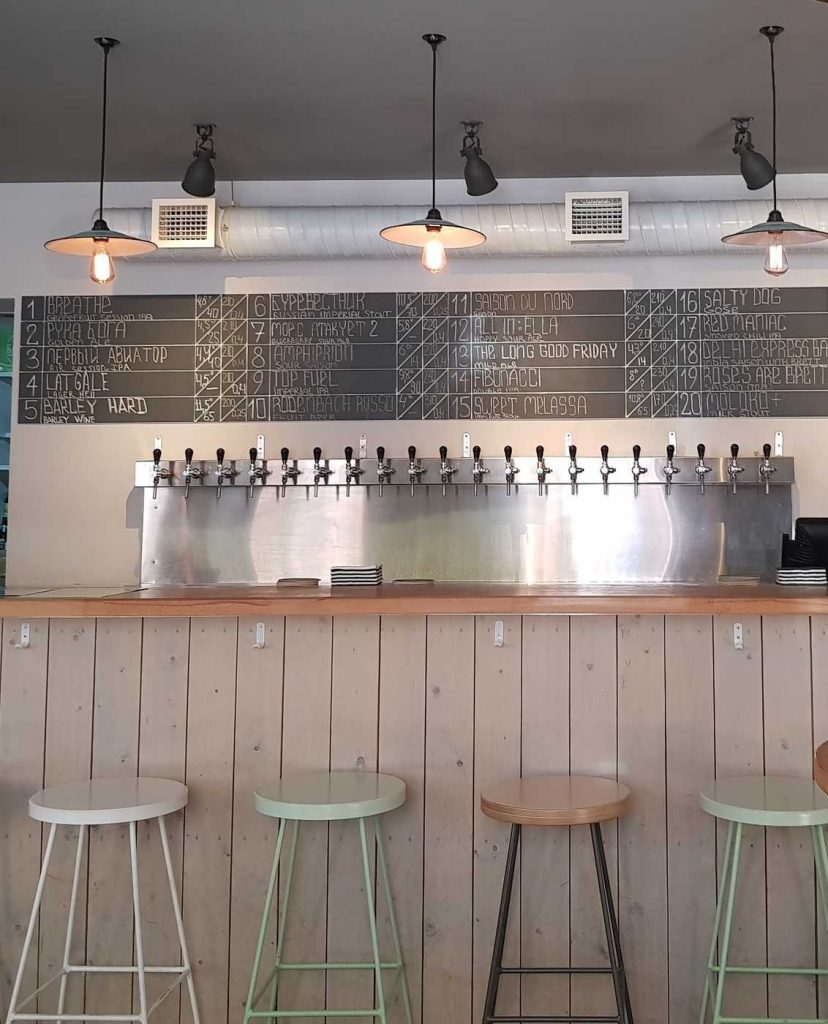
    Rocket and Bishops bar in St Petersburg

    Shops will stop selling alcohol after 11pm so make sure you get your last-minute booze beforehand. Alternatively, places like Moscow and St Petersburg will have plenty of bars to party and drink the night away.

    15. Dress up for a night on the town

    Dressed up to see the ballet at Mikhailovsky Theatre St Petersburg
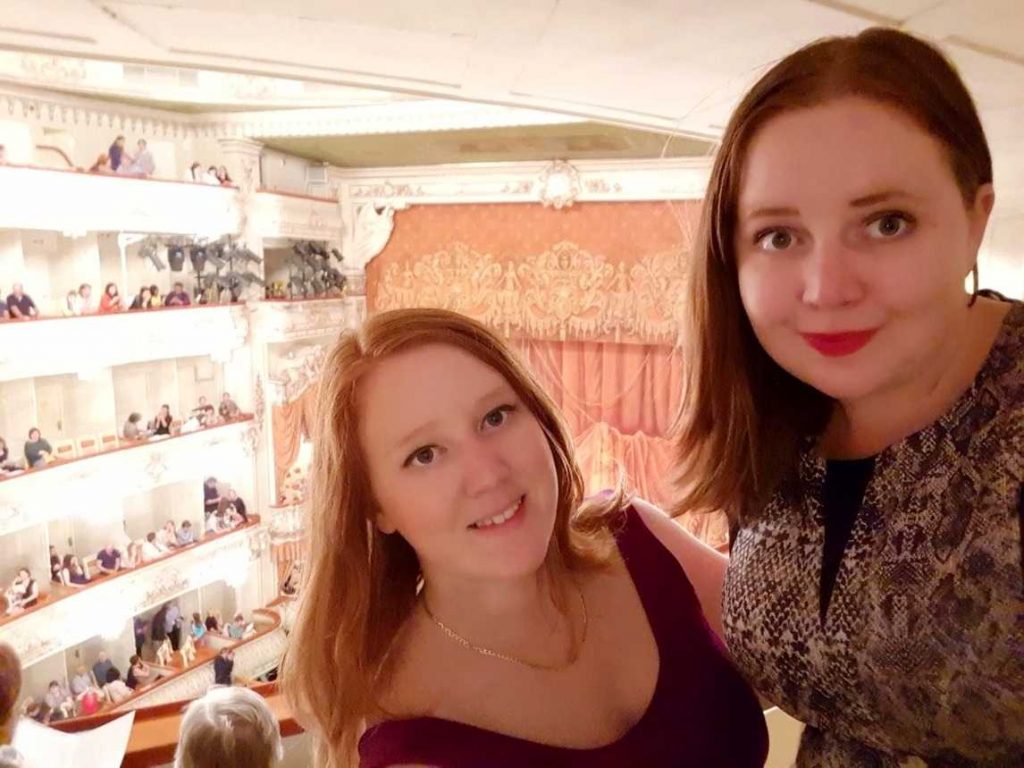
    Dressed up to see the ballet at Mikhailovsky Theatre St Petersburg

    Planning to hit the clubs whilst you are in Russia? It’s key to dress up otherwise you may not make it past the ‘face control’. For ladies it best to wear high heels and short skirts and for men to wear all black.
    If you prefer to go to the theatre or a posh restaurant, do like the Russian do and dress up and you will fit in like a charm.

    16. Asking for a Mixer with Your Vodka is a Sin

    Vodka is a big deal for Russians and breaking the traditions and by not drinking it as a shot is a sin. If shotting vodka is a struggle then have a chaser with the shot like a lemon, a pickle or, perhaps, a separate glass of water. Vodka is drunk in swift shots, not sipped.

    17. Be respectful in churches

    When travelling we tend to dress for the weather in European countries and don’t always think that what we are wearing will be an issue. For example; if you walked into a church in Russia with shorts and a tank top it would not go down to well.

    Ladies, when entering an active church you should cover your head and shoulders. In some monasteries and churches, it’s also required to wear a skirt, however, there are generally wraps are available at the door if you forget. Men have it easier with only needing to take off hats and not to wear shorts.

    18. Check the Train Timetable

    Long-distance train timetables are written according to Moscow time and can make it difficult when travelling across Russia’s multiple time zones. In most stations, the clocks are set to Moscow time. If you are only travelling between Moscow and St Petersburg there is nothing to worry about as they share the same time zone. Ensure you double check before travelling.

    19. Reserve Tickets to the Russian Ballet (remember some close during August)
    Ballet at Mikhailovsky Theatre St Petersburg
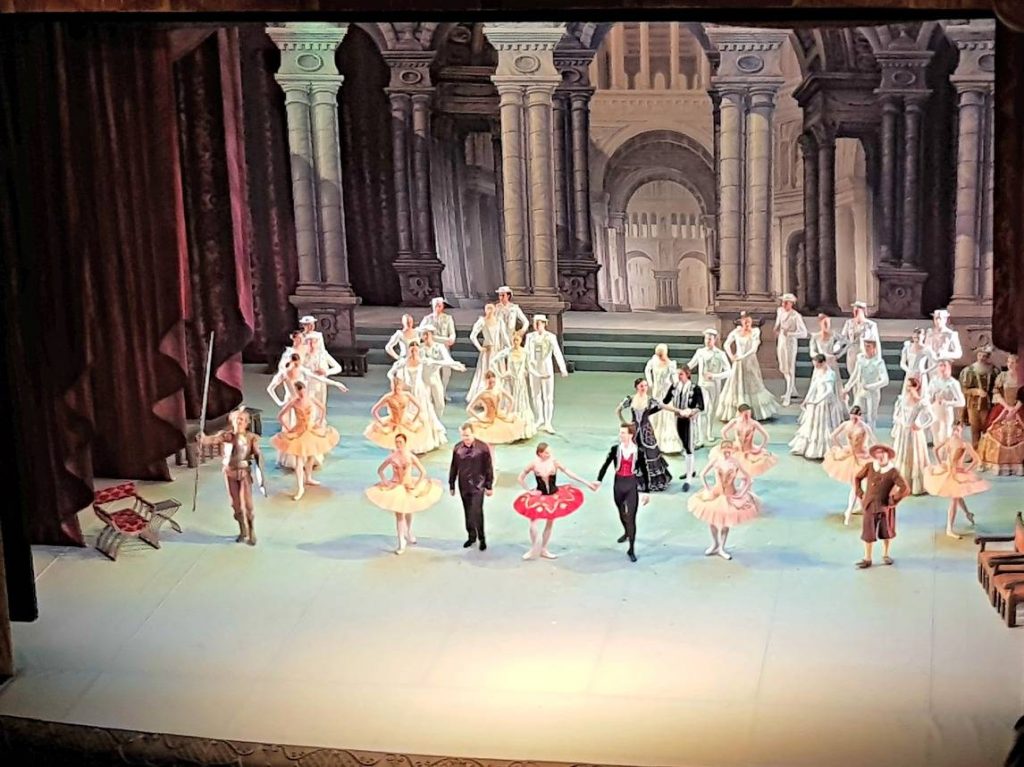
    Ballet at Mikhailovsky Theatre St Petersburg

    Book ballet tickets at least one month in advance as the reasonably priced tickets sell out fast and you could be left paying £150 and upwards. I booked us tickets online to the Mikhailosky Theater as they were around £25 – 30. Even though it was cheaper than the Bolshoi and the Mariinsky the performance was still spectacular.
    Below are the top ballet theatres in Russia (if you are going to Moscow or St Petersburg in August some of the theatres close so you may not be able to see the ballet during this month). You will be able to see what performances are on, how much they cost and will be able to book your tickets online.
    Bolshoi
    Mariinsky
    Mikhailosky

    What You Need to Know Before Going to Russia
    You can see why Russia is fast becoming a popular tourist destination with magnificent attractions like the Hermitage, the Kremlin and Kazan Cathedral. There are a few things you need to know before heading to Russia and I have detailed 19 things to consider before you go. #Russia #travellingtorussia #keythingstoknowbeforetravellingtorussia
  • The Ultimate Guide on How to Spend Four Days in Moscow

    The Ultimate Guide on How to Spend Four Days in Moscow

    Moscow is renowned for Red Square, the Kremlin and St Basil’s Cathedral, the list could go on. It’s the capital of Russia, has an astounding 13.5 million people that live there and 9 million people a day catch the metro. Ok, so 13.5 million isn’t a lot when you think about Beijing or Delhi but it’s a lot for Europe.

    It’s a vibrant city with a 24-hour vibe and a great mix of ancient and modern. Here is my Ultimate Guide on How to Spend Four Days in Moscow.

    Day one

    Red square is a must for day one of your Moscow trip and visit the marvellous buildings around like St Basil’s Cathedral, Kremlin and State History Museum. St Basil’s Cathedral must be one of the most beautiful buildings in the world. To think that Stalin wanted to knock down the cathedral so that he could fit tanks through Red Square, thankfully that didn’t happen and we still get to admire the architecture of the cathedral.

    Depending on the day, you can go to see Lenin in his Mausoleum in Red Square. Lenin was the founder of Soviet Union and has been there since his death in 1924. It’s open 10am – 1pm, Tuesday-Thursday & Saturday.

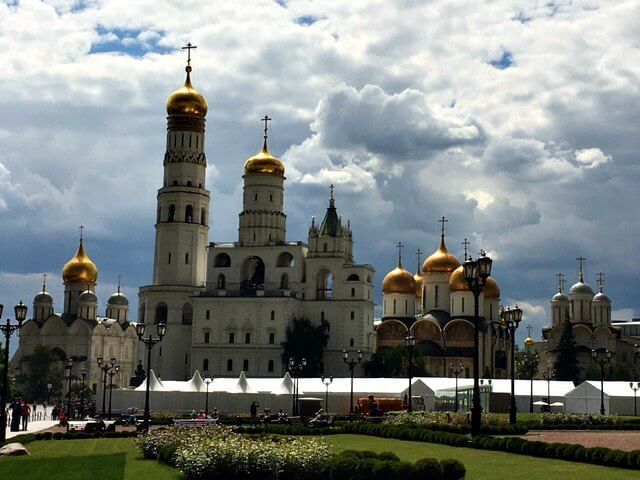
    Tick off the top things to do in Moscow, go behind the State History Museum and see the inside of the Kremlin. Pass the Tomb of the Unknown Soldier and finally arrive at the ticket desk.

    The ticket lines are a little confusing, there were two massive queues when we arrived and couldn’t tell what we were lining up for. I knew there were a couple of ticket types you can get so check which queue you want to wait in.
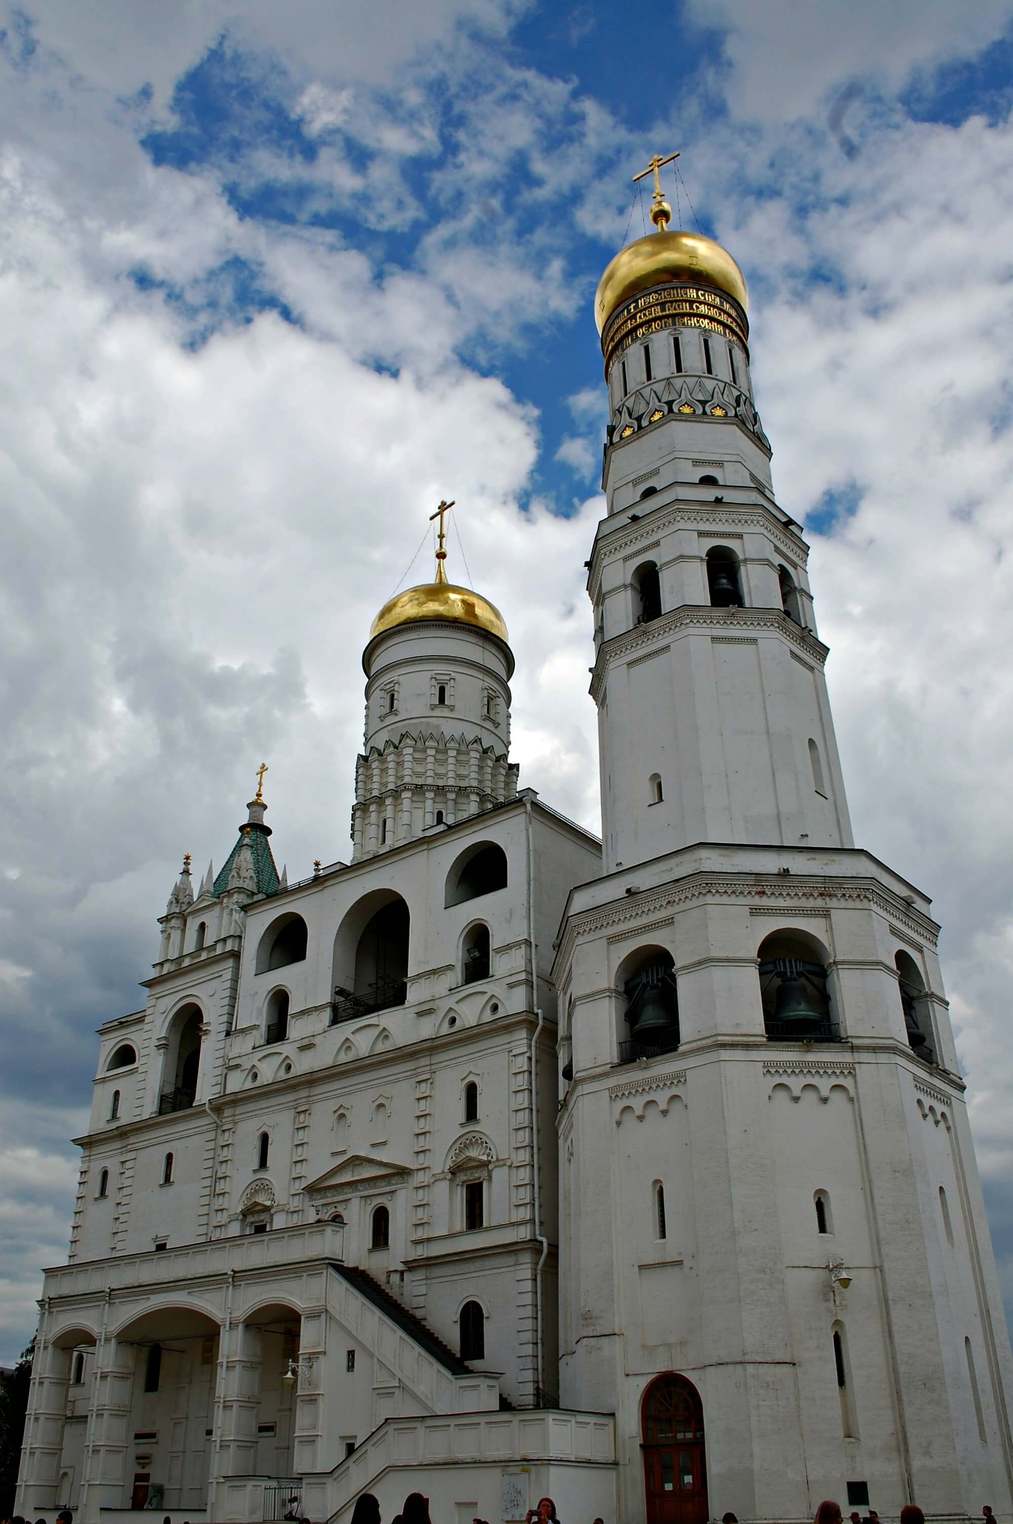
    It’s 500 roubles for complex, 700 roubles for the Armoury and complex, Ivan’s Bell tour is 250 roubles.
    Note that: Tickets to Armoury and Ivan’s Bell Tower are timed, tickets can be sold 45 minutes before opening times which are 10am, noon, 2.30pm and 4.30pm.

    Inside the Kremlin
    Inside the Kremlin
    The Ivan the Great Bell Tower
    The Ivan the Great Bell Tower

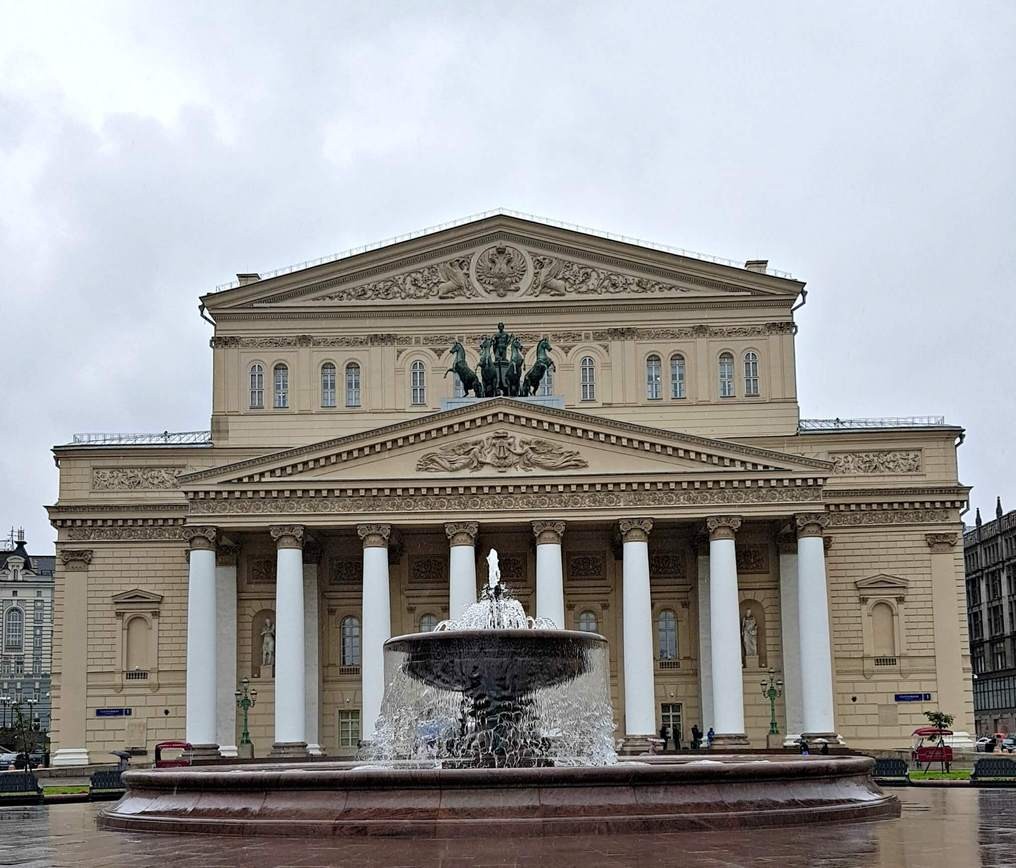
    The Bolshoi Theatre is the most prestige ballet in Russia and one of the world’s leading ballet companies. It’s on the pricer end of ballet tickets at £150 per ticket upwards. Not in my budget for this trip, read how to spend four days in St Petersburg for other ballet options.

    Bolshoi Ballet Theater
    Russia is famous for it’s ballet and the Bolshoi is one of most famous places to watch the ballet.

    Day Two

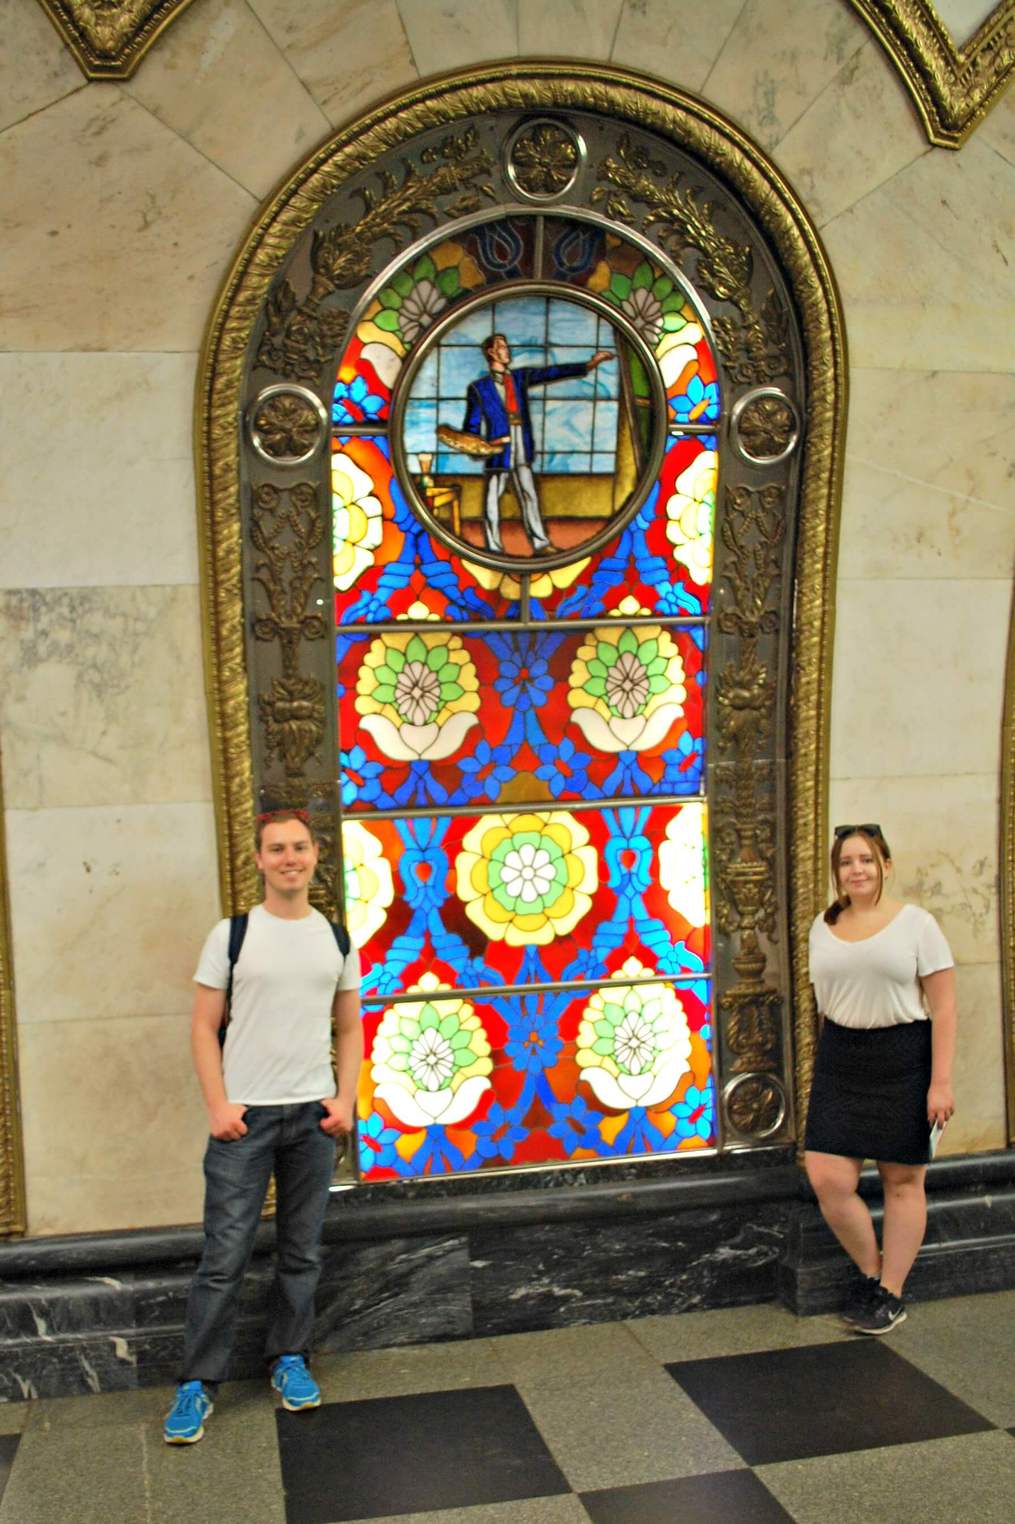
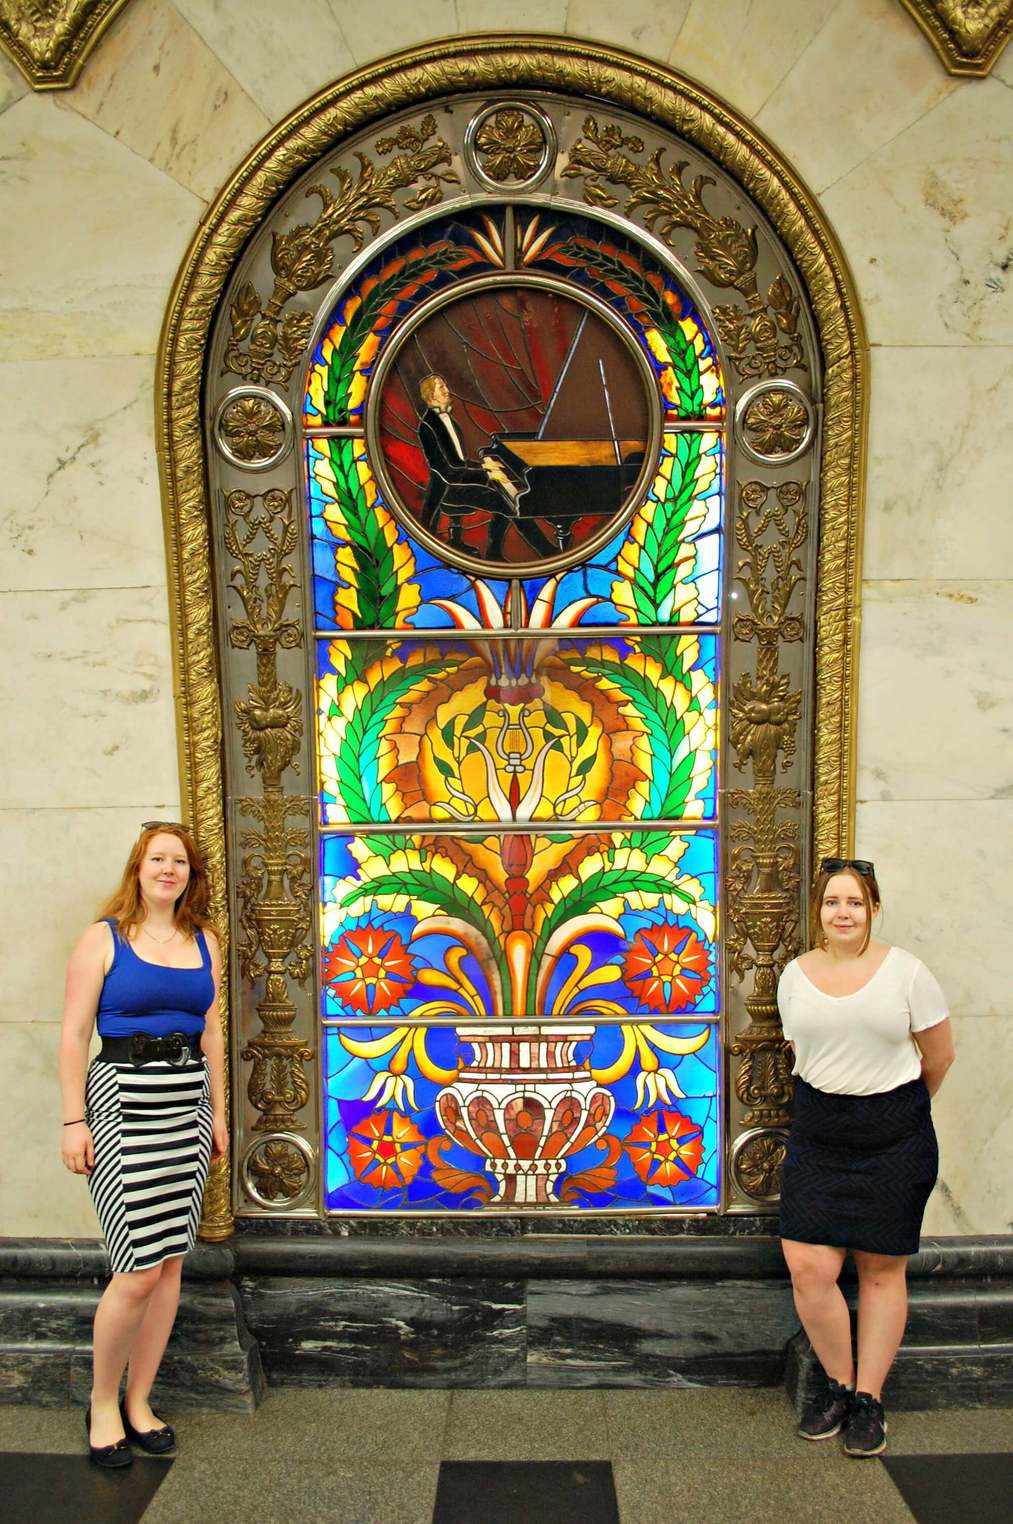
    Spend a few hours in the Moscow Metro Stations which are a tourist attraction in their own right. Being in awe of the different styles from statues to stained glass windows and wonder why your commute to work doesn’t look like this! Read my self-guided tour of the Moscow Metro Stations here…

    Novoslobodskaya Metro Station
    Novoslobodskaya Metro Station

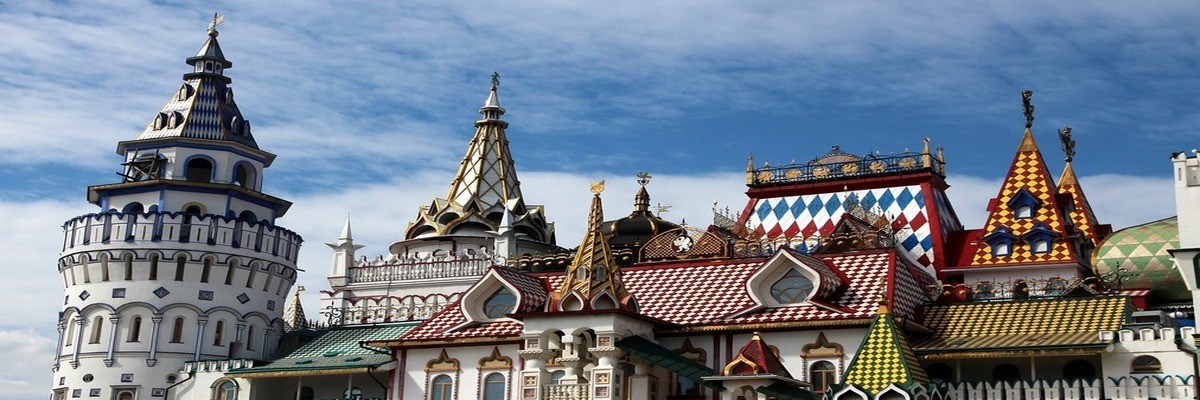
    As you are already exploring the Metro station head to Izmaylovsky markets, it’s near Partizanskaya station. It’s like a Disney-like medieval village where you can bargain for your souvenirs and take some wonderful photos. Be careful you don’t get caught out like us with their opening hours which is Wednesday and Friday to Sunday.

    Day three

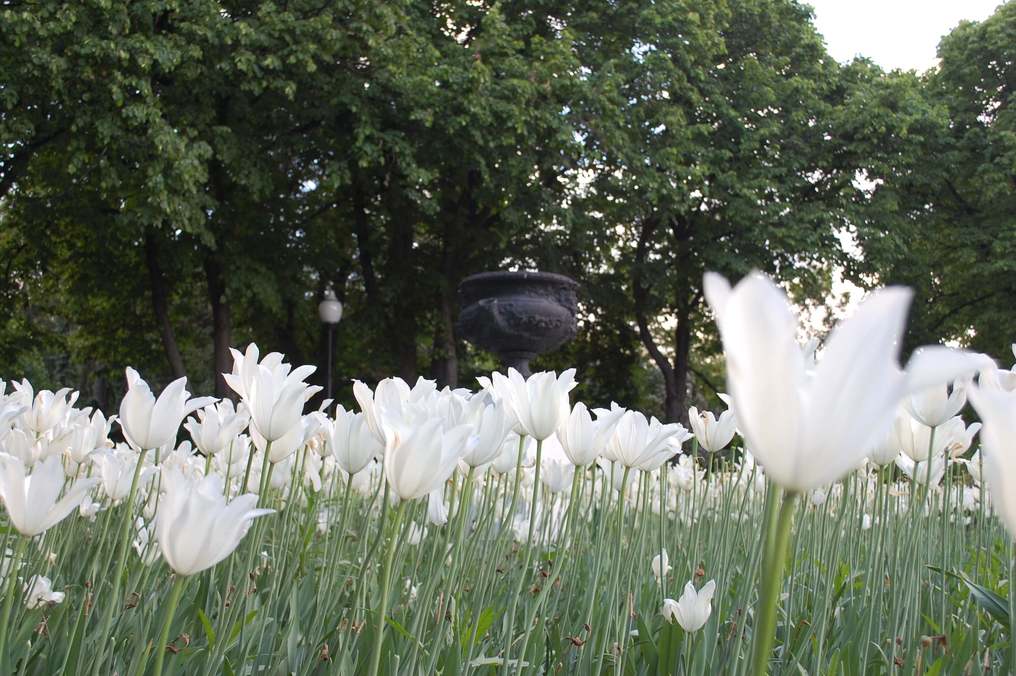
    Take a walk-through Gorky Park starting at the main gate, if the sun is shining grab an ice cream from one of the many vendors. People watch, catch a couple of skateboard or rollerblade tricks. Enjoy the endless activities the park offers from cycling, rollerblading, beach volleyball and table tennis.

    Flowers in Gorky Park
    Flowers in Gorky Park

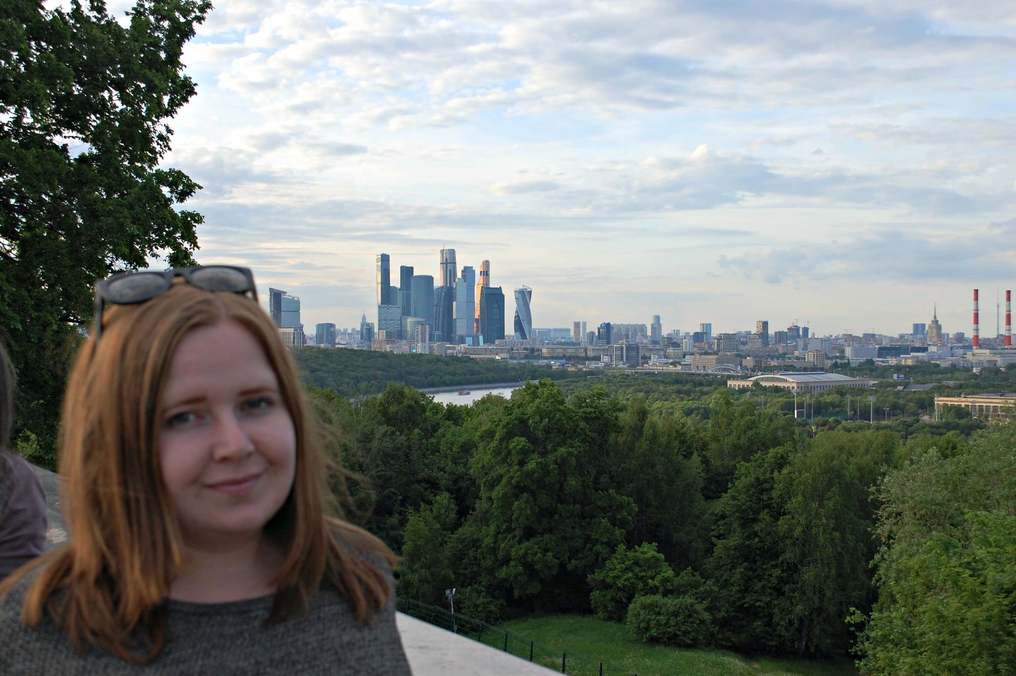
    Close by is the Sparrow Hill Observation Platform. Catch bus 7 from Akademika Petrovskogo St (ул. Академика Петровского) stop to Universitetskaya Square. The platform is one of the highest points in the city and has spectacular views of Moscow. Directly behind the platform is Moscow State University.

    Kat at Sparrow Hill Observation Deck
    Enjoying the views at Sparrow Hill Observation Deck.

    Relax at Tramplin na Vorobyevykh (Трамплин на Воробьевых) for drinks and continue enjoying overlooking Moscow city.

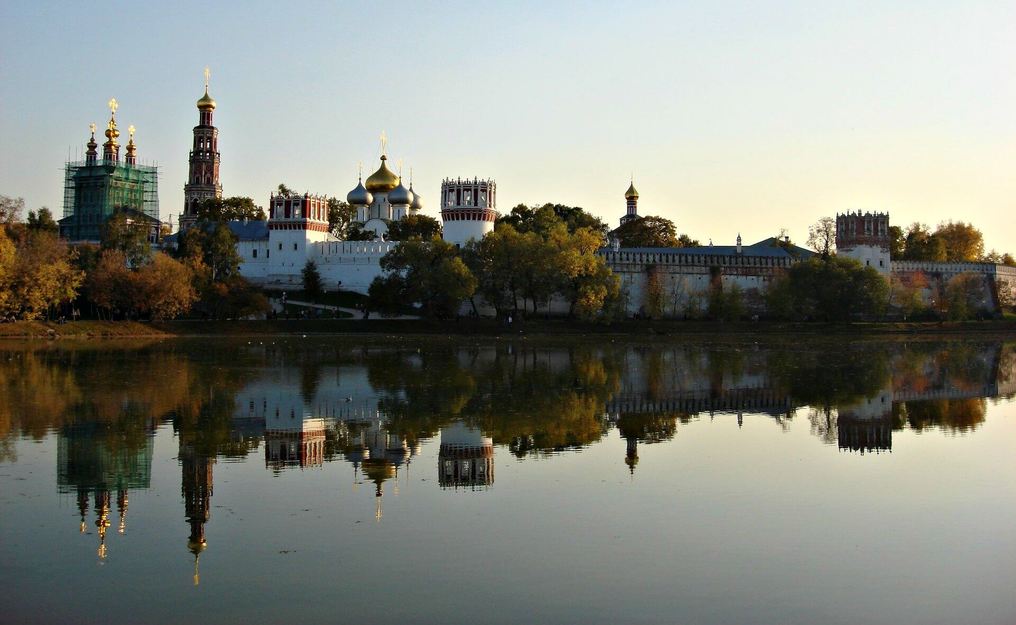
    Walking back to Vorobyovy Gory station you can head across to Novodevichy Convent.

    The convent was founded in 1524, and has been kept intact since the 17th century. Naturally, the Convent became a UNESCO World Heritage Site in 2004.

    Novodevichy Convent
    Novodevichy Convent

    Day Four

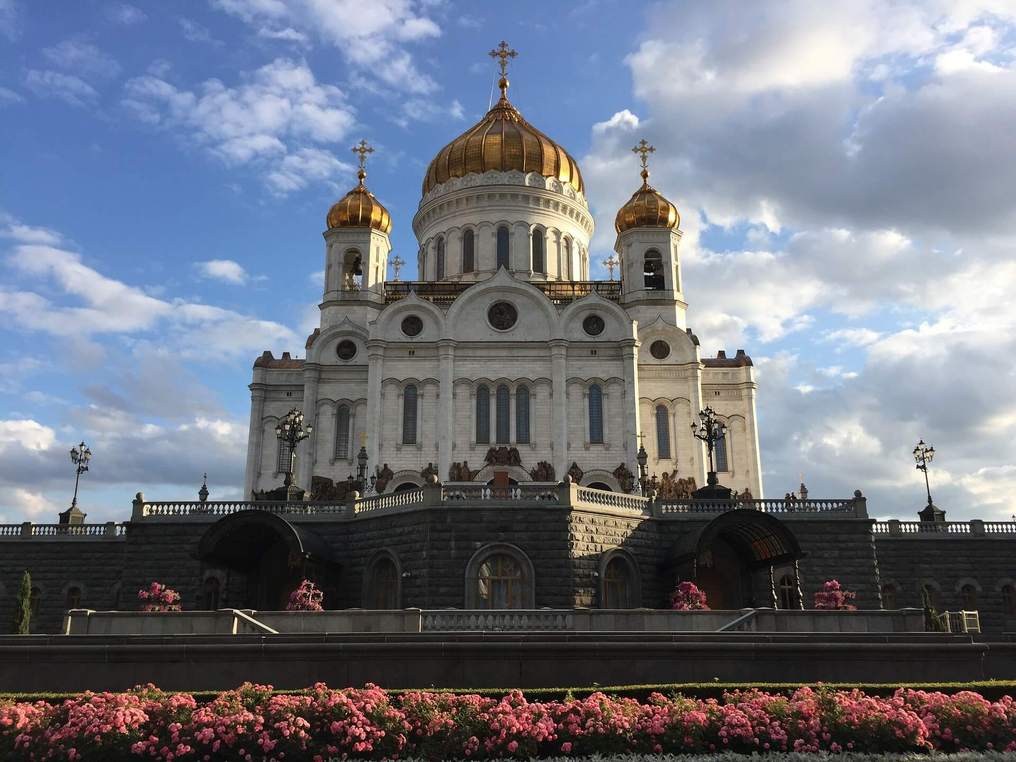
    Spend the last day wandering around the streets of Moscow. Start at the Cathedral of Christ the Saviour. There have been two churches of this site, the current cathedral which was built between 1995 – 2000 and the original church, built during the 19th century. Stalin destroyed the original church in 1931. It was intended to be replaced with colossal Palace of the Soviets to house the country’s legislature. Construction was halted in 1941 when Nazi Germany invaded the Soviet Union during World War II.

    Christ the Savior Cathedral
    Christ the Savior Cathedral

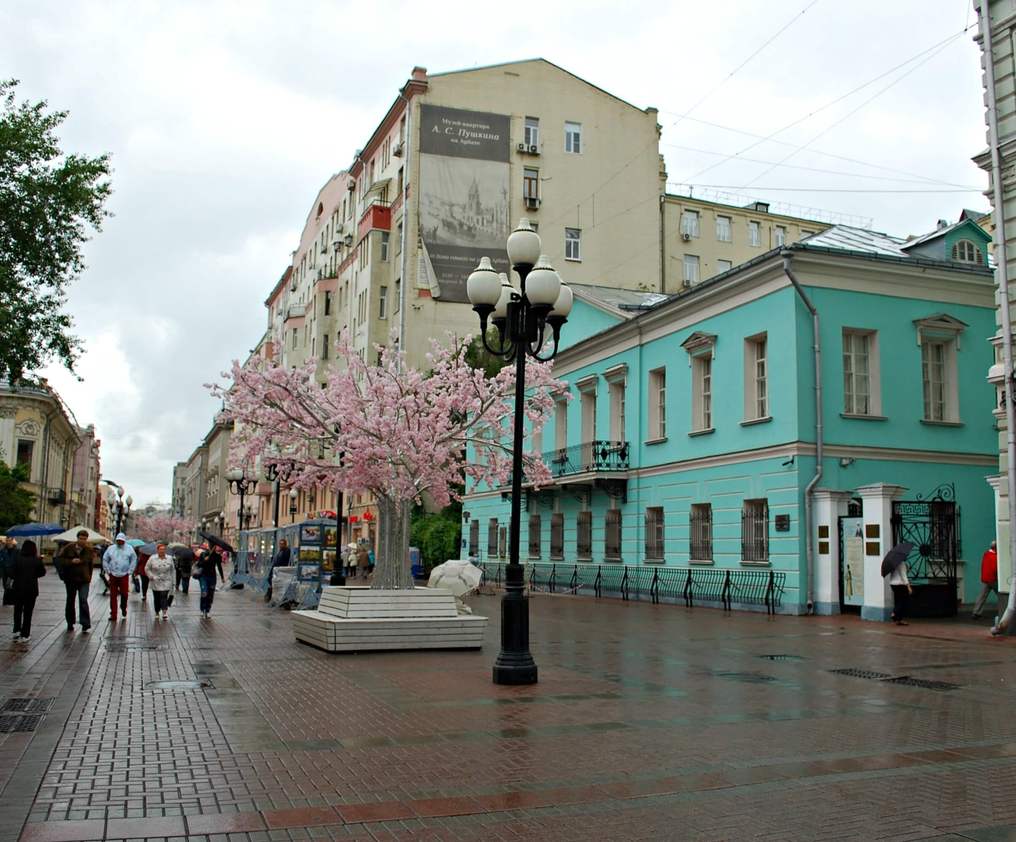
    Nearby is Old Arbat Street, it’s one of the oldest surviving streets in Moscow and has been around since the 15th century. Old Arbat Street used to be an important trade route and home to craftsmen. Now Arbat is a pedestrian walkway with historic buildings, souvenirs shops and restaurants.

    Old Arbat Street
    Old Arbat Street

    Have you ever been to Moscow? What are you most excited to see? Let me know in the comments!

  • A Self Guided Tour of the Moscow Metro Stations

    A Self Guided Tour of the Moscow Metro Stations

    The Moscow Metro is known as one of the most efficient and cheapest underground transit systems in the world and I would have to say the Moscow Metro is also one of the most beautiful. The stations are tourist attractions in their own right. The idea behind the stations was to make the city’s metro stations “palaces for the people” and has translated into some spectacular stations.

    It’s easy to get lost in exploring the different styles of the stations and the magnificent arts of work from statues to stained glass windows.

    There are so many stations to choose from! Here are the top ten stations you could visit; Elektrozavodskaya (Электрозаводская), Shosse Entuziastov (Шоссе Энтузиастов), Nakhimovsky Prospekt (Нахимовский Проспект), Park Pobedy (Парк Победы), Prospekt Mira (Проспе́кт Ми́ра), Kievskaya (Ки́евская), Komsomolskaya (Комсомо́льская), Novoslobodskaya (Новослобо́дская) , Mayakovskaya (Маяковская) and Ploschad Revolutsii (Пло́щадь Револю́ции) .

    Essentials for the tour

    • A map of the metro stations – As the signs in the stations are in Cyrillic, I suggest you highlight the Moscow Metro Stations you wish to see. This will make it easier when you are trying to find your way around the stations.
    • A ticket, which you can buy at the ticket booth (“касса”) of every station. I bought a single ride costs 55 rubles for my self-guided tour as you don’t ever step out of any station. Be careful not to head towards the exit which is labelled “ВЫХОД В ГОРОД”/ “Exit to the city”. You can pay for a tour of the stations although the prices are not budget friendly in my opinion and are generally over 1,900 rubles.

    Here is a Self Guided Tour of the Moscow Metro Stations

    This self-guided tour will take you to 4 stations, starting at Komsomolskaya (Комсомо́льская) and ending at Ploschad Revolutsii (Пло́щадь Револю́ции) which is near Red Square. I would allow at least 1-2 hours minimum as this gives you more time to explore.

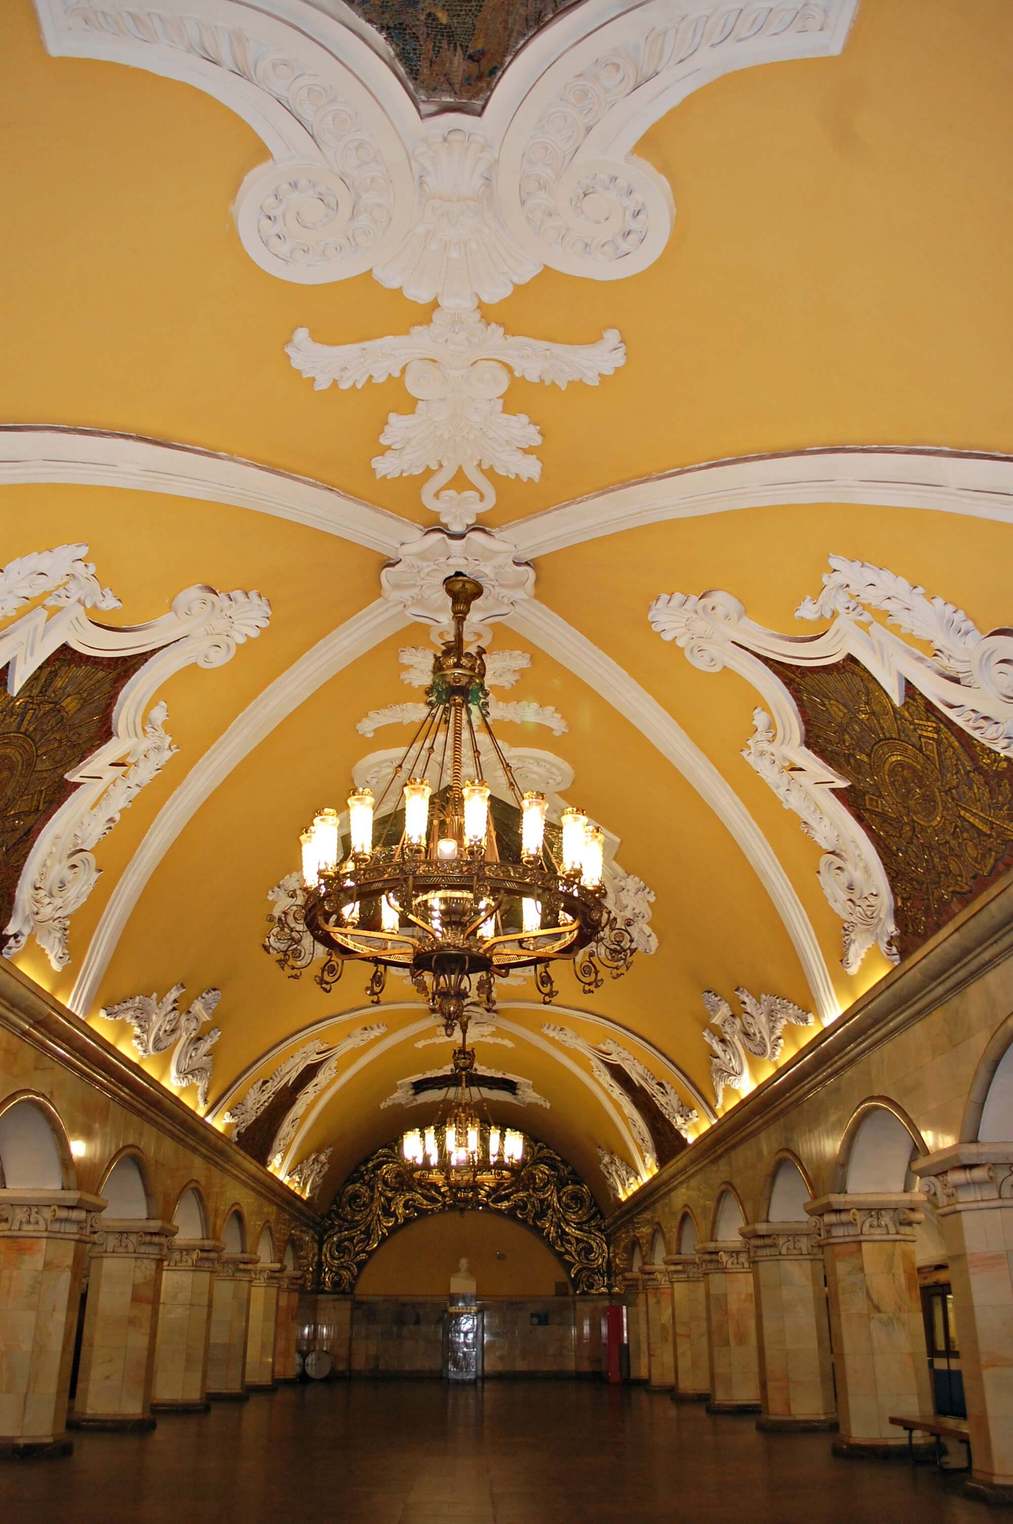
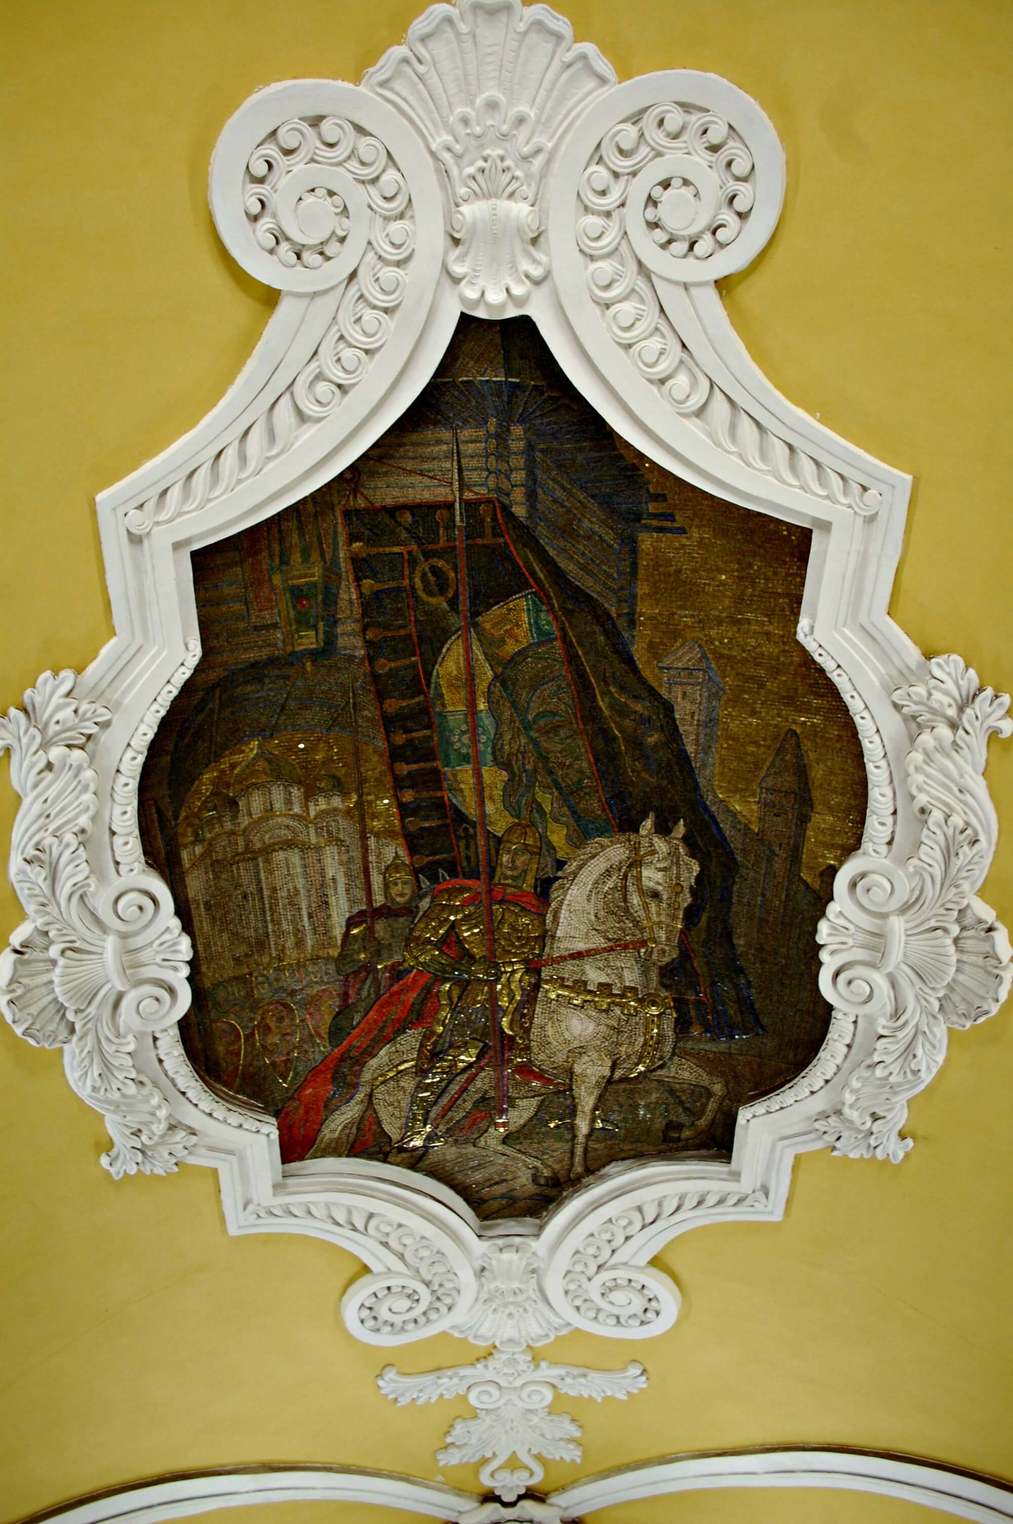
    Arrive at Komsomolskaya (Комсомо́льская) Metro Station to start the tour. As it’s slightly outside of the city you will be probably be catching the metro here so depending on how you arrive at Komsomolskaya (Комсомо́льская) Metro Station you can arrive on either the red (1) line or brown (5) line. We arrived at the station on the red (1) line, it was underwhelming, was this it? Thankfully the next station required us to make our way to the brown (5) line and you finally experience the grand decor of the station. Words cannot describe how grand and beautiful these stations are, as you can see by these photos…

    Komsomolskaya Metro Station Moscow
    Komsomolskaya Metro Station Moscow
    Komsomolskaya Metro Station Moscow
    Komsomolskaya Metro Station Moscow

    Now you’ve perfectly set yourself for the next stop at the brown (5) line which will take you to Novoslobodskaya (Новослобо́дская) Metro Station. Getting off you are taken aback by the marvellous stained glass across the station.

    Novoslobodskaya Metro Station
    Novoslobodskaya Metro Station

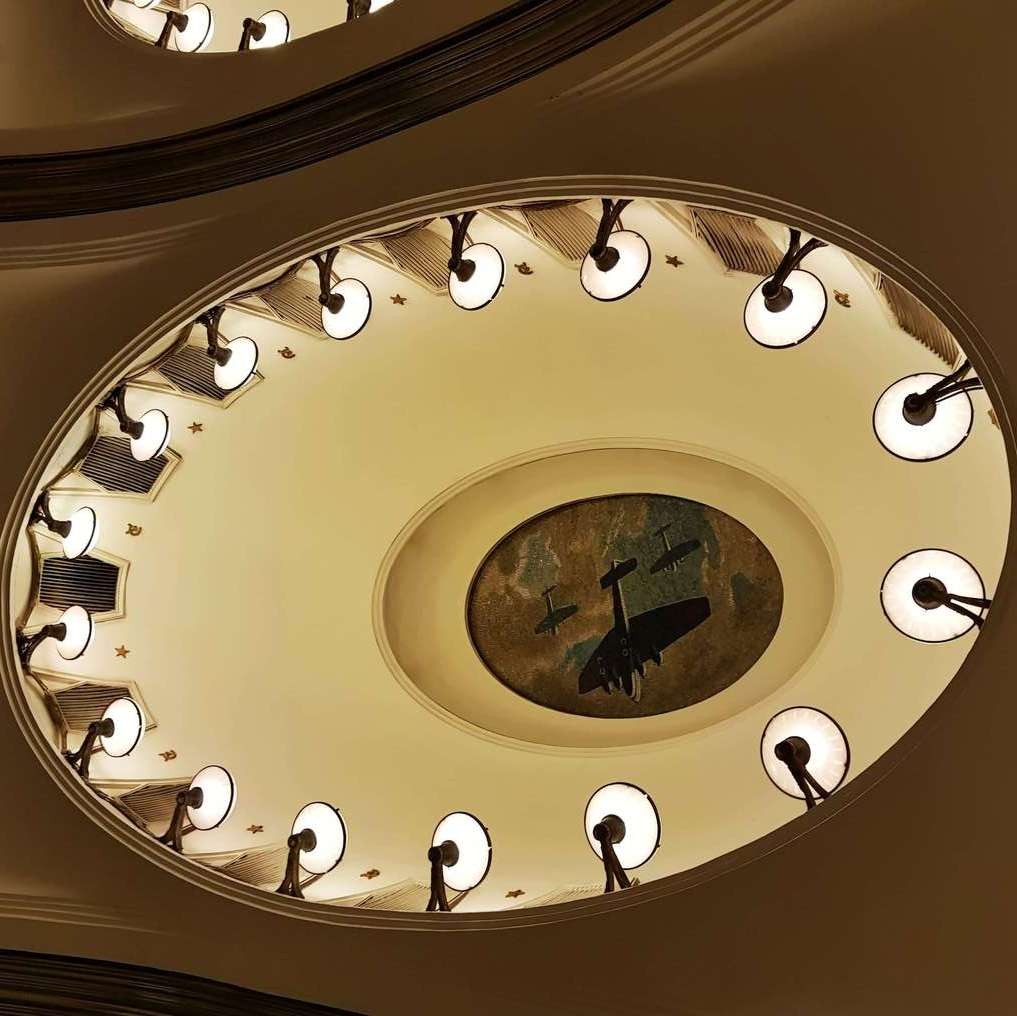
    Swap at Berlorusskaya to green (2) line and get off at Mayakovskaya (Маяковская). When you first look at the hallways you cannot see the artwork hidden inside the oval shapes and walking under each one provides another mosaic masterpiece.

    Mayakovskaya Metro Station Moscow
    Mayakovskaya Metro Station Moscow

    Last stop on the tour! Follow green (2) line to Teatralnaya and swap to blue (3) line to Ploschad Revolutsii (Пло́щадь Револю́ции) Metro Station. It’s full of statues depicting the people of the Soviet Union, there are a total of 76 sculptures in the station! You can tell the most popular statues as they are more worn like the man and his dog. Tourists and locals touch the dog’s nose for good luck.

    Ploshchad Revolyutsii Metro Station Man with his Dog
    Ploshchad Revolyutsii Metro Station Man with his Dog

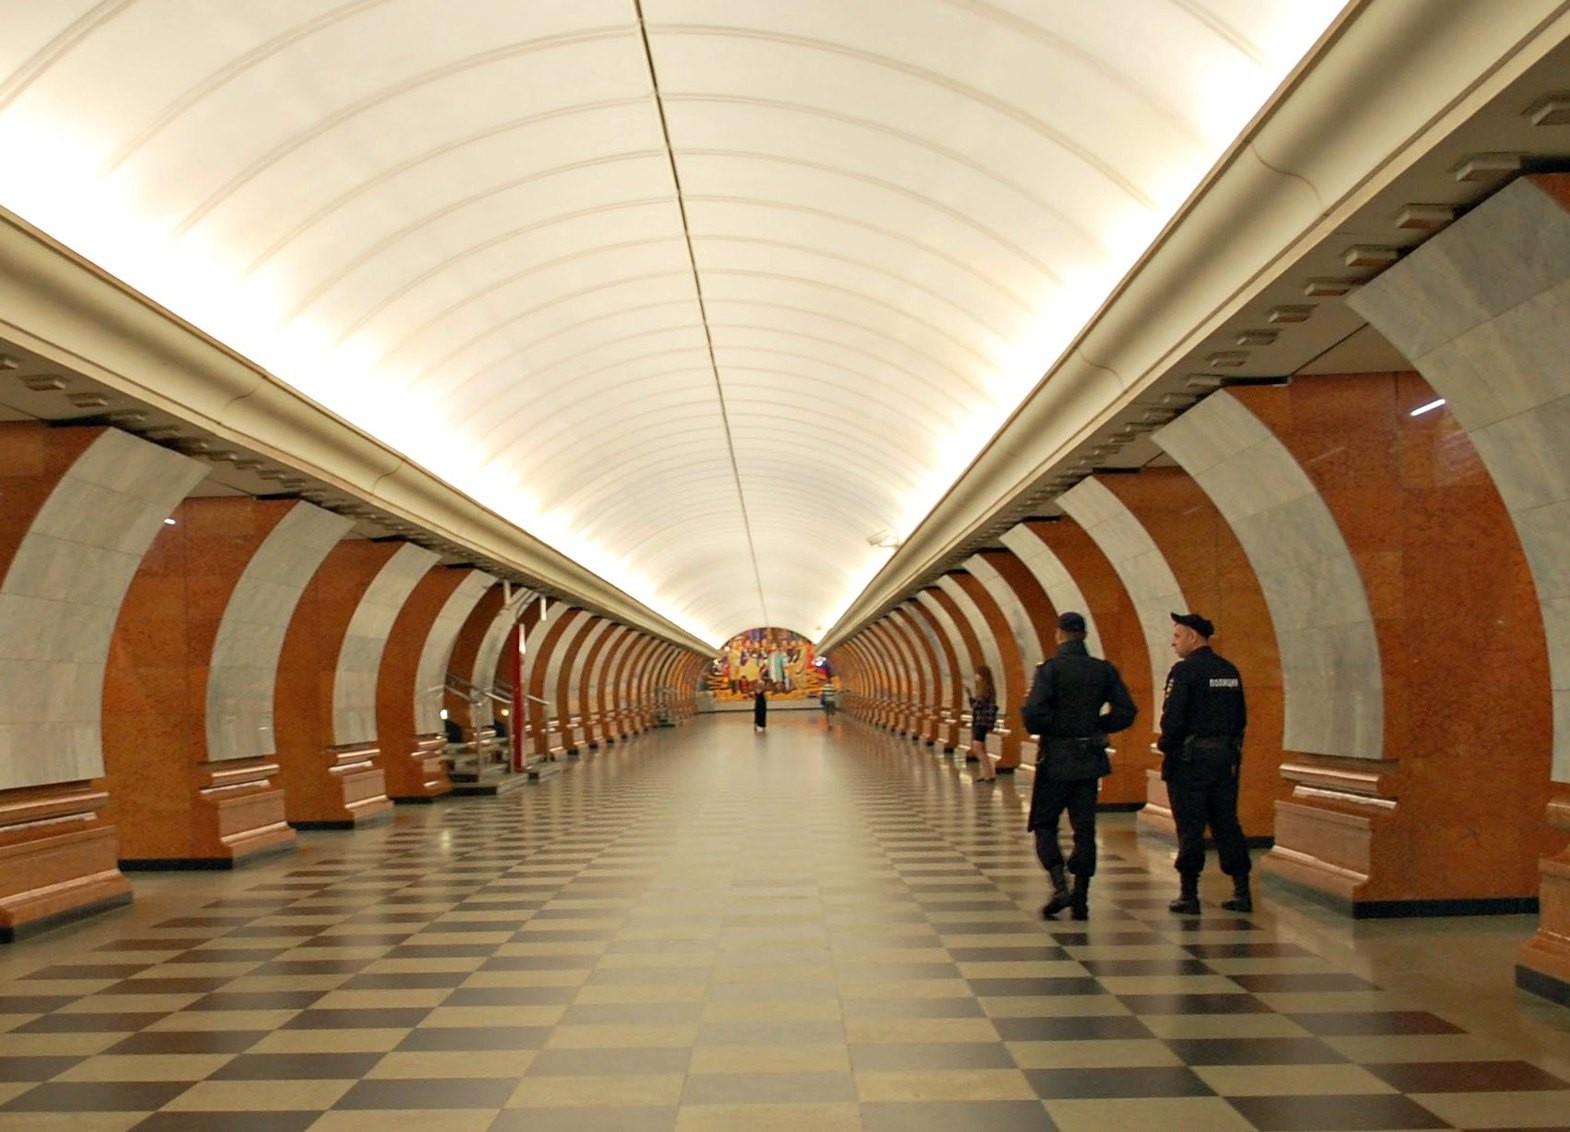
    We did also venture out to Park Pobedy (Парк Победы). The station is a little less convenient to get to whereas the 4 above are located near/around the centre of Moscow. It is the third deepest station in the world after Arsenalna in Kiev and Admiralteyskaya in St Petersburg. An impressive ride up and down the escalator, a little terrifying if you are scared of heights.

    Park Pobedy Metro Station
    Park Pobedy Metro Station

    Have you ever ridden the Moscow Metro? Which station is your favourite? Let me know in the comments!

  • St Petersburg 4 Day Itinerary

    St Petersburg 4 Day Itinerary

    You can see why it’s Russia’s Cultural Capital with buildings like The Hermitage, The General Staff Building and other museums that have gathered true masterpieces of painting, sculpture and jewellery. It’s also home to the Mariinsky and Mikhailovsky Theatres which host Russia’s famous ballets.

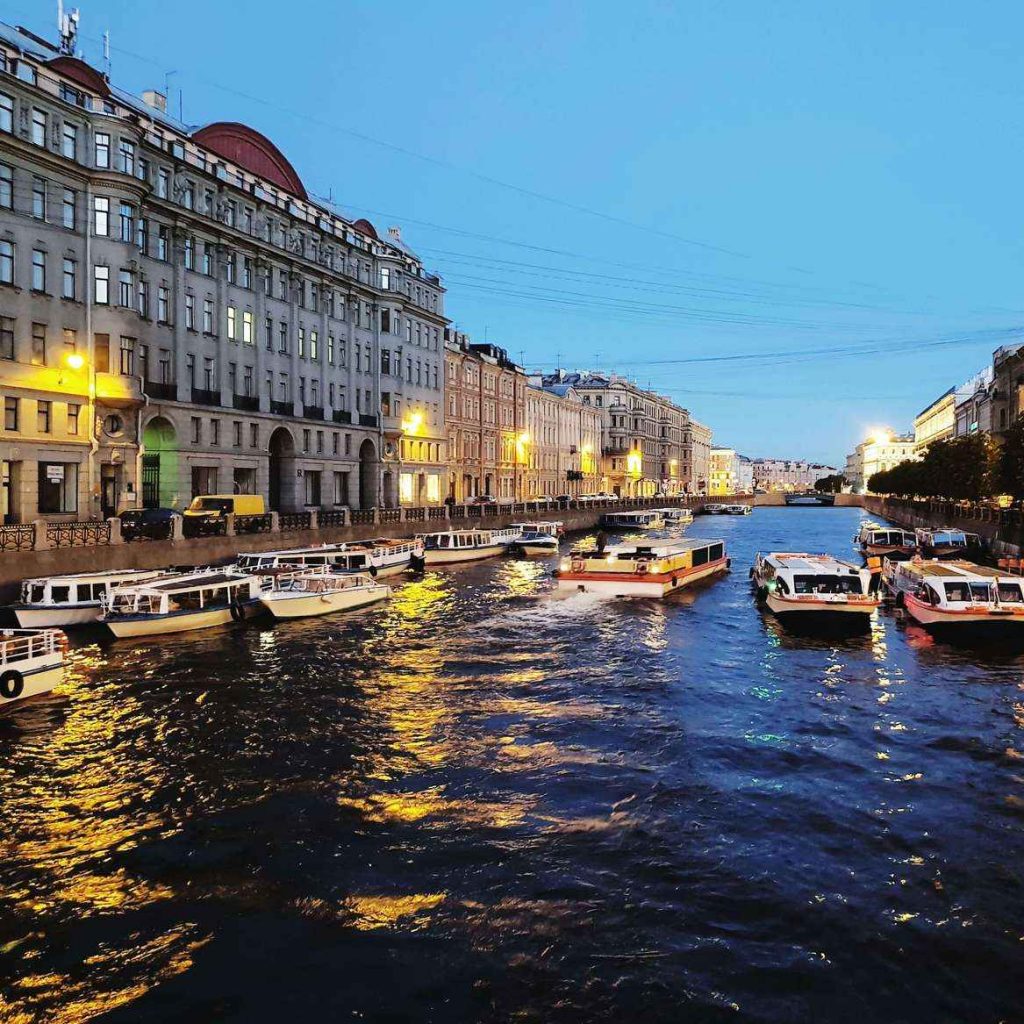
    Summer is a fantastic time to visit St Petersburg, especially with the White Nights Festival. It’s when it never gets properly dark due to the high latitude. It’s not the only city that has White Nights but it has taken acclaim to this phenomenon with the city coming alive and bustling with people throughout the night as well as the day! The whole city seems to take on a two-month continuous round-the-clock celebration.

    St Petersburg Canals during White Nights
    St Petersburg Canals during White Nights

    Do I need a Russian Visa to Visit St Petersburg?

    Russia requires you to have a visa unless you are arriving by boat to St Petersburg or your country is listed in the “visa-free regime”.  Your St Petersburg visa will be free in this case and you are able to stay for 72 hours. Read more about Russian Visa’s in What you need to know before going to Russia. 

    How Many Days Should I Spend in St Petersburg?

    Three days is a must, as there is so much to do and see. It’s best to gauge your stay on how much time it will take to do all the main sites. A 4 Day itinerary will allow you to complete a day trip to Catherine’s Palace or The Peterhof Grand Palace.

    If you are planning to extend your stay and visit Moscow, read more about Moscow here.

    Where to Stay in St Petersburg?

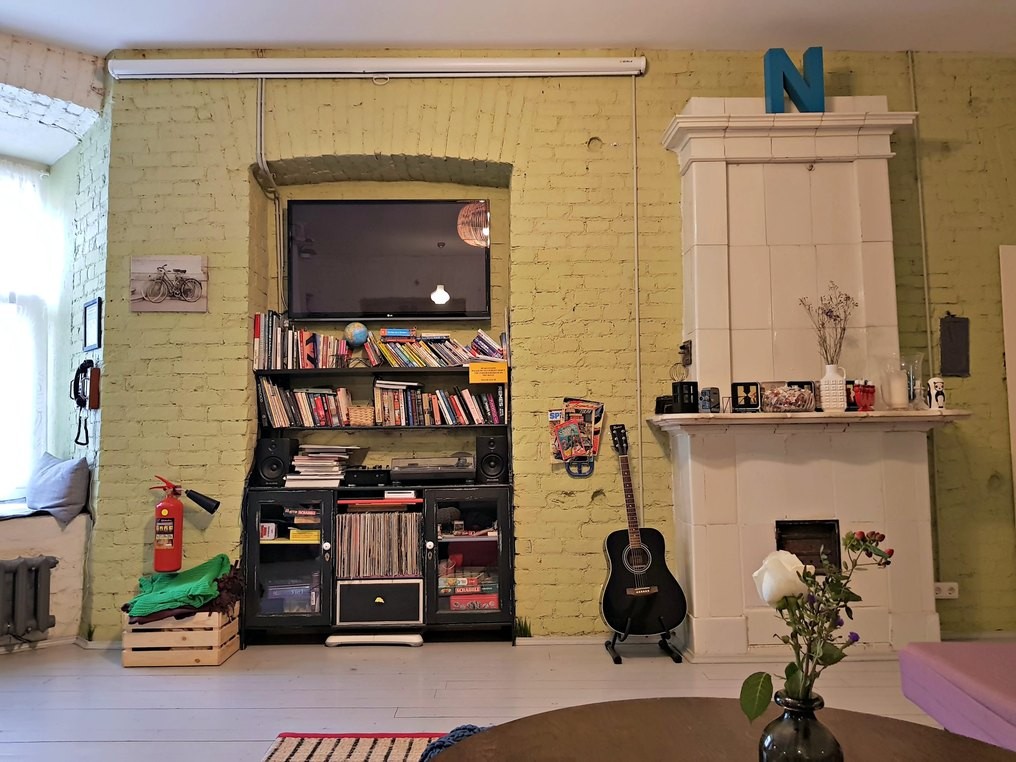
    Soul Kitchen has to be one of the best hostels I’ve ever stayed at. Before we had even arrived they upgraded us to a private room instead of the 4-bed dorm we previously booked for the same price. When we arrived, they checked us in early and offered us coffee and a slice of apple cake for breakfast. The hostel had a welcoming and comfy feel that made you think you were at home. It’s won several awards for being one of the best hostels.

    Book your stay at Soul Kitchen here.

    Soul Kitchen Living Room
    Soul Kitchen Living Room

    St Petersburg 4 Day Itinerary: Day One

    Start the first day with a bit of culture at the State Hermitage Museum and General Staff Building which is open every day except Monday. Tickets are 700 roubles, this gives you access to both buildings. If you are lucky enough to be in St Petersburg the first Thursday of the month then the museums will be free to enter.

    The sheer size of the museums means that you can easily spend 3+ hours in each so allow a whole day to complete Hermitage and General Staff Building.

    The secret to beating the queues is to get your ticket at the General Staff Building. It’s home to Russian and European decorative art, paintings and sculptures including Impressionist and Postimpressionist paintings for example work by Matisse and Picasso. Most of the impressionist paintings are located on the third floor and it’s also a great height to capture a photo of the Hermitage.

    Grab some lunch before tackling the Hermitage. Try Shtolle (Штолле) pie shop or Bushe (Буше) bakery.
    Now to tackle the Hermitage and as a bonus, you get to skip the queues! The museum was founded in 1762 when Catherin the Great acquired an extensive collection of painting from Johann Ernst Gotzkowsky.

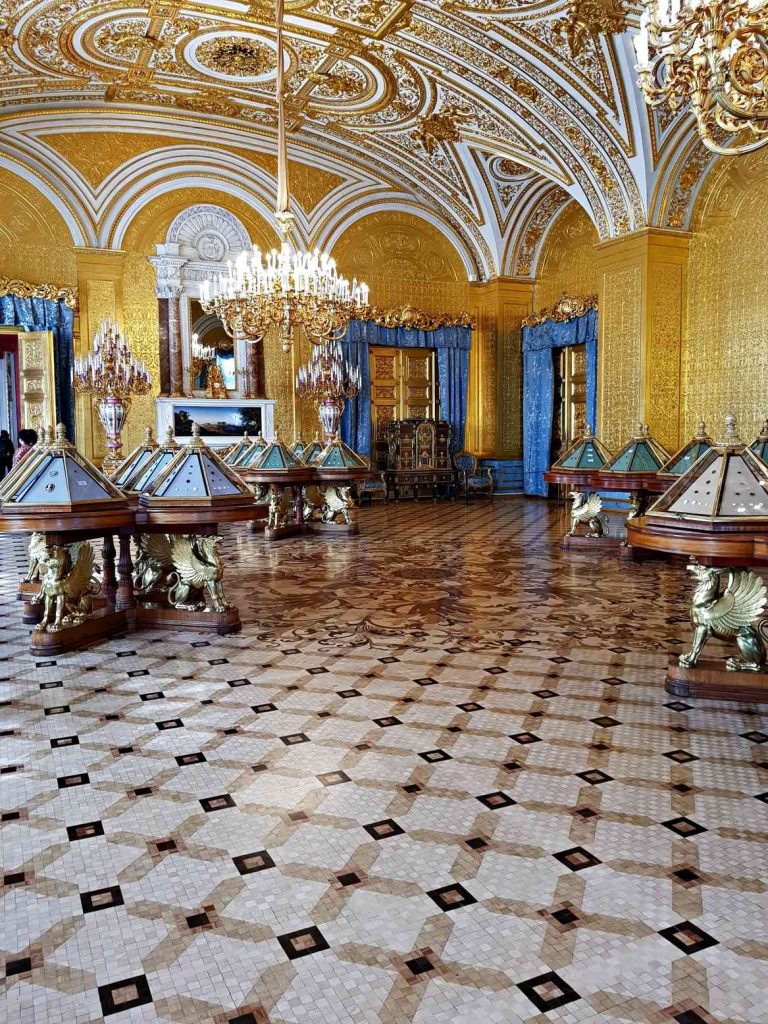
    In side the Hermitage
    Inside the Hermitage

    The museum holds the largest collection of paintings in the world and took us over 3 hours to see roughly 45% that was on display. Being such a large collection, the artwork is spread across 6 buildings; Winter Palace, Small Hermitage, Old Hermitage, New Hermitage, General Staff Building and Hermitage Theatre.

    St Petersburg 4 Day Itinerary: Day Two

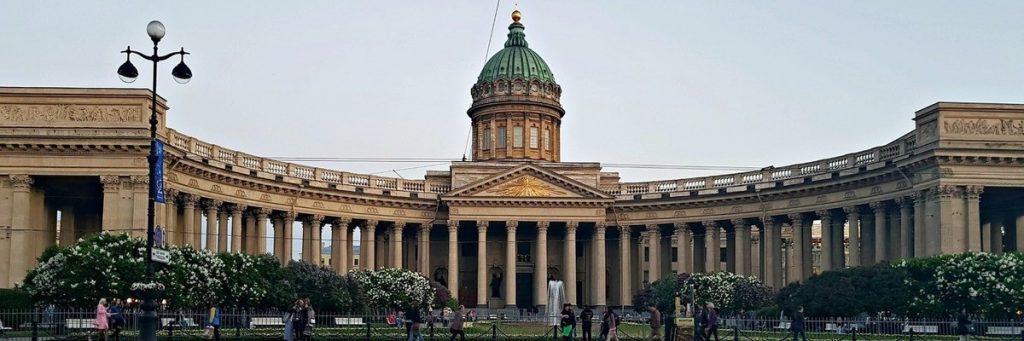
    St Petersburg is home to a significant number of churches and cathedrals. There are three that I recommend seeing in the centre; Kazan Cathedral, St Isaac’s Cathedral and Church of the Saviour on the Spilled Blood. Do wear respectable clothing when entering working churches or cathedrals.

    Kazan Cathedral is a traditional orthodox and is free to go into as it’s a working cathedral.

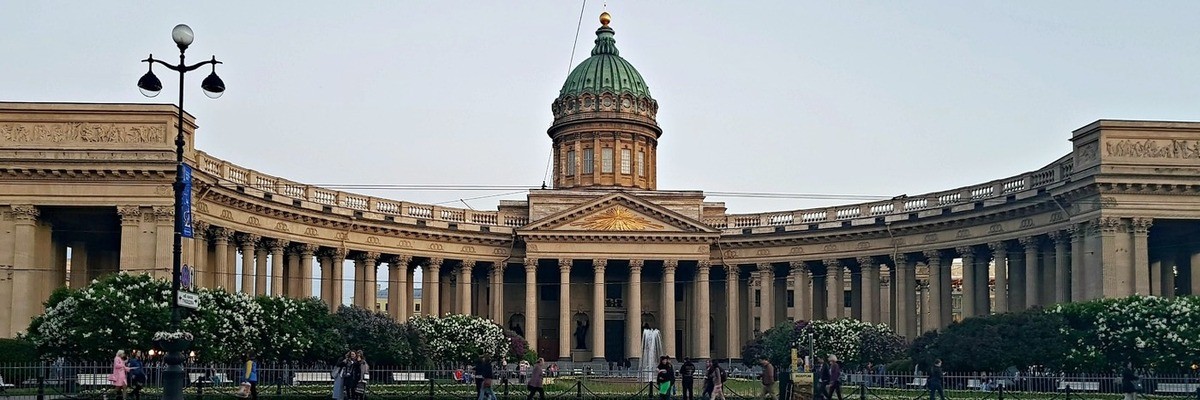
    Kazan Cathedral
    Kazan Cathedral

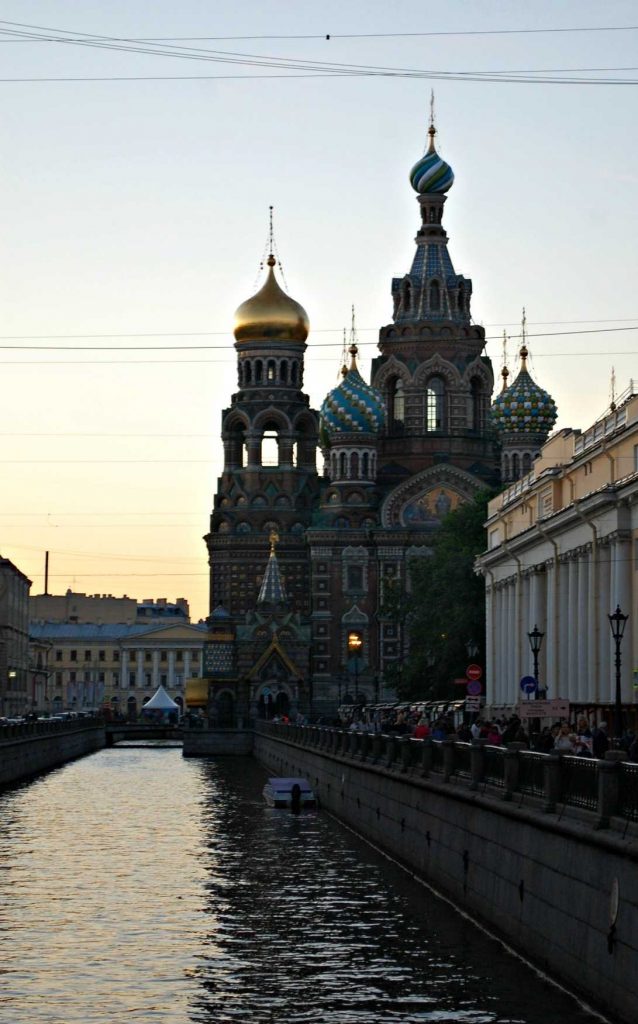
    Continue down Griboyedov channel embankment and you’ll come across the Church of the Saviour on the Spilled Blood. Emperor Alexander II was fatally wounded in March 1881 at this site and they Alexander III built the church on this site to commemorate his father, hence the name Spilled Blood.

    Church of the Saviour on the Spilled Blood
    Church of the Saviour on the Spilled Blood

    Stop for a cheap and cheerful Russian doughnut at Pyshechnaya (Пышечная). It’s a popular place with locals and tourists, the queues move fast so you won’t be waiting long for your doughnut.

    Russian donut at Pyshechnaya
    Russian donut at Pyshechnaya

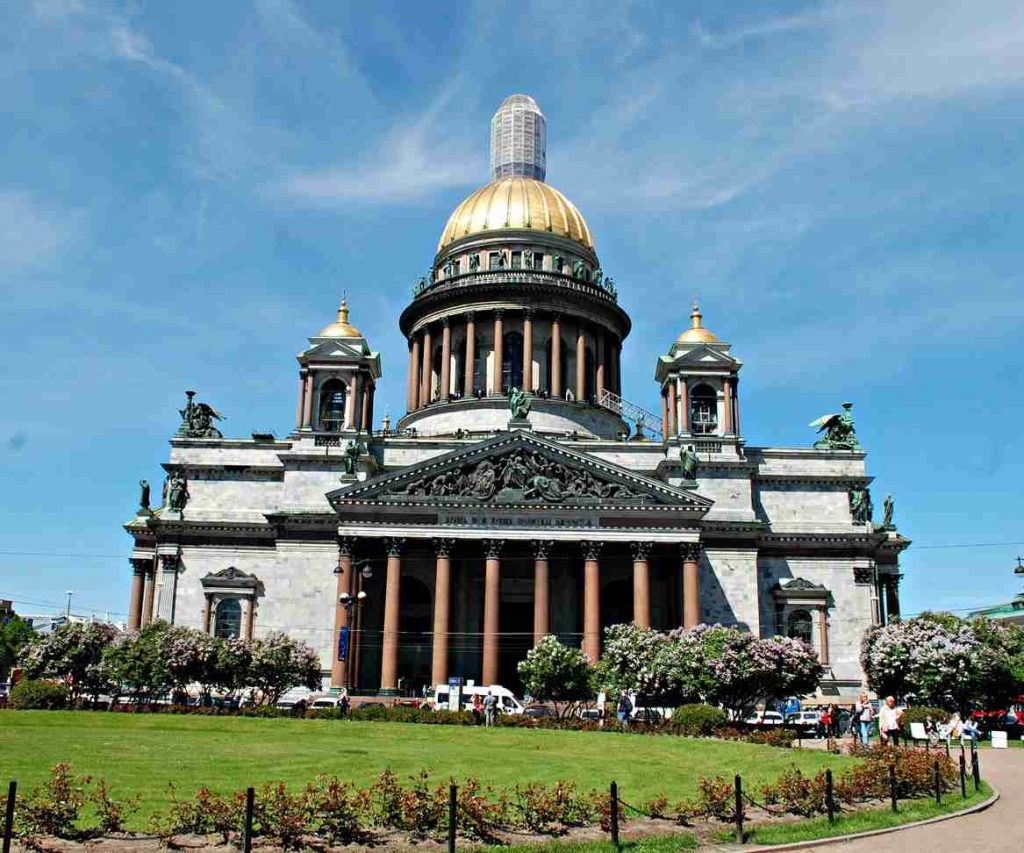
    A ten-minute walk away is St Isaac’s Cathedral with its gleaming gold dome which is plated with pure gold and dominates the skyline of St Petersburg. No longer a working cathedral it has been turned into a museum and viewing point. It’s 250 roubles for the museum and 150 roubles for the viewing point. Note: The museum is not open on Wednesday and be aware that the price does change the viewing point based on the time.

    St Isaacs Cathedral
    St Isaacs Cathedral

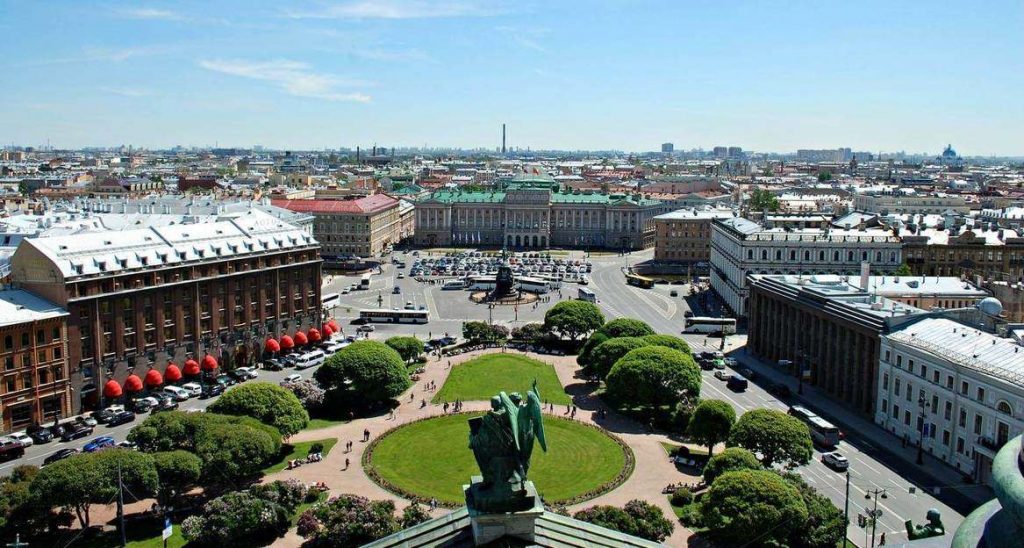
    Work off those doughnuts by climbing the 262 steps to the top of St Isaacs Cathedral and admire the view of St Petersburg. As the city is low rise you’ll be able to see a lot from the cathedral.

    View from St Issacs
    View from St Issacs

    Extend the cultural experience by heading to the ballet. Do book in advance as the more affordable tickets sell out fast. I managed to get tickets to the Mikhailovsky Theatre for £24 per ticket. The cheaper tickets sometimes have a restricted view so if you are purchasing circle tickets then either get the front row or back row so you can stand. Buy tickets to Mikhailovsky Theatre here. 

    St Petersburg 4 Day Itinerary: Day Three

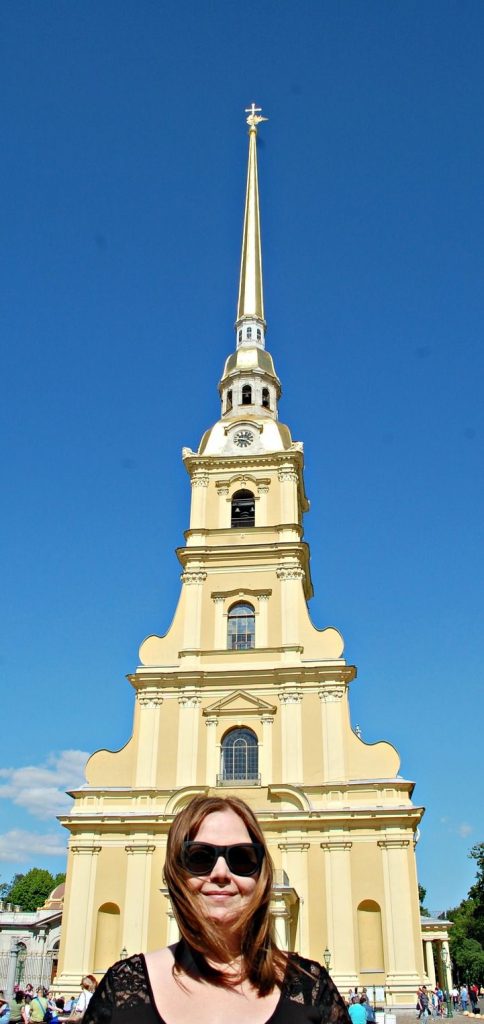
    Enjoy a lovely walk across the Birzhevoy Bridge towards the Peter and Paul Fortress. Taking in the different views of the Hermitage and St Isaacs gleaming in the distance. The fortress complex is open to walk around. It was the original citadel of St. Petersburg and then in 1720 was turned into a garrison and prison. We didn’t enter any of the museums as we read on trip advisor that the museums were only in Russian.

    Peter and Paul fortress
    Peter and Paul fortress

    Continue completing a loop around the fortress and walk across Troitskiy Bridge. Take a break in the Summer Gardens or Mikhailovsky Gardens. During summer, you may come across an ice-cream truck. We stumbled across a guy selling unicorn ice-cream. Which colour would you choose, black or pink?

    End the day by enjoying a Russian meal at the Soviet cafe.

    St Petersburg 4 Day Itinerary: Day 4

    A short distance away from St Petersburg is Catherine’s Palace and Peterhof Grand Palace. Both are stunning Palaces and worth a day trip to at least one.

    Catherine Palace is located in the town of Tsarskoye Selo (Pushkin). The palace was once the summer residence of the Russian tsars. Now a museum, displaying over 300-years of history and elaborately decorated Rococo-style architecture. The palace is most famous for its baroque style and neoclassical interior that exemplifies Russian wealth and extravagance.

    Our choice was Peterhof Grand Palace. The palace was founded by Peter the Great and is often referred to as the “Russian Versailles”. In the palace grounds there are 64 elaborate fountains and more than more than 200 bronze statues, bas-reliefs and other decorations.

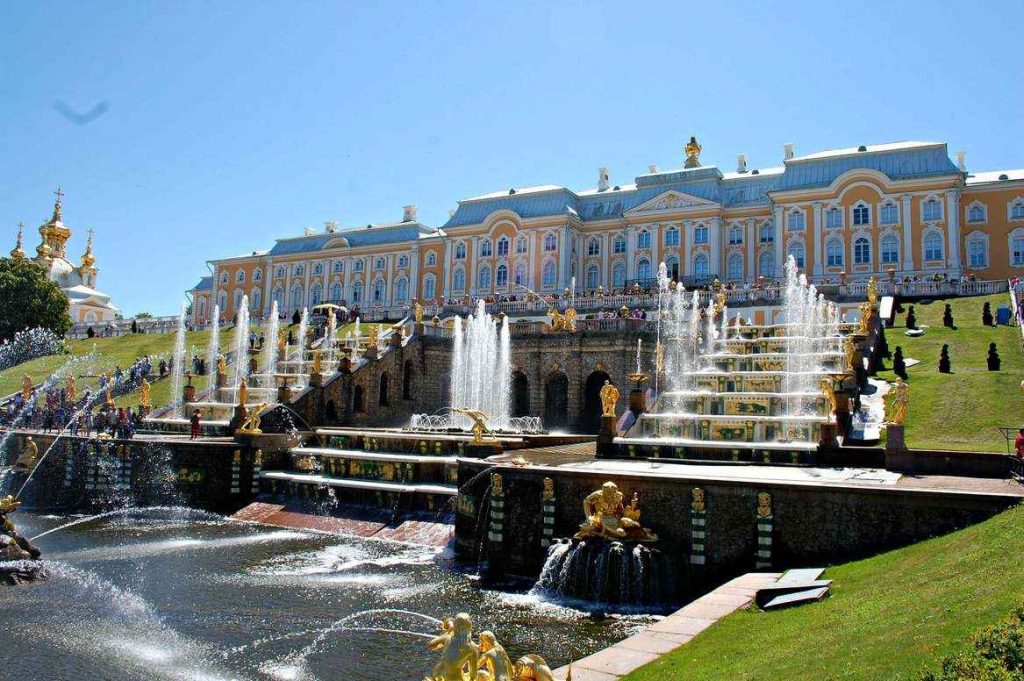
    Grand Cascade and Palace at Peterhof Palace
    Grand Cascade and Palace at Peterhof Palace

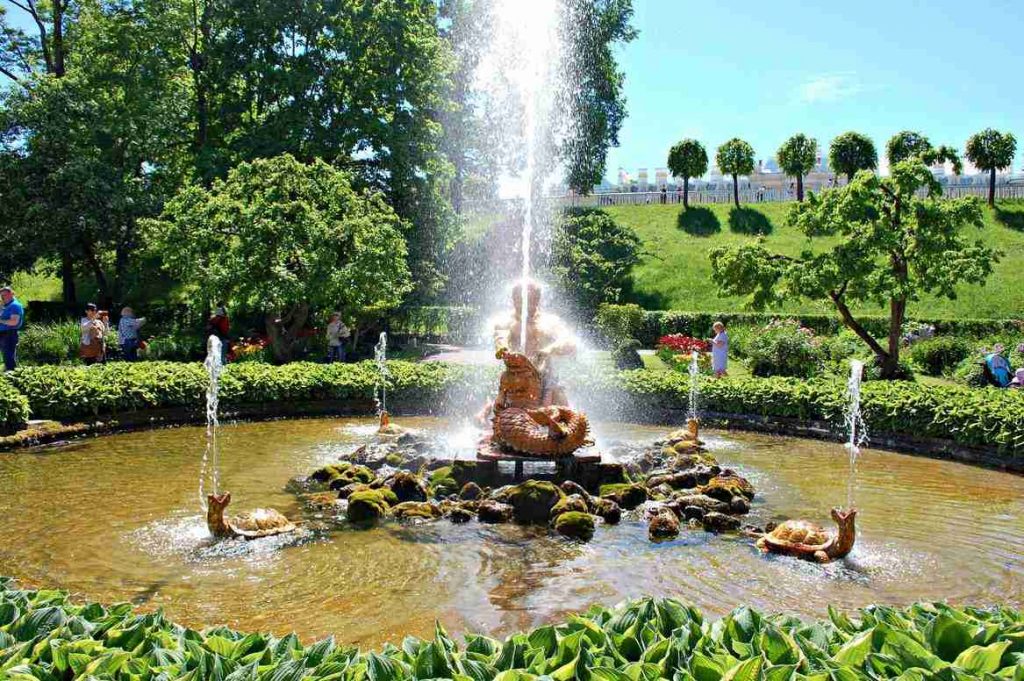
    People mainly visit the lower park famous for its a range and diversity of fountains, the Grand Cascade being the most decadent running from the Grand Palace to the Marine Canal.

    Fountains in the Lower Park at Peterhof Palace
    Fountains in the Lower Park at Peterhof Palace

    How to get to Peterhof Grand Palace

    We caught an Uber to Peterhof Grand Palace as it was only a couple of pounds each and seemed the simpler option at the time and then the Hydrofoil back to the city. This option ended up being around 1,100 roubles each.

    However, you can catch the mini-buses (marshrutkas) № К-300, К-424, К-424А from Avtovo metro station which is the most budget-friendly option.

    If you are not on a tight budget then the Hydrofoil from the Neva river embankments of the Lower park in Peterhof is super easy. It’s 800 roubles each way and try and get a window seat to catch the sites.

    How much does it cost to visit Peterhof Grand Palace?

    Depending on the attraction you wish to see at the Peterhof Grand Palace you will be presented with an associated fee. The most popular attractions are listed below

    • Lower Park is open 9am to 8pm, extended on Saturdays to 9pm and entrance fee is 750roubles.
    • Upper Garden is open 9am to 5.30pm, extended on Saturdays to 9.30pm and entrance is free.
    • Grand Palace is open daily except Monday and the last Tuesday of each month. The entrance fee is 700 roubles.

    Tickets to the Lower Park can be purchased online on the official website of Peterhof. 

    How to Travel to St Petersburg Russia

    Below are the various different transport modes you can use to travel to St Petersburg.

    Train

    There are four mainline railway stations serving inter-city and international trains. Two are historic buildings in the very centre of the city, while the others are a short metro ride from Nevsky Prospekt and the downtown area.

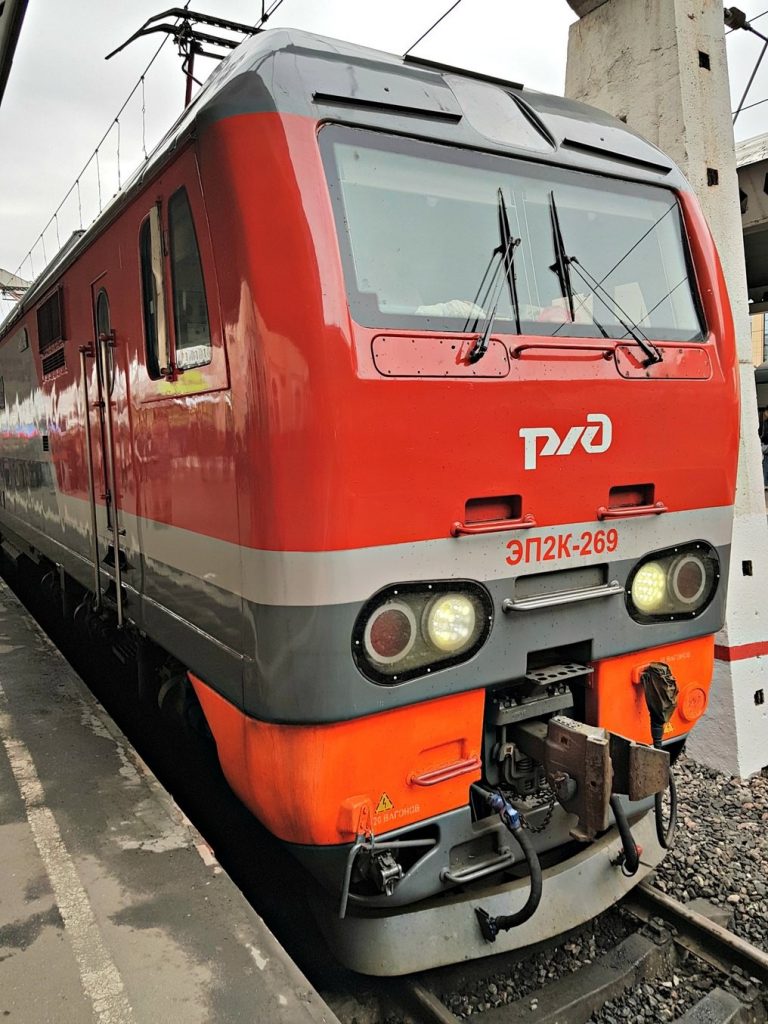
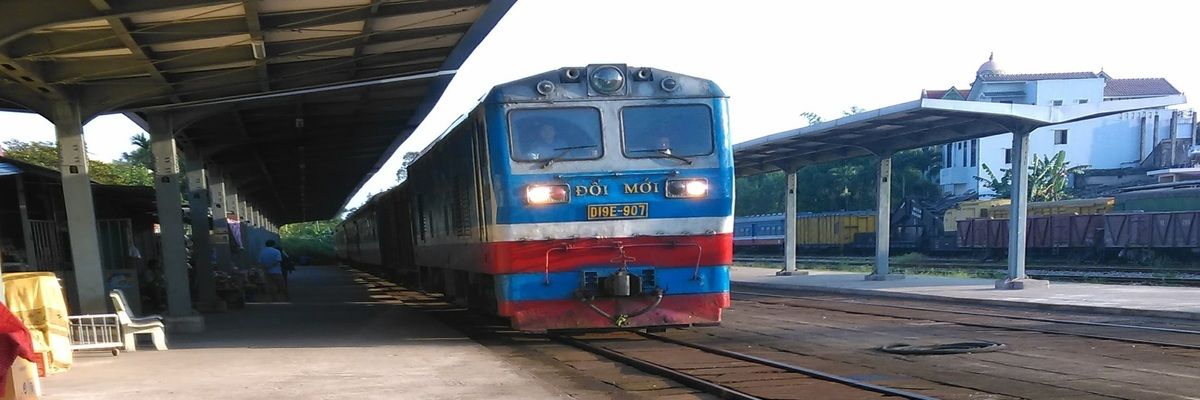
    To get between Moscow and St Petersburg or vis versa the easiest way is by train. You can either catch a day train that will take about 4 hours or save some money on accommodation and take an overnight train. Moscow to St Petersburg train cost for the 006А train with the 2nd class ticket was around £60 each. The train was modern and more comfortable than our Vietnam train experience.

    A006 Train to St Petersburg
    A006 Train to St Petersburg

    Airport

    Pulkovo is the airport in St Petersburg and is split into two terminals. Pulkovo-2 is where most of the international traffic arrives at Pulkovo-1 is mostly a domestic airport. Pulkovo doesn’t have a metro station nearby and the bus is the only transport option. You have the option of Aeroport Express, Marshrutka minibus shuttle services or one of the city buses N39 or N13.

    Cruise or Ferry

    There are two passenger ports you can arrive into, one for sea passengers (Sea Station (Morskoy Vokzal)) and one for river passengers (River Station (Rechnoy Vokzal)) in the far south-east of the city.

    Most passengers arrive by cruise ship and won’t have to worry about the port that you arrive at as the cruise companies will organise your onward transport.

    Those who aren’t arriving by cruise are advised to plan your onward journey in advance as neither terminal is convenient for the city centre or most hotels.

    Sea Station (Morskoy Vokzal)

    The Sea Station (Morskoy Vokzal) is the docking point for St. Peter Line ferries from Helsinki, Stockholm and Tallinn. The station has no metro stations located nearby and you will need to catch a bus to get to the city centre.

    River Station (Rechnoy Vokzal)

    The River Station welcomes river cruises from Moscow and the Russian North, and is located in the far south-east of St. Petersburg on Prospekt Obukhovskoy Oborony. The closest metro station to the River Station is Proletarskaya Metro Station which is about a 10 minute walk away.

    Bus

    There is an increasing amount of coach options form international destinations to St Petersburg, the most popular bus options from Baltic States or Helsinki. The city does have a Central Bus Station, although many international routes are operated by non-Russian companies which use their own bus stops. These stops are generally close to either railway stations or major hotels. Some bus companies you can use to get to St Petersburg are:

    • Lux Express offering bus services from Estonia and Baltic States to St Petersburg.
    • Ecolines offering bus services from Latvia to St Petersburg.
    • Savonlinja offering bus services from Helsinki to St Petersburg.

    Have you experienced White Nights? What were your favourite things about it?

  • Six Things to know about Overnight Trains in Vietnam

    Six Things to know about Overnight Trains in Vietnam

    Trains are my favourite method of transport for long distances and what better way to get across Vietnam than catching overnight trains. Accommodation and travel at the same time!

    During our journey through Vietnam we took two overnight trains. I thought trains would be the better option than the buses as the trains had sleeper berths and unlike buses, you would need to sleep sitting up. I’ve since found out there are also sleeper buses as an option! Both are great options whilst travelling in Vietnam.

    Here are Six Things to know about Overnight Trains in Vietnam

    1. Booking overnight trains in Vietnam

    Originally, I wasn’t going to book my overnight trains in Vietnam in advance but after reading a couple of sites they all advised to buy tickets in advance during peak season unless you are more flexible. I only booked tickets three weeks in advance so when I say in advance it only needs to be a couple of weeks.

    Unless you are travelling during peak holiday periods such as Tet (Vietnamese New Year, in late January or early February) you should definitely pre-book as soon as the booking opens. If you don’t want to book ahead during the peak season then being flexible is your best option. You may need to wait a day for the next train or have a hard sleeper berth than a soft one.

    The booking opens between 60 and 90 days before departure for the longer end-to-end journeys like Hanoi to Saigon. The shorter journeys like Hanoi to Hue or Nha Trang to Saigon will open later. If you are completing a short distance then these will only open a week or two ahead.

    Vietnam doesn’t have an official rail site and has some impressive looking imposter websites that could be scam websites. We used Baolau as the travel agent to book our Vietnam train tickets in advance.

    It was super easy, book via the online forms and pay. The travel agent gets back to you letting you know if it’s available, if it is they attach the ticket or if the train or seat is not available they give you alternative options.

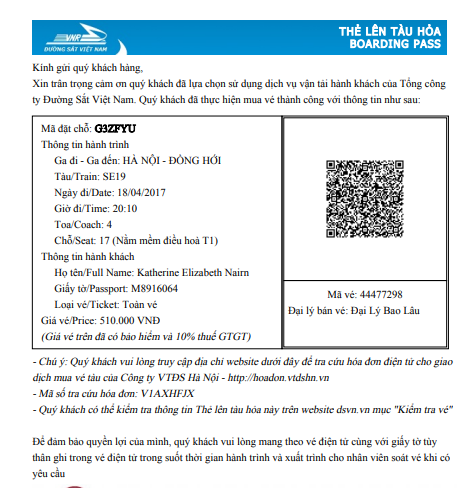
    Baolau even gave us e-tickets, therefore, we didn’t even need to collect our tickets in advance. It also minimises the risks of scams with fake ticket counters.

    Our Vietnam Rail Tickets from Baolau
    Our Vietnam Rail Tickets from Baolau

    Other companies you can use to book your Vietnam Overnight Train:
    Vietnam Impressive
    12go

    2. Vietnam Overnight Train Seat Options and Comfort Levels

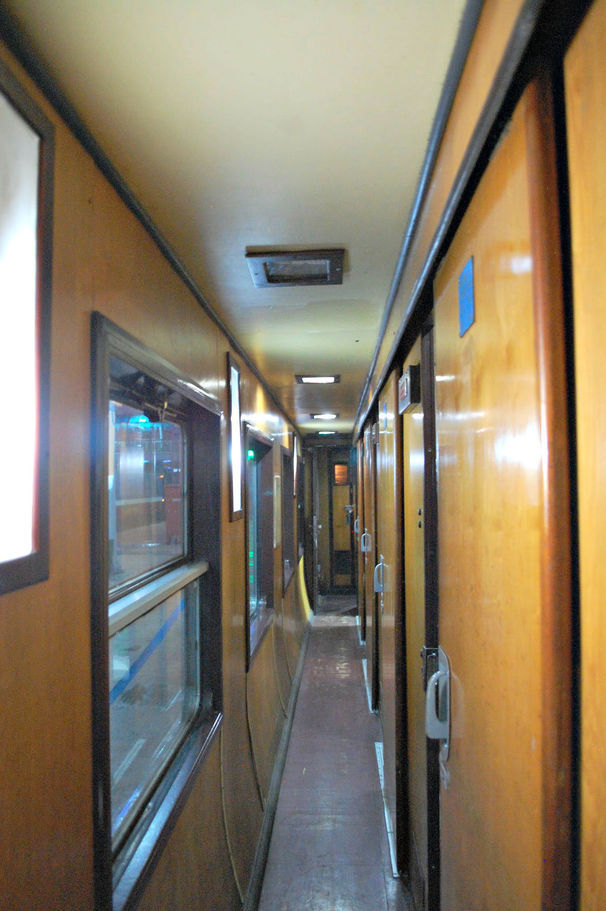
    The hallway on the Vietnam Overnight Train
    The hallway on the Vietnam Overnight Train

    Depending on the length and time of the journey there are a couple of seat option and comfort levels you can choose from, here are the four options available:

    • Hard seats – if the soft beds are anything to go by, I’d image these to be as comfortable as a park bench. I would only choose this option if you are taking a short journey.
    • Soft seats – recommend for short travel and the seats looked comfortable when I saw them through the window.
    • Hard beds – 6 beds in a cabin, when we went passed these on the train, they looked highly uncomfortable. Unless you like extremely hard beds! They are a cheaper option and maybe the only choice during peak season.
    • Soft beds – 4 in a cabin (highly recommend for overnight travel), we used these for both train journey and these were still pretty firm beds but comfortable enough to sleep in.

    3. Should I Choose a Lower or Upper Berth?

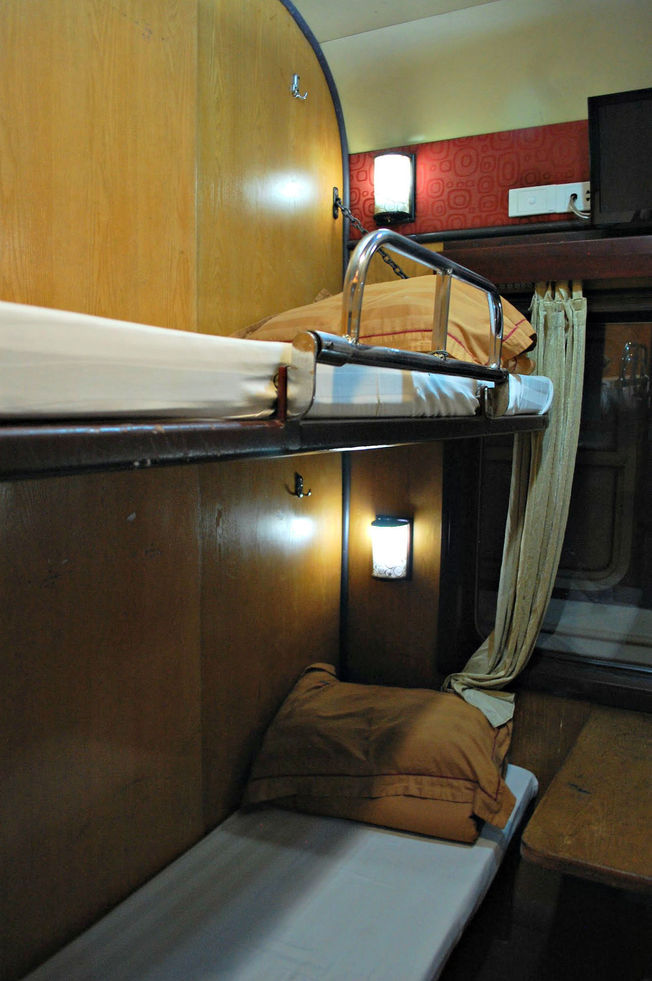
    Soft Bed Berth on the Vietnam Overnight Train
    Soft Bed Berth on the Vietnam Overnight Train

    If you are comfortable with heights and have the ability to pull yourself up then either lower or upper berth is fine. If you have issues with heights, you are elderly, you have knee problems or any other issues that mean you would struggle to lift yourself up onto the upper berths than definitely book the lower berths.

    Some people feel a little safer with the upper berths as they are harder to get to. Personally, I didn’t feel unsafe on the lower berths and being short they are easier for me to get into!

    The upper berth can also be cooler due to the air con so take some warm clothes as it can be very cool on the top.

    4. Punctuality of the Vietnam Trains

    We had two overnight trains in Vietnam and the punctuality of both trains were polar opposites. The one from Hanoi to Dong Hoi left around the time it stated it would and arrived pretty much on time too. Our second train arrived an hour late at Dong Hoi than it should’ve so it seems a bit unpredictable.

    Either way, be on time and expect that your train might not show up for an hour or so.

    5. Food on Vietnamese Trains

    Travelling across the UK on trains, I’ve always brought my own food and drinks with me. There is food on Vietnamese trains but I wouldn’t trust the quality. During our train journeys, we were only offered food once and there isn’t a lot to choose from. Buying food beforehand will minimise the risk of food poisoning and trust me, no one wants food poisoning in those train toilets.

    6. Experience on the Vietnam Overnight Trains

    This was my first experience catching an overnight train and I had no idea what to expect. Here is my experience on the overnight train:

    • The train arrived 30 minutes before departure and we boarded with excitement. The soft bed’s berths were freshly made and the beds looked as comfortable as they could be. Although I wouldn’t say the standards are high and you may find other passengers rouge hairs.
    • They don’t change the bedding during some parts of the journey, so if you start your journey at Hanoi, for example, this will be fresh bedding but if you get on part way through a journey like we did the second trip, they changed the bedding in preparation for Da Nang. Basically, we were in a cabin that has already been used and the remnants of the previous person from Dong Hoi to Da Nang.
    • If you’re sensitive to cleanliness take something to throw over the pillow.
    • We shared a room with another couple that was travelling to Hue which was great as we knew that we’d have the same people for our journey.
    • With any train journey, even if you feel safe you should always make sure your belongings are in sight, valuable items are hidden and just generally use your common sense. The compartment was secure and there is a lock on the door so it is a good idea to lock the door when you are all sleeping.
    • If you are travelling alone and are worried about your belongings whilst you are in the bathrooms or leave the room then just get a small bag and carry your wallet, passport etc in.
    • As for sleeping, I think on any train in Asia you would be hard-pressed to get a good night sleep. I put music on the whole journey to get some rest, but it was not the deepest sleep.
    • Set an alarm 30 minutes before your stop, even though they will come and wake you up but it gives you time to prepare before you get off the train.
    • There is a power socket in every bunk, so you will be able to charge your electronics during the journey.
      The toilets were the western style at one end of the carriage and an Asian style at the other, they were reasonably clean at the start of the journey, but very dirty by the end of the trip. Take some tissues and hand sanitiser!
    • The last point don’t lose your train ticket as ticket inspectors come around regularly and you’ll definitely be asked for it on the way out.

    Vietnam Train Map

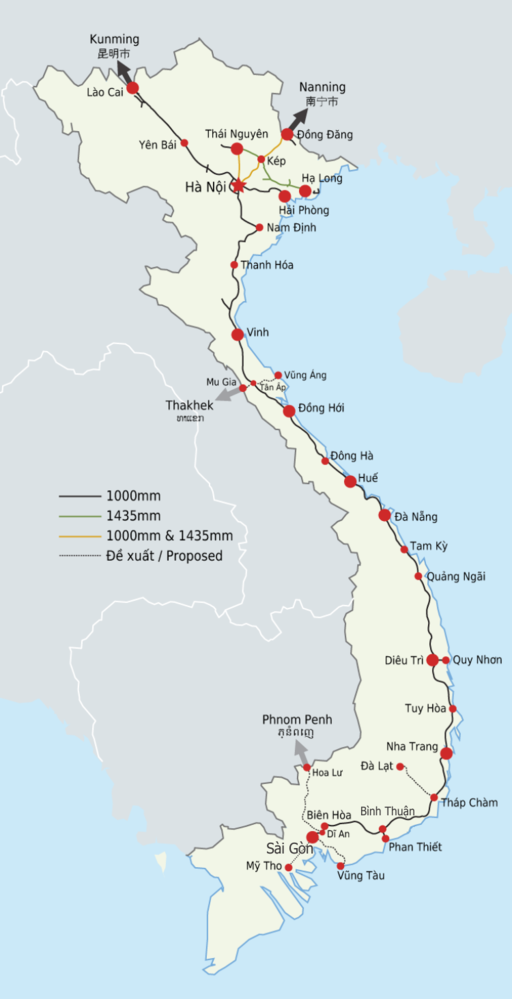
    The most popular train routes are along the coastline of Vietnam and run between Hanoi and Saigon (Ho Chi Minh City). This route is sometimes referred to as the Reunification Express however this is a name purely used by guidebooks and travel agents and not reflected on the routes or trains.

    During the Vietnam War the train line was divided between the south and north. After the war the trains resumed running and creating ease of travel along the coast of Vietnam again.

    See below the routes and destination you can go across Vietnamese train network:

    Vietnam Railway Map
    Vietnam Railway Map
    Original source https://commons.wikimedia.org/wiki/File:Vietnam_Railway_Map.svg

    I hope you found this article useful for planning your overnight train journeys through Vietnam. Let me know if the comments below how your journey was 🙂

    Six Things to know about Overnight Trains in Vietnam
    Trains are my favourite method of transport for long distances and what better way to travel across Vietnam than catching overnight trains. Accommodation and travel at the same time! Read more about six things to know about overnight trains in Vietnam. #Vietnam #Vietnamovernighttrains #Vietnamtrains