Category: Settling and Naturalisation UK Visa’s

  • 25 Pros and Cons of Living In England

    25 Pros and Cons of Living In England

    Weighing up whether you should move to the UK? And whether the pros and cons of England worth it? There are good and bad things about every country, and it’s always best to be really prepared before making any big moving decisions. All big changes come with challenges, but the rewards are often worth it.

    There are plenty of good reasons to move to England, but often film and media paint a rose-tinted version of English life. Whilst we do have the rolling hills and breathtaking countryside, there are some downsides.

    Here are the pros and cons of living in England, along with my own personal experiences in this wonderful country. 

    Pro: Excellent Public Transport System

    Catching the tube in London

    England is known for its excellent public transport system that spans the country.

    In London alone, the London underground system is a fantastic example of how impactful a good public transport system can be. The history of the underground began in the 19th century, with the first deep-level tube line opening in 1890. Over the past one hundred and thirty years the system has gone from strength to strength, and evolved into the efficient transport system it is today.

    Outside of London the country as a whole benefit from an excellent system of train stations (even in rural areas). The stations come with easy access for all and are generally reliable.

    The bus and coach routes that cover the country play an equally important role in the well functioning public transport system. Bus stops and stations cover the UK, from the most rural villages to busy cities.

    Bus times can vary, but in highly populated areas bus stops will usually offer services every 10 minutes or so. In more rural areas the bus may only come once an hour or in extreme cases only a few times per day. The takeaway here is that no matter where you are, it’s likely you’ll be able to access public transport in some form or another. This is great for people who don’t drive or can’t afford to own a car.

    Con: Public Transport

    Travelling-to-Edinburg-Scotland-by-Train.
    Paddington Train Station

    While public transport is great in England it also has its negatives. You’ll often hear Brits complain when there are delays and seems like they can be brought on by anything, leaves on the track, tracks are too hot from the sun, ice on the track and whatever else weather-related.

    Transport is also expensive! As an example, if you are commuting into London from a commuter area you can easily spend £5,000 a year on a train ticket.

    Psst… if you are looking at saving money on train fares consider getting a railcard. There are various types you can get, check out their website to see if one fits your needs. This can save you 1/3 on rail fares around Great Britain (although not on season tickets).

    Pro: National Health Service
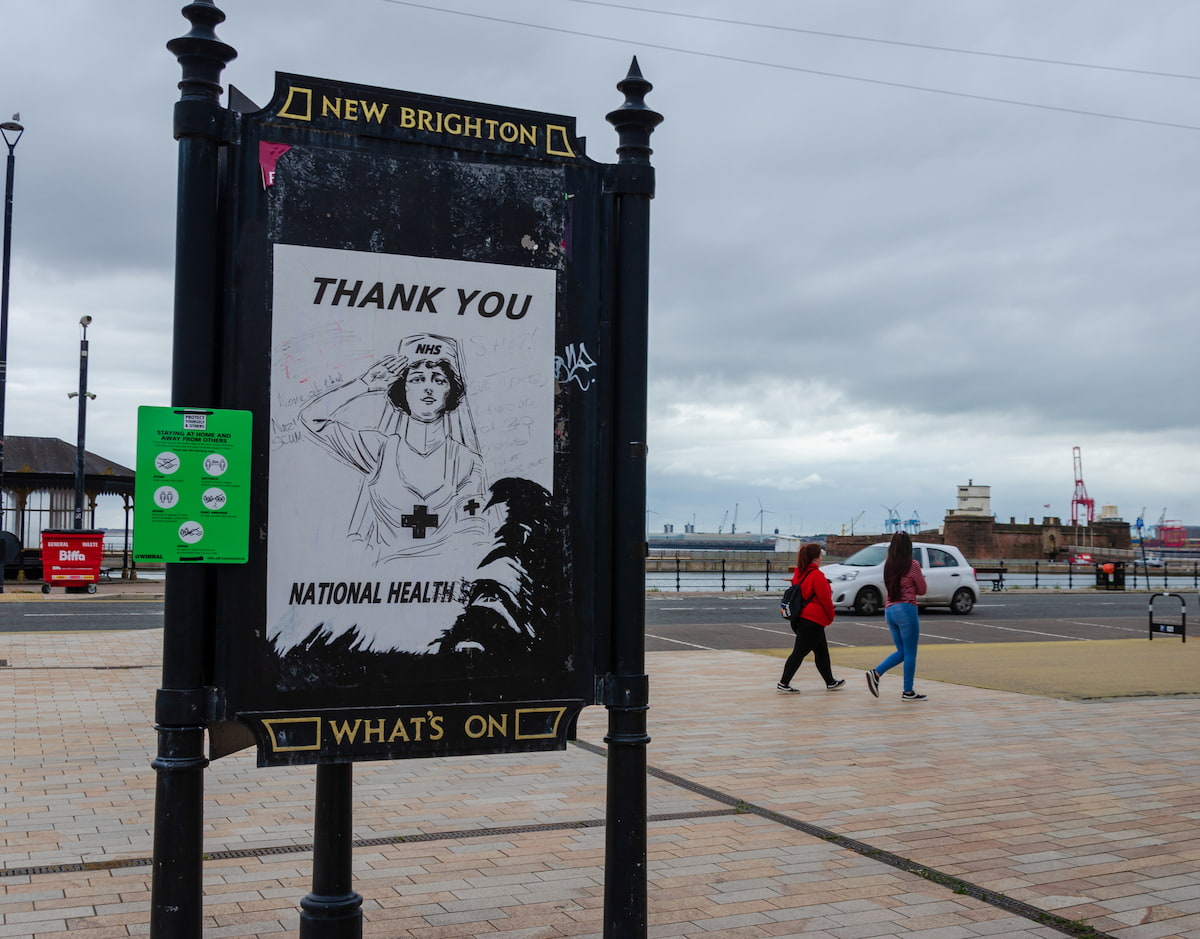
    Thank you NHS sign in Brighton

    One of the biggest pros of living in England is having access to healthcare. Due to paying taxes in our wages the services are mostly free or have capping in place.

    The National Health Service, or ‘NHS’, is a vital service that promises a better quality of life for all. The NHS is a high contributor to England’s good standard of living, eliminating health care worries and financial stress for the masses.

    Being able to call for an ambulance without the worry of fees is a world-class luxury. If an elderly relative has a fall, or you or your partner have a cancer diagnosis, the additional stress caused by finances is simply not an issue here.

    It is worth noticing that dental care is not completely free here, and often requires a flat fee based on the service provided. However free dental care is available to qualifying low-income and elderly residents.

    Optical care is also not a free service and requires a fee. Many employers offer excellent employee benefits that will cover optical care. Some are able to access free optical care if they are vulnerable enough to qualify.

    It’s also important to be aware of the NHS surcharge as part of visa applications. It does depend on Visa type, so be sure to research this thoroughly if you are considering moving to England. For a 5-year Ancestry visa this can cost you upwards of £3,000 on top of your visa cost.

    Con: Waiting Times For Services

    The impact of 2020/2021 has had on the NHS means that there is now a long wait time for services and it’s understandable why there is an impact. I am thankful for the NHS efforts during this time and only thank them for their services.

    There is a KPI that 92% of patients should be treated within 18 weeks as part of the referral-to-treatment scheme. Since 2016 these have not been met and has hit a new high after 14 years.

    You may want to consider private healthcare if this is a concern for you.

    Pro: Areas of Outstanding Natural Beauty

    swan-and-moored-boats-in-Lake-Windermere

    If you enjoy the sublime views of nature, and a slower pace of life, then the English countryside will be very attractive to you.

    England has beautiful countryside that is hard to match. The rolling hills of Shropshire and the stunning views of the Lake District are just a couple of examples of how breathtaking the countryside here really is.

    Enjoy the quaint small-town life in chocolate box towns with tiny cottages. Or if you enjoy both nature and city life then come and experience the beautiful city parks this country has to offer.

    See for yourself the stretching moorlands that inspired English literature classics like Brontë’s Wuthering Heights or the rambling hills that inspired Tolkien’s Shire.

    England also has stunning beaches and seaside towns to enjoy. Cornwall in particular is a popular tourist destination with a highly sought after property market. In the summer months, the English seaside towns are super fun for a day trip out or a weekend away. Enjoy a classic portion of British fish and chips by the sea, or an ice cream looking out at the views.

    If hiking is more your thing than the call of the Peak District may be for you. Explore the adorable town of Bakewell and sample the world-famous Bakewell tart, or enjoy long hikes through the Yorkshire Dales. The possibilities are endless!

    Con: Over Tourism of Certain Areas

    Areas of Outstanding Natural Beauty like Cotswolds, Lake District or Peak District are known throughout the world for their stunning beauty and has many visitors every single year. This is great for England, as its economy thrives on tourism and it brings great support for the small businesses in rural areas. 

    However, we need to support responsible tourism and minimise our negative impacts on the environment and local communities. This is something that we learn over time while travelling and being conscious about it builds the habits over time.

    Taking care of the landscape mostly comes down to common sense, such as leaving sites how you found them, taking litter away and not dropping waste that conflicts with the natural ecosystem. 

    Or designing your trip carefully so that you’re leaving a positive footprint in England. For example, instead of driving there consider catching the train. Travelling in non-peak times so that your business is evenly spread.

    Instead of booking accommodation with Airbnb, see if you can book with the accommodation directly so they are getting money to support their small business.

    Pro: England’s Rich History

    Kat at Stonehenge

    England has a long and rich history that can be explored in person amongst mystical ruins and well-kept heritage buildings alike. Visit sites like Stonehenge, or the hillforts in Shropshire to learn about ancient civilisations. 

    England’s history is one of the most attractive pros in this list for those with a sense of adventure and a curious mind.

    This also bodes well for educational opportunities for kids too! Explore England’s castles and heritage sites and enjoy the rich historical settings.

    Stand on the grounds of ancient battles (think the battlefield and Abbey of the 1066 battle of Hastings) or view Buckingham Palace and its guards. There are plenty of things to do and see for history buffs! Ramble over the hills and view the remains of Roman forts or tour renovated stately manors.

    Whether you’re interested in ancient history or the Victorians (check out the Blists Hill Victorian town experience with operating Victorian shops and mills), there is something for all tastes. Throughout England, each town or city will have its own historical landmarks to explore.

    There is plenty to see for those who enjoy the industrial revolution period too, or for World War history fans. Tour hangers filled with old war planes or visit museums dedicated to England’s industrial revolution and see the magnificent machinery.

    Pro: Free Art Galleries and Museums
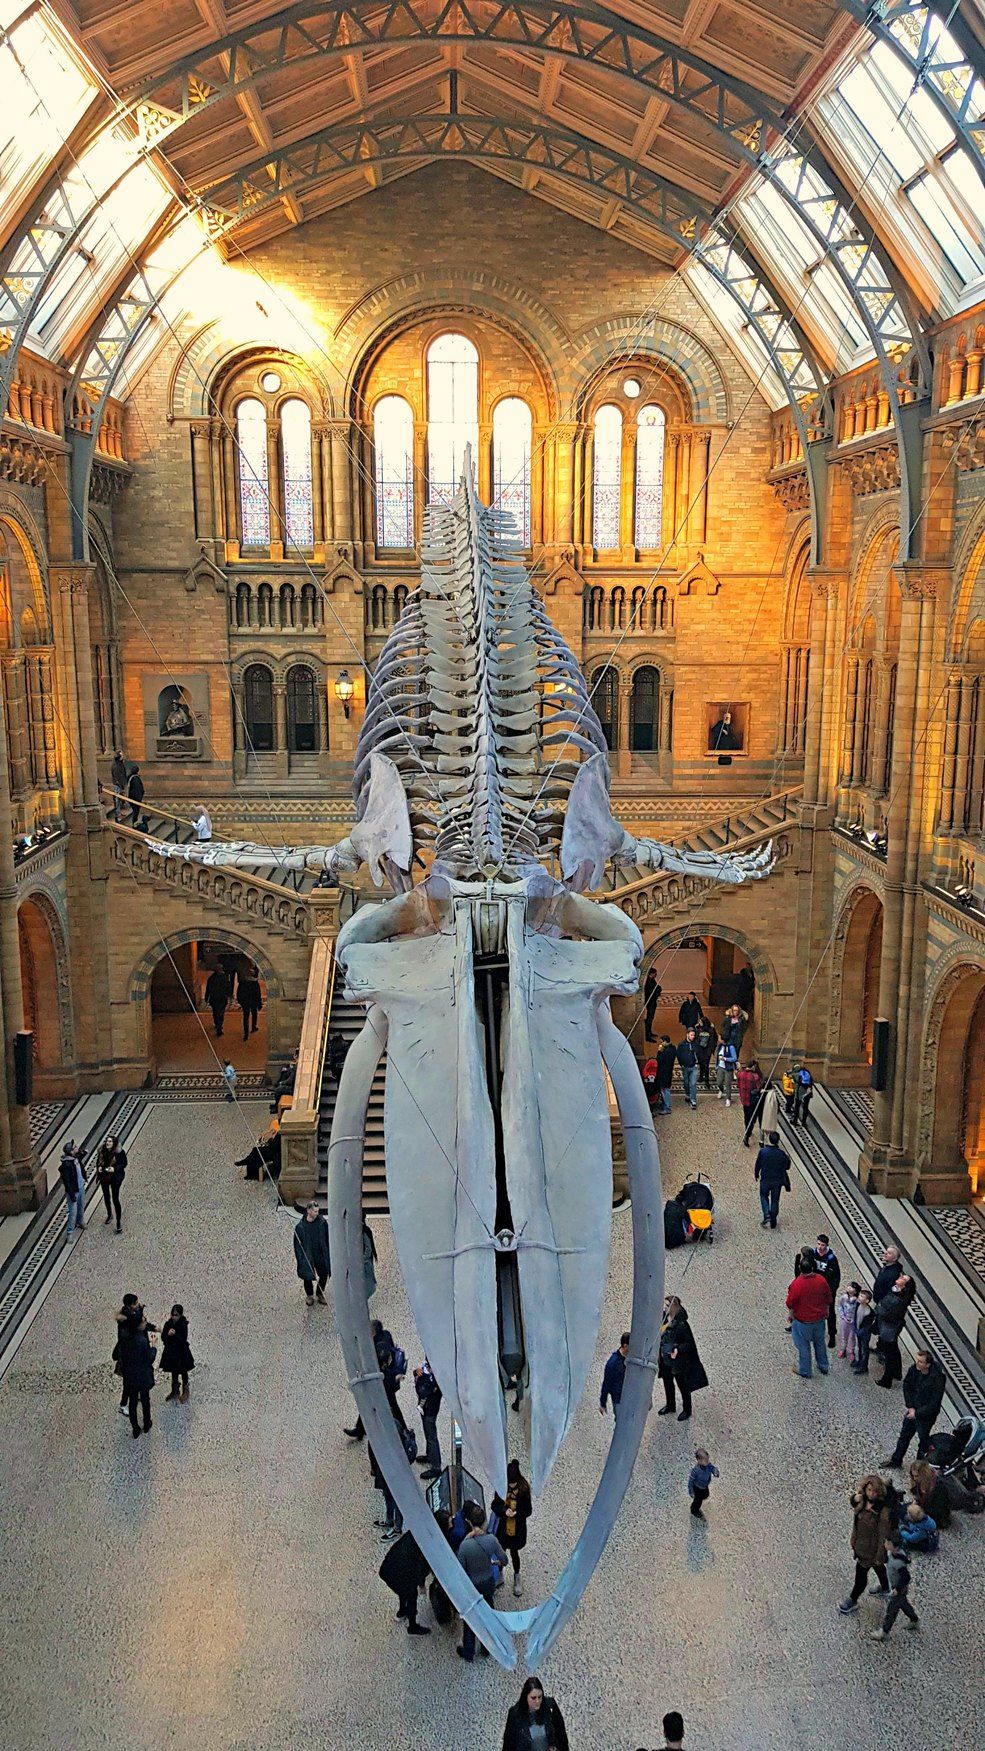
    Natural History Museum
    Natural History Museum

    Across the UK you will discover that museums are free! If you are interested in education, culture and arts then England has plenty of wonderful museums, art galleries and beautiful parks to peruse.

    This was mainly instated in 2001 and it is such a great privilege we have. Whilst they are free do consider when you’re visiting a museum making a donation or becoming a member to help support the maintenance.

    You will find that exhibitions are paid for and most places will have at least 1 runnings. My favourite is the wildlife photographer of the year award which is held at different venues in England.

    If art is more your thing then, England has a lot to offer in this space too. With art galleries spanning the country, there is always something to see and do.

    British Museum

    The British Museum is particularly attractive as it’s a world-famous museum with plenty to offer that is always changing and updating. No two visits are the same – come to see the attractions again and again.

    It’s a wonderful space dedicated to human history, art and culture full of wonders to browse. Established in 1753 the museum itself is a piece of British history.

    Tate Modern

    Check out the amazing Tate Modern in London – this art gallery resides in the former Bankside Power Station (wow!) and forms an iconic part of London. Not only does it house amazing work from artists all over the world but it actually has live art performances and installations to enjoy. The exhibitions it hosts throughout the year are another reason to visit this gallery over and over again.

    Pro: West End and Theatre

    If you enjoy theatre then England has some amazing spaces and performances to offer. See the breathtaking interiors of old theatres and enjoy modern performances of classic plays. What else could you expect from the home of Shakespeare?

    Across England there are great theatres, here are some of my favourites to go and see:

    • Book of Mormon
    • Hamilton
    • Harry Potter and the Cursed Child
    • Lion King
    • Any Shakespeare

    Pro: Bank Holidays

    One of the top pros of living in England is the bank holidays. Enjoy days off from work with bank holidays that pop up throughout the year.

    Here is a list of the bank holidays in 2022, for reference, so you can see how many extra paid days off you can get (in addition to your allotted annual leave from work!):

    3 January
    Monday
    New Year’s Day (substitute day)
    15 April
    Friday
    Good Friday
    18 April
    Monday
    Easter Monday
    2 May
    Monday
    Early May bank holiday
    2 June
    Thursday
    Spring bank holiday
    3 June
    Friday
    Platinum Jubilee bank holiday
    29 August
    Monday
    Summer bank holiday
    26 December
    Monday
    Boxing Day
    27 December
    Tuesday
    Christmas Day (substitute day)

    Bank holidays are fantastic paid time off days that can be enjoyed with family and friends. There is a pleasant English culture surrounding bank holidays, where the whole country feels joyful. 

    And best of all, these days come in addition to your paid annual leave allowance from work – you heard that right! It should be noted however that some jobs do require employees to work over bank holidays, but most do not.

    Celebrate the sunny bank holidays with friends at barbeque garden parties, or cosy up in the winter by the fire in an English pub. Bank holiday culture is great for all!

    Pro: Fabulous Cities

    Kat at Clifton Bridge in Bristol
    Kat at Clifton Bridge in Bristol

    Another fantastic pro of living in England is the fabulous cities it has to explore. Aside from London, the amazing capital city, England has many other big cities with their own attractions to enjoy.

    Visit Manchester’s Northern Quarter and sample dishes from world-famous restaurants (with all of the insta worthy glitz and glam) or head over to Bristol to enjoy the artsy scene (the home of Banksy!).

    If a fun English night out is your idea of a good time try the beautiful pubs of York and feel as though you have stepped back in time. There are plenty of pubs and swanky bars hidden in the nooks and crannies of York’s medieval streets.

    With plenty to do and see in cities across England, you’ll never run out of staycation ideas when living here.

    Here’s some inspiration to add to your list!

    Pro: British Culture

    British culture is another fun pro for moving to England. There’s a different accent in every city and a culture to match. England is a hub of cultural activity, and English people are fun to be around.

    The English music scene in particular is a great part of English culture that people travel from around the world to experience. 

    From gigs in your local pubs to full blown music festivals, the English music scene is an attractive pro for audiophiles! From Glastonbury and Reading to Download rock festival, there are festivals for all music tastes.

    Pro: Great Labour Laws and Employee Benefits

    England’s labour laws and employee benefits are an attractive reason to move to the country for many.

    Benefits for employees like sick pay, a company pension, maternity leave, annual leave, the right to unionise, and often optical and medical benefits too are amongst some of the employee benefits that are offered in job packages.

    Some companies go a step further and also offer great paternity leave, cancer insurance cover, physiotherapy, medical cover for the families of workers, an option to join employee shares schemes, fun evenings out on the company, bereavement leave, counselling and more.

    A national minimum wage too must be upheld, along with the right for employees to unionise and rules around working hours that can’t exceed 48 hours a week (in most cases).

    These laws are designed to protect employees and serve as an excellent incentive to move to the UK.

    Pro: Access to Free Education

    Access to free education is an excellent pro for moving to England. Education is vital for developing minds, and so it is offered for free for children between the ages of five to eighteen years old.

    Education is mandatory between the ages of five and sixteen. After the age of eighteen children are able to attend higher education at university, which is not free.

    Free education is a great benefit that England has to offer for younger people.

    Con: Unpredicatable Weather

    English weather is often the punchline for many British jokes, because of its unpredictability. It can be raining one minute and then beaming sunshine the next – you never quite know what you’re going to get.

    Whilst England and the rest of the UK does have defined seasons, sometimes snow can carry over into spring and April showers can carry into the summer months.

    The gloomy weather is often a grizzling complaint from locals, however, we do experience lovely summers, so it all balances out!

    Pro: People Make the Most of the Summer

    Kat in Norfolk with an Icecream

    You know when the sun comes out in England! People make the most of it, from heading to the beach, hosting a last-minute BBQ or enjoying a beer garden. The summer months are the best months to be living here as everyone gets their social calendar in.

    Con: House Prices

    The housing market in England is a point of contention for many, due to its difficult entry requirements.

    House prices are steep for buyers, and for many first time buyers it can be hard to get on the property ladder because of this.

    I highly recommend checking the house prices of the general area you would like to move to in the UK to get a decent idea of what you are in for, should you like to buy in future.

    The extra bits you need to buy a house can be tricky for some to obtain. Getting a mortgage requires a number of documents, and is easier if you have the following:

    • Have a permanent job in the UK and can produce three payslips from the last three months
    • Have been a resident of the UK for the last two years
    • Have a UK bank account

    The above can be hard for some to obtain and will require planning in advance.

    Con: Requirements to Move Here

    US Passport money and flag

    Visa requirements for the UK can pose as a con for some, as they can be quite hard to meet. Countries like Australia have easier requirements as we can access the Youth Mobility visa and in 2021 they agreed to extend this to 3 years. Other commonwealth countries are offered 2 years Youth Mobility visas.

    For US citizens this can be more difficult and a harder process to go through.

    Here is a quick rundown of what requirements you can expect when applying for a UK visa, for you to read on gov.uk here.

    Making sure you apply for the correct visa and have the supporting documents is a vital step to take when moving to the UK.

    Pro: Close to Europe

    Kat at Fisher Bastion in Budapest
    Kat at Fisher Bastion in Budapest

    One of the main reasons I moved to England was the proximity to Europe and the ability to travel there for a weekend. It’s such a luxury to have the option to be able to do this and if travel is on your list then England is a perfect location to be able to do it from.

    Con: Competitive Job Market

    The English job market can be quite competitive, and higher positions may have difficult education and experience requirements to meet.

    Whilst there are many resources to help you source a job in England, it is worth noting that the process can prove difficult for some.

    If you aren’t headhunted and recruited from abroad, you’ll need to get something lined up for yourself when you move.

    Here’s how I moved to the UK without a job and experiences getting one since living here.

    Con: Lower Average Wage (Outside of London)

    Another con is the average wage outside of London drops quite drastically. Before moving to the UK it’s best to have a good understanding of the average wage in the area you have your eye on, instead of looking at England’s average wage as a whole.

    Here are the average wages across big cities in England, to help you get the full picture:

    • London’s average wage is £39k
    • Manchester’s average wage is £30k
    • Bristol’s average wage is £31k
    • Liverpool’s average wage is £26k
    • Leeds’ average wage is £29k
    • Leicester’s average wage is £26k

    Con: Narrow Country Roads

    If you aren’t used to driving down small winding roads then you are in for a shock when you move to England!

    Even the largest and widest roads in the UK pale in comparison to the size of American roads for example.

    Small narrow country lanes are quite tricky to navigate, with there often only being enough space for one car to fit at a time. If you meet with another vehicle head on, one of you may have to reverse quite a long way until an indent or layby presents itself.

    Country roads on foggy days or late at night are not for the faint of heart. And what’s more – the locals who know the area well can often take these roads at quite the speed. Watch out!

    Con: Very Hard to Rent If You Have Pets

    London-Flat-Cat

    In England and the UK as a whole it can be very difficult to rent if you have pets. Some landlords may allow fish or a small hamster, but cats and dogs are usually completely off the table.

    If you have pets you will need to plan in advance when moving to the UK. Make sure you find accommodation that allows for your furry friends, or you’ll be in a spot of trouble when you arrive.

    Some landlords may be lenient about pets when asked directly, so it’s always worth dropping an email or giving a call to the landlord when looking at a prospective place to see if they will wave their rule.

    Buildings that are owned by large companies or blocks of flats will almost never allow for pets, so keep this in mind. You’re better off looking for somewhere that’s owned by a landlord with one or two properties on their portfolio, who you can develop a direct relationship with. In these cases, the landlords may be more lenient.

    Con: Small Houses

    If you are from America or anywhere else in the world that enjoys large houses, then the size of English houses may come as a bit of a shock to you.

    Whilst the UK and England have their fair share of mansions and big houses, the average English house is far smaller than the average American house for example.

    The average square footage of an English house is 729 square feet, whereas the average American square footage of a house is 2687 square feet.

    It’s best to check the average square footage of houses in your area, then compare them to the average in the area of the UK you would like to move to, so you can get a good idea of the difference.

    For some this may result in an improvement in square feet, but for most American readers this may come as a shock!

    Con: Scams (Phone, Text & e-mail)

    There are quite of scams! For spoof HMRC to text saying you need to pay import tax to receive your parcels. Some seem so real as well so it can be hard to tell. There are also lots of calls asking whether you’ve been in an accident!

    Also watch out for renting scams. If they ask you for money without seeing the property this should send red flags straight away. I’ve written an article on renting which describes the fees that you may pay as a part of renting, even though it says London it does apply to England.

    It’s something to watch out for when you move here. Unsure if you’re being scammed then Google, ask a friend or check with the company that sent you the text. If it seems odd then you’re probably right!

    Overall

    Living in England does have its upsides and downsides, but overall the beauty of the country, the NHS and overall quality of life certainly makes it a great contender for a big move.

    It’s always best to really know what you are in for by carefully considering the cons also. I hope my list will help you get a broader understanding of England.
  • Biometrics Appointment for UK Visas (UKVCAS Process Explained)

    Biometrics Appointment for UK Visas (UKVCAS Process Explained)

    There have been a lot of changes over the past year with the visa process and you may have been wondering – UKVCAS how does it work? I will run through:

    • How to book the biometrics appointment online
    • The biometric appointment locations
    • How to check UKVCAS appointment availability
    • UKVCAS upload documents and categories
    • What to expect when you attend the biometrics appointment.

    Disclaimer: This is based on my experience of going through the process (I’m not a lawyer or immigration advisor). If you have any issues make sure you contact UKVI or UKVCAS.

    As things are changing (due 2020 events) with UKVCAS service please keep up to date with UKVI latest information and UKVAS.

    Difference between UKVI and UKVCAS

    Before we get started on the process, let’s cover the difference between UKVI and UKVCAS.

    UKVI – UK Visa and Immigration

    Here’s a quick summary:

    • UKVI are the ones making a decision on your application
    • If you have any questions about the application they are the department to call
    • Most importantly if you want a quick decision (i.e. super-priority) on your visa and you are eligible for it, this is where you want to spend the money!

    Read more about the service here: UKVI Services and UKVI Information About UKVCAS.

    UKVCAS – UK Visa and Citizenship Application Services

    Here’s a quick summary:

    • It’s a third-party service run by Sopra Steria
    • Their website is where you book to have your biometric information taken
    • Upload your supporting documents for your application
    • Attend your biometric appointment at one of the centres which fingerprints, photo, signature and submitting your application.

    UKVCAS website.

    Choosing Standard or Super Priority Service?

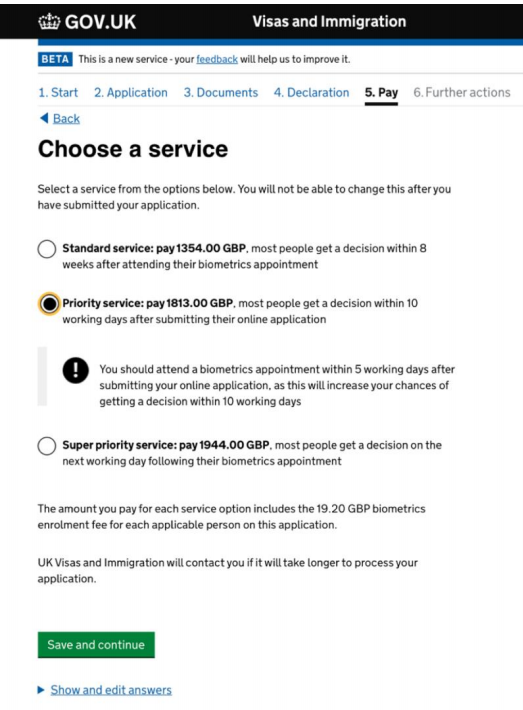
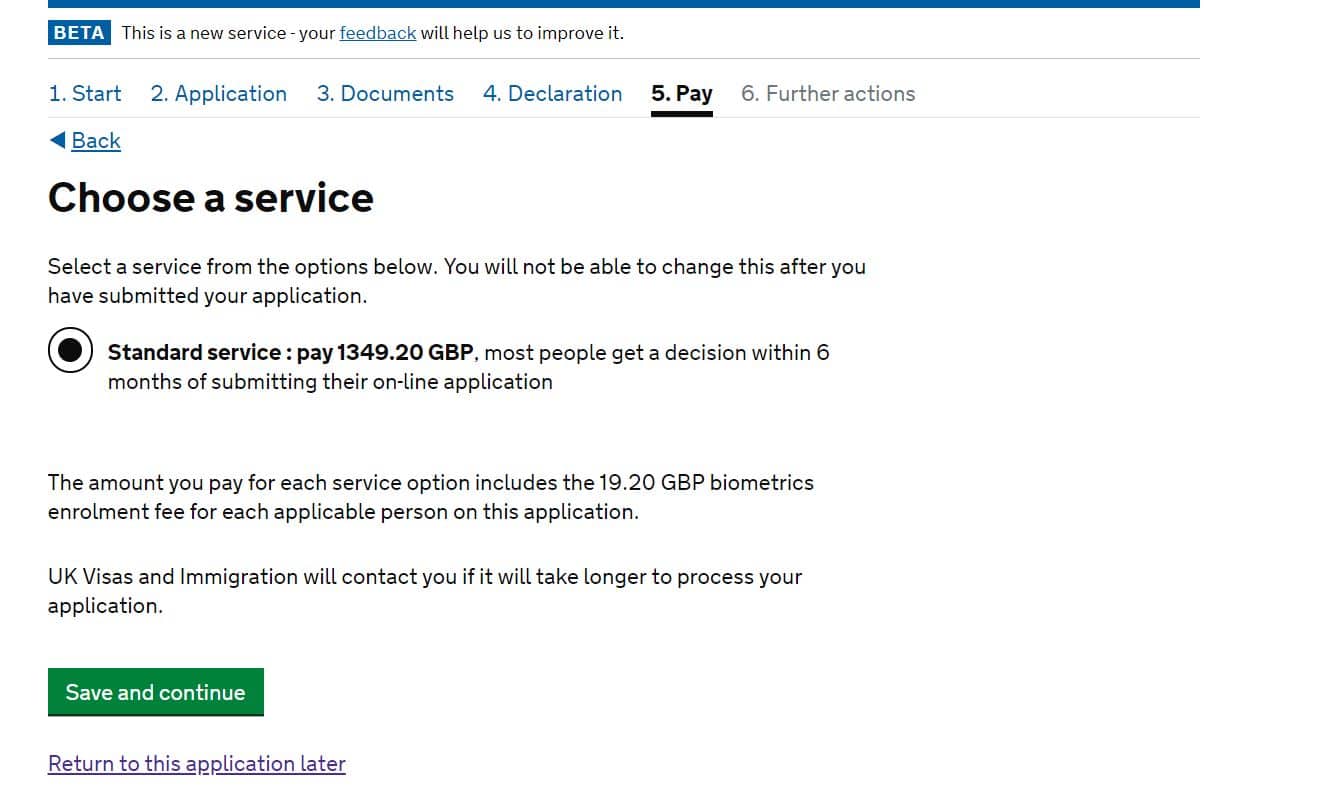
    When you get to the payment screen you will be potentially presented with two options. This is the most critical part of the application, especially if you wish for a faster decision. They are:

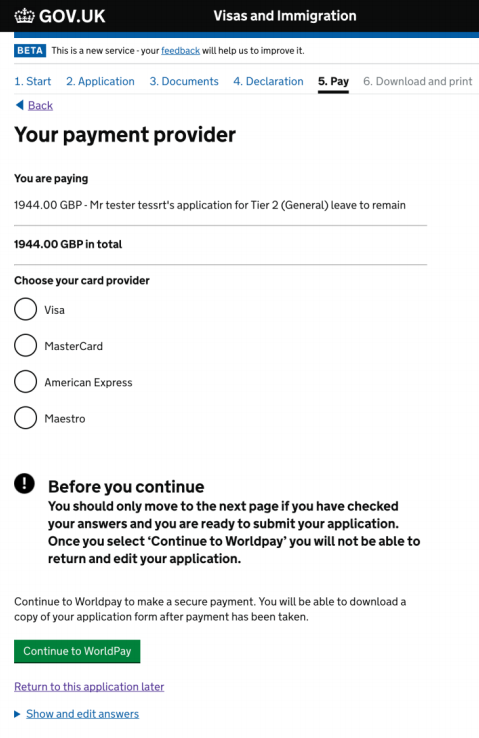
    If your visa is eligible for super-priority, then you will have the ability to choose this during the payment screen. This will give you a decision within 24 hours. Just to note this doesn’t give you a faster biometric appointment.

    In this example, you can see there is only one option and unfortunately, UK citizenship is not eligible for super-priority.

    Payment screen on UKVI
    Payment screen on UKVI

    The type of visa’s service is offered to are:

    • Tier 2 or 4 visa
    • Tier 2 or 4 dependant
    • Tier 1 or 5 dependant
    • Remain in the UK with family – applying in the partner, family life as a partner or private life in the UK routes
    • Indefinite Leave to Remain
    • And a few more.

    The price of super-priority is currently £800. Here is the price list from UKVI.

    Step by Step Guide to Biometrics Appointment for UK Visa (UKVCAS)

    To complete your application, you must attend a UKVCAS service point to have:

    • your identity confirmed
    • any required biometric information enrolled
    • any required supporting documentation digitised and checked
    • confirm you are happy to send your application sent to UKVI

    I will show you the steps I completed to create my account, booking an appointment, uploading documents and what to expect during the appointment.

    UKVCAS has no bearing on the decision process, all it does if you choose to pick a premium appointment is to provide you with an appointment quicker, after hours etc. There are a few options. If you want a quick decision, then you need to choose this during the application process as stated above.

    If you prefer watching the step by step process here is a video version.

    UKVCAS Account Setup

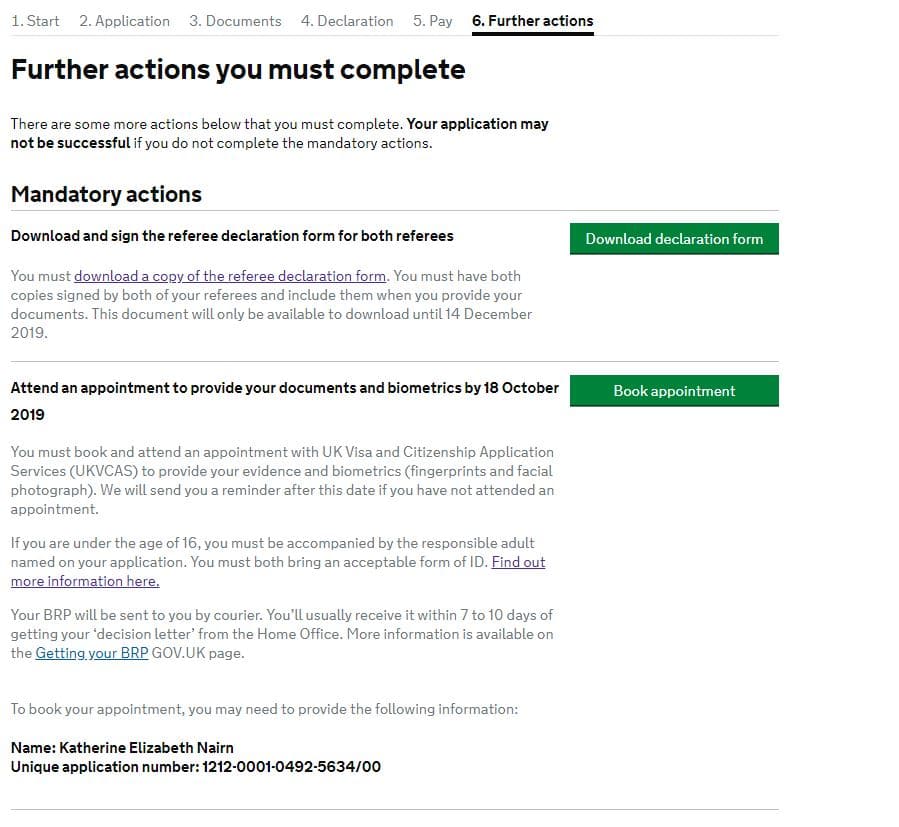
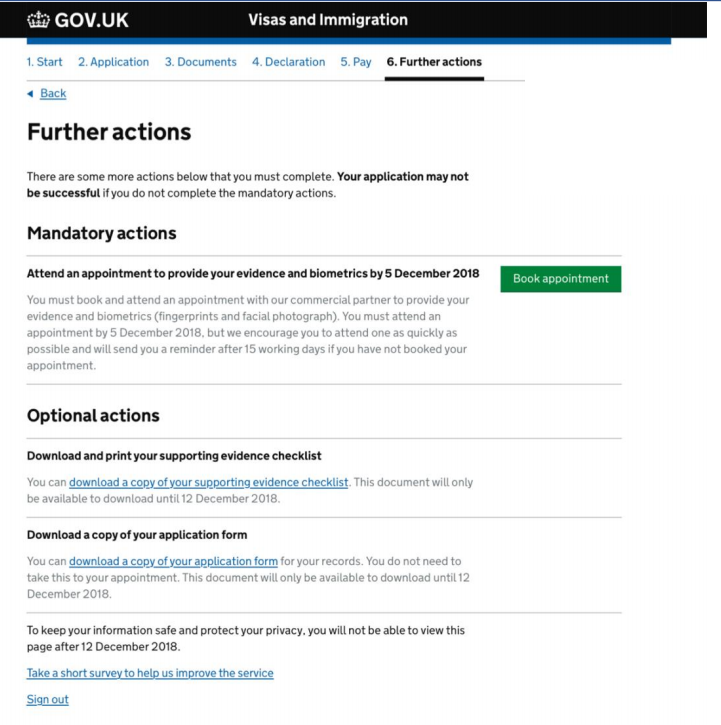
    Once I reached the further actions page on the application I was presented with mandatory actions, one of these will be ‘book appointment’, I clicked this button to commence the set-up for the UKVCAS site.

    Further actions screen on UKVI
    Further actions screen on UKVI

    Please note: if you have any issues with setting up your account you will need to call UKVCAS.

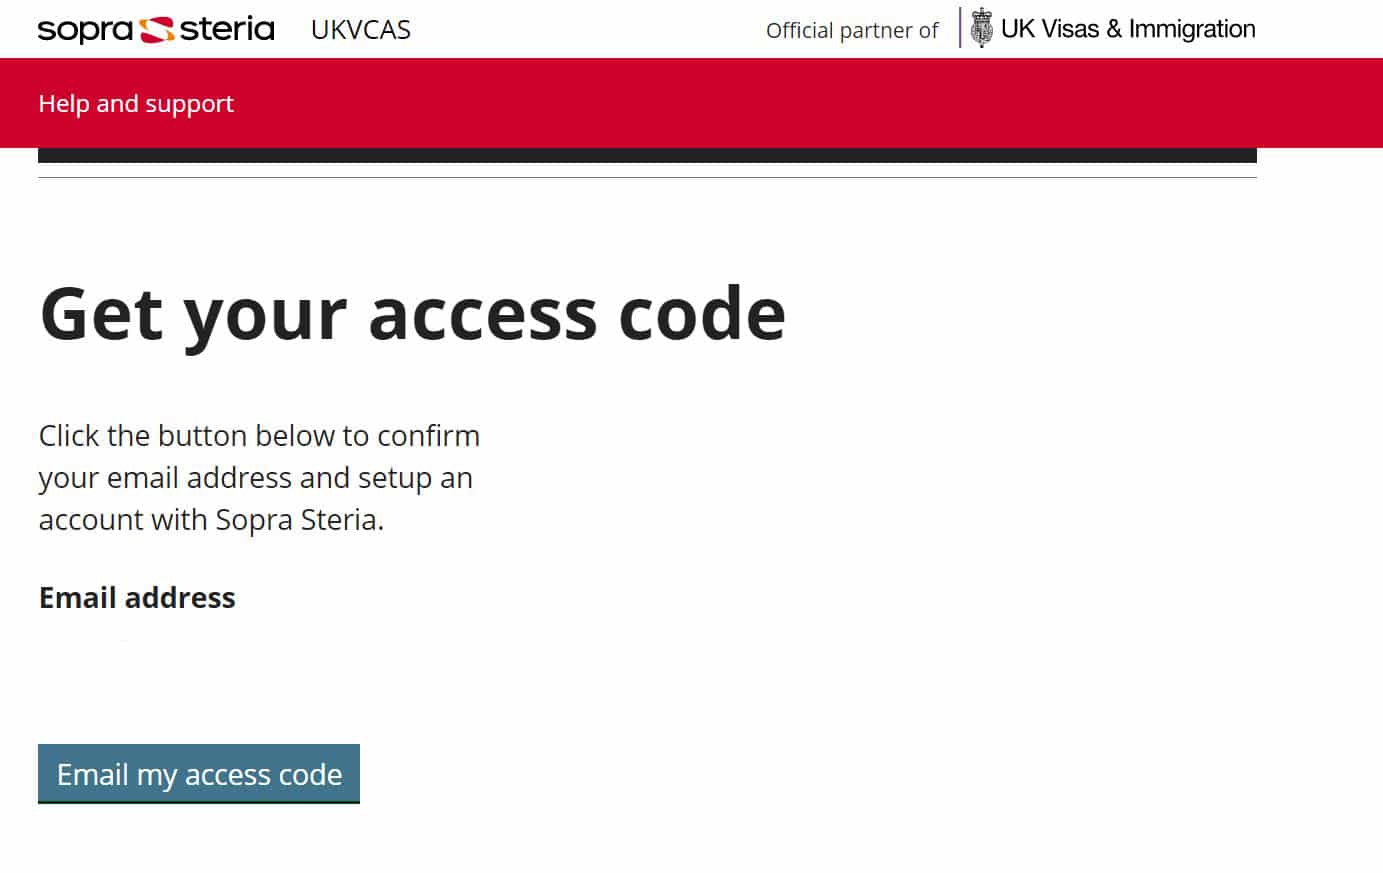
    Next, I was presented with a screen to ‘get your access code’. This will be sent to the email address you registered with UKVI.

    UKVCAS screenshot of access code
    UKVCAS screenshot of access code

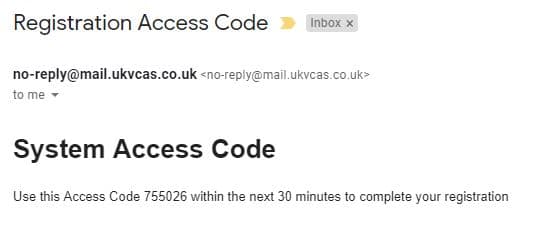
    In my inbox I received an email like this with 6 digits, you have 30 minutes to use the code.

    Email from UKVCAS that provides access code
    Email from UKVCAS that provides access code

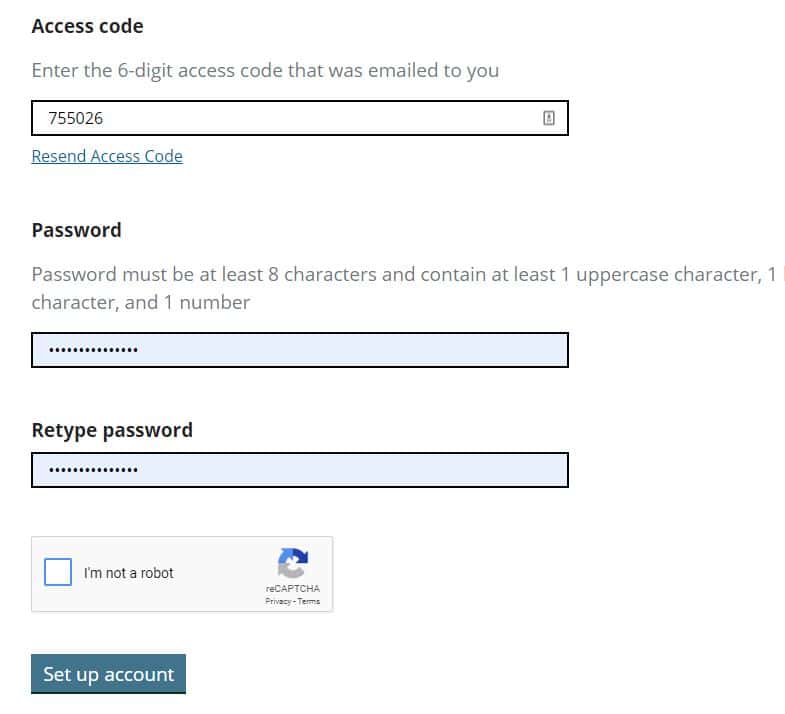
    Finish the sign-up process I added the code and created my own password for the UKVCAS website.

    Setup UKVCAS account with password
    Setup UKVCAS account with password

    That’s it, my account was all set-up with the email I registered my UKVI application with.

    Book Your Biometric Appointment

    You can book an appointment in two ways:

    • On the UKVCAS website
    • by phone by calling the UKVCAS Premium Support Line on 0900 165 6600 (Calls cost £2.50 per minute)

    Personally I did all of this myself via the website.

    Once I set-up my account and then logged on, I was taken to a home page which explained the booking of the appointments, the extra services and stuff they offered. I kept scrolling through until I got the book appointment button at the bottom of the page.

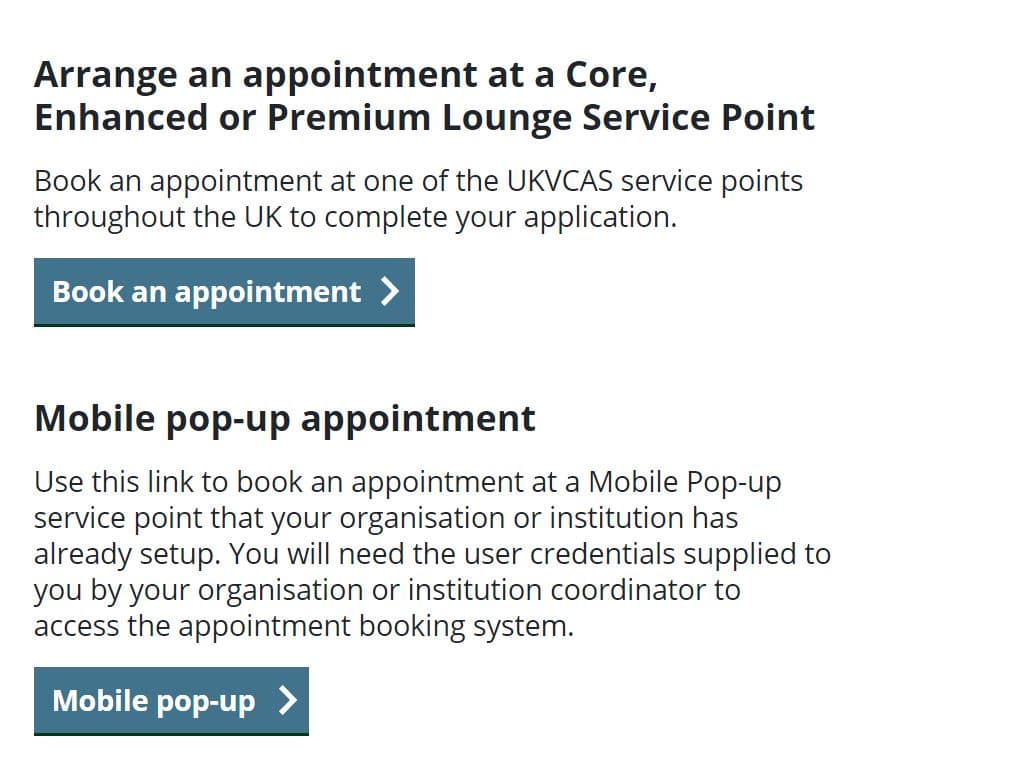
    Choose a UKVCAS appointment
    Choose a UKVCAS appointment

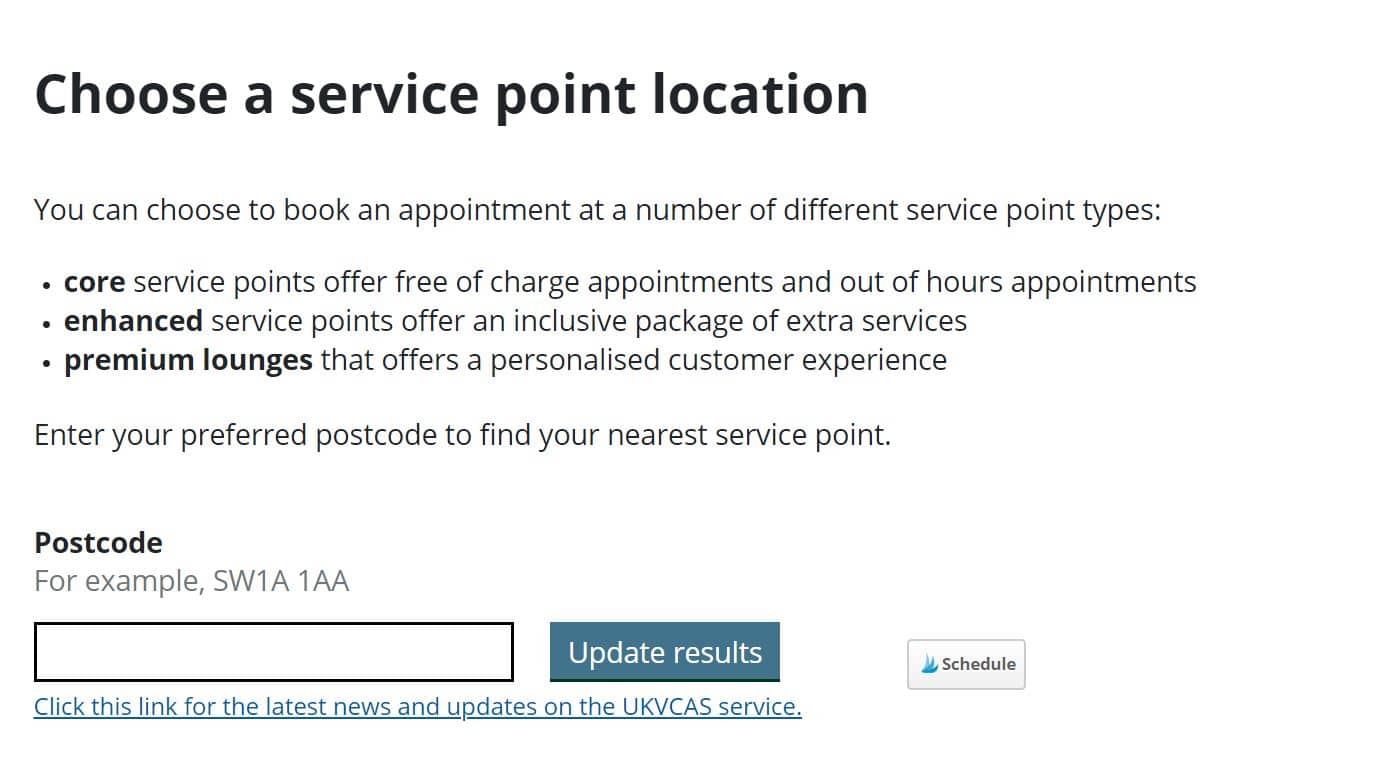
    Next was choosing a service point location. The tool gave me the closest centres near me or I could search by using a postcode.

    Choose a service point location for biometric appointment
    Choose a service point location for biometric appointment

    If you wish to get a free appointment there are 6 core service centres offering free appointments – Manchester, Birmingham, Glasgow, Cardiff, Belfast and Croydon.

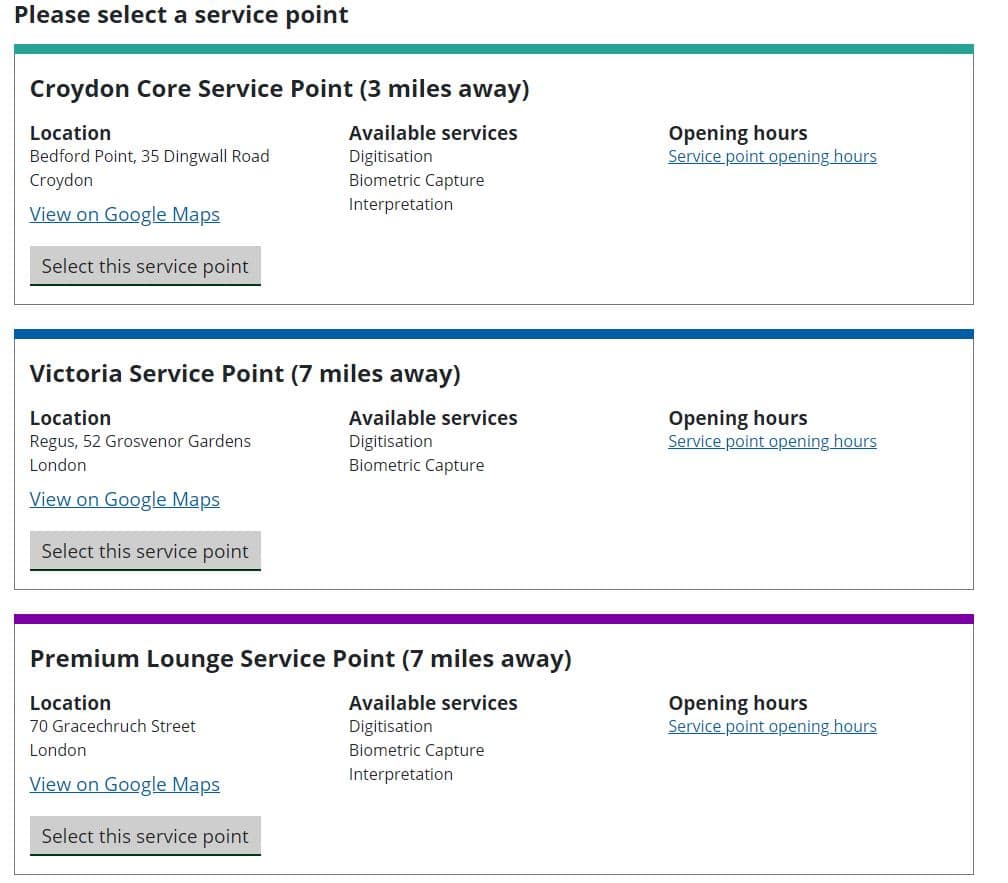
    Once I was happy with the location, I clicked on select this service point which gave me the available appointments.

    Example of UKVCAS service points
    Example of UKVCAS service points

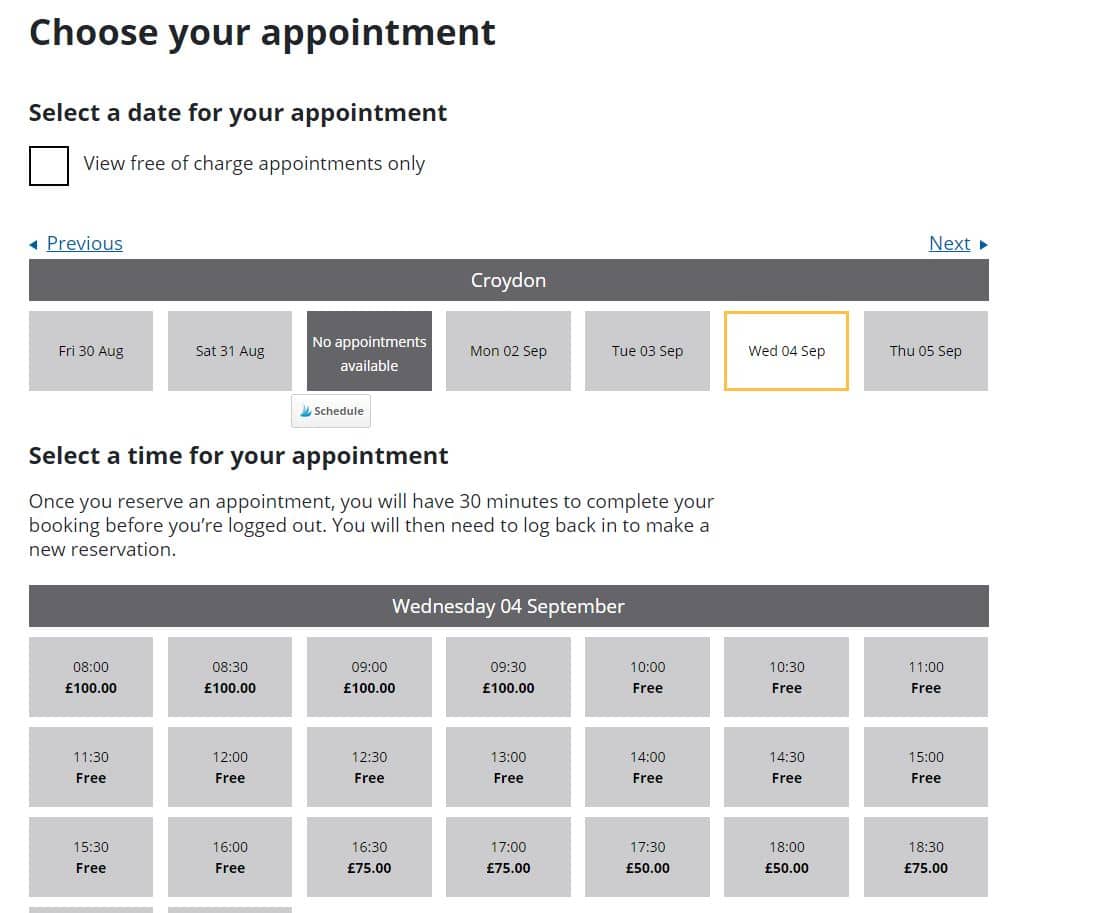
    Next was the choose your appointment screen which showed me the appointments for the first week and you can keep pressing next for further dates. When I clicked on the dates it told me if there are appointments available and the price if it was a paid appointment.

    As you can see below there is a range of free and paid appointment between £50 to £100. Read more about the fees here.

    Choose a UKVCAS appointment
    Choose a UKVCAS appointment

    I was happy to wait for an appointment but it is dependent on what you want to do and how quickly you want to get your application done.

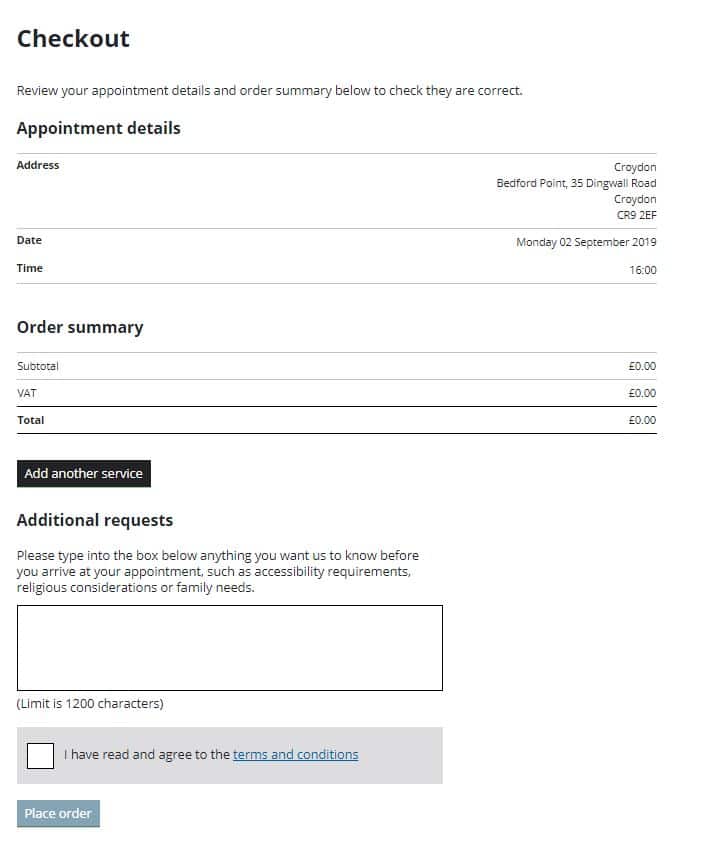
    I selected a time I was able to make and then went to the checkout screen which gave an order summary. As I had a free appointment it states 0 but if you have a paid appointment this is where you would enter the payment flow. You can also add additional services here like document checking.

    UKVCAS checkout screen
    UKVCAS checkout screen

    Once I finished booking the appointment and I received two emails. One was the tax invoice and one was the booking confirmation.

    The booking confirmation is a must to take to your appointment and this will be the thing that will track you through your biometric appointments. It’s really important. You can either print it or you can take it on your phone but you do need to have a copy available.

    It has a QR code and information about me and my appointment and that’s basically it, so nothing too exciting.

    UKVCAS Upload Documents

    Remember that checklist from the application? Well, that’s your guide on what you need to upload document wise! You do have the option of paying UKCVAS to do this for you but I just did it online at home for free.

    You can upload documents in stages right up until you attend your appointment. When uploading your documents, there are a few guidelines.

    1. Document type:  The documents are marked as either mandatory or other documents. A description of the mandatory documents required for each category is provided in the tabs.
    2. Category: Your supporting documents need to be submitted under the categories. Some are easier to determine than others – see categories below.
    3. File Format: PDF is the preferred format, JPG and PNG format. If you don’t have a scanner just search for an app in the Google Play or Apple Store, there will be quite a few available.
    4. File Name: needs to be as simple as possible e.g. bank-statement-Apr-2018.pdf. Do not use filenames having special characters, #,ë, or bank.statement.apr.2018.pdf
    5. File Size: maximum file limit is 6MB. You can separate your documents into parts if your file is too big and there is no limit on the number of documents/files you can upload.
    6. Scan in Greyscale or Black and white: This helps with controlling the size, although I didn’t end up reading this part before I scanned all my documents and they were fine in size. In fairness, there wasn’t as many as my ILR application.
    7. Password: Make sure there are no passwords on the files and they are fully accessible. I know it can be worrying by not protecting your information but it can delay a decision if they are unable to access any of this.

    How to Upload Your Documents on UKVCAS

    Depending on where you are ready to upload documents, you can either do this straight after booking the appointment or whenever you’re ready.

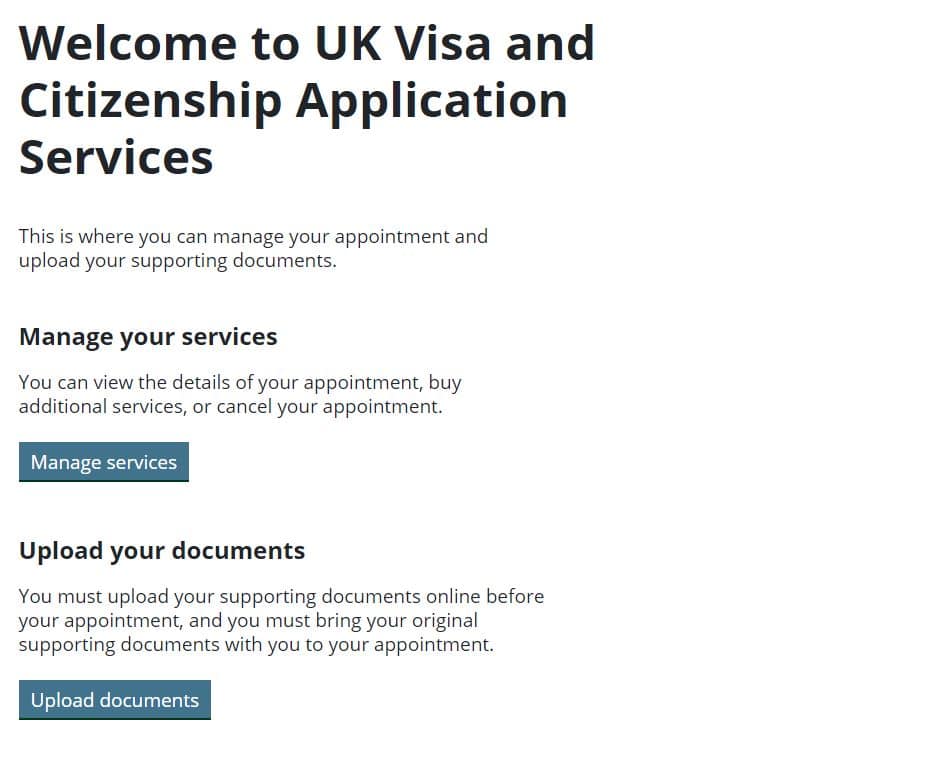
    I did this before my appointment so when I logged in you will be presented with a welcome page that had an upload your documents button.

    UKVCAS Manage your service screen
    UKVCAS Manage your service screen

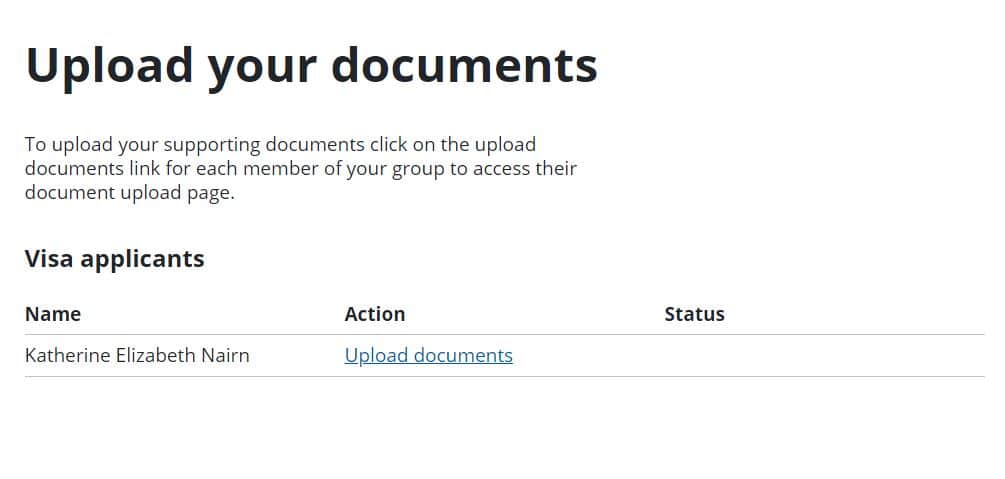
    Once I clicked the button I was presented with visa applicants, as it just me, it’s only my details. I clicked the blue action link which took me to the next page.

    UKVCAS-Upload-your-documents

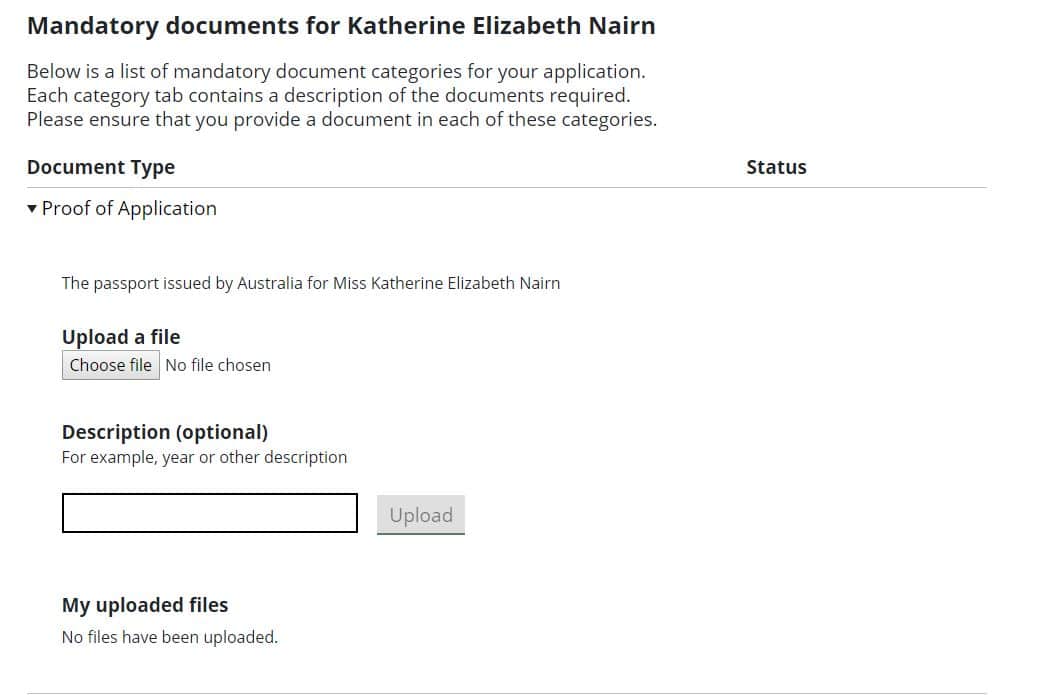
    There is some information about the files and formats which I have summarised above and you will reach the upload section. This example just covers the mandatory document.

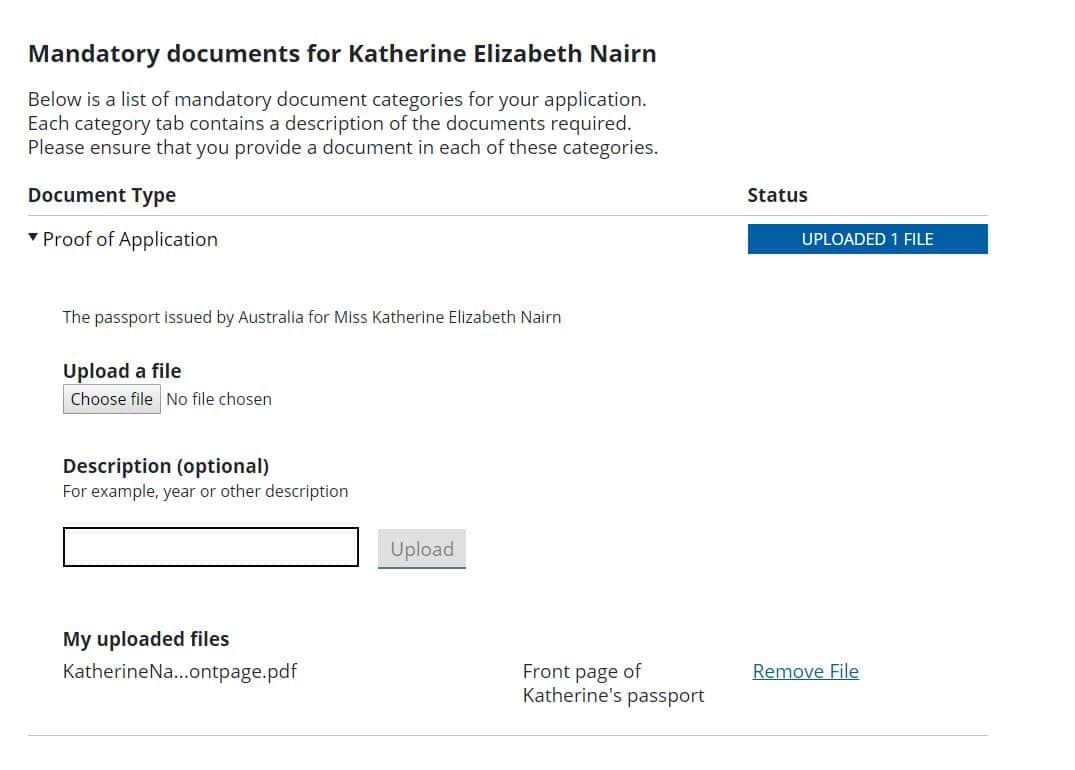
    All I did was upload the named file I had and added a description which basically Katherine’s Front Page of Passport. Just to note I also uploaded a copy that had every page that was stamped in my passport in another section.

    UKVCAS-proof-of-application

    Once uploaded my document there was a status to say how many files were added.

    Uploading files to UKVCAS
    Uploading files to UKVCAS

    That’s it! I kept repeating until all my files were uploaded.

    UKVCAS Document Upload Categories

    One of the biggest things that I found a bit annoying is there is no guidance from the UKVCAS or UKVI on where you’re supposed to put them. I made a few assumptions and added information where I thought it suited best.

    This is all based on UK Citizenship to give you an example, if you are applying for other visas like Spousal Visa then chances are you will have documents such as life events. Just make sure you include all the documents that your checklist states in the visa application.

    Mandatory Documents

    Statement from UKVCAS website in the document upload section: Below is a list of mandatory document categories for your application. Each category tab contains a description of the documents required. Please ensure that you provide a document in each of these categories.

    Proof of Application – I only added my passport here because that’s what it stated I need to put here.

    Optional Documents

    Statement from UKVCAS website in the document upload section: Below is a list of optional document categories. Please ensure you check your Access UK document checklist before including documents in the categories below. For some application routes, ‘Optional’ documents offer you the ability to provide evidence in a number of categories at your discretion to satisfy immigration rules.

    • Other – I included my referees in this section.
    • Residence in the UK – I included my approval letter for my indefinite leave to remain and then I put my BRP card with my indefinite leave to remain there.
    • Finances – I included six P60’s from 2014 to 2019.
    • Proof of Business – I didn’t include any proof of business.
    • Life Events – I didn’t include any Life Event documents.
    • Medical Information – I didn’t include any medical information.
    • Sponsors / Employment – I included two employment letters and also one HMRC letter from 2018 from my indefinite leave to remain application.
    • Proof of Identity / Travel History – I included my Excel Spreadsheet that covers all of the dates I’ve been outside the UK, my current passport and my old passport, which includes all of the pages from the passport. The front page and then all the pages with stamps on them.
    • Educational – I included my life in the UK pass notification.

    What Happens at the Biometrics Appointment?

    When I arrived at the biometric centre, I was greeted by a security guard and he requested that I give my booking confirmation and my passport. The next step was speaking to the receptionist who my booking barcode to confirm what floor I needed to go to.

    Once I arrived at the appropriate floor I was greeted by another staff member who gave me a ticket number which was to be used during the process. They advised me that there will be two parts phase of the appointment.

    Part One: The Biometrics.

    Basically, they have these booths that record your biometrics with a computer system. The only way that I can describe it is like the passport e-gates at an airport. When you go through the e-gate and you scan your passport and takes a photo and then lets you through, that’s basically how these biometric systems were, except they just take your signature as well.

    You will be explained the process before you register your biometrics. The photo process is probably the lengthiest process of all of it. It’s very picky and can take a while to get a photo it likes.

    Once I did that, I walked back out to the waiting room until my number is called again.

    Part Two: Checking of Documents and Submitting Your Application

    Another representative came and collected me. This is the stage that they went through my application, documents and biometrics. The first thing again they ask for is that confirmation sheet with a QR code and your passport. They will scan that in, it’ll bring up all the details of that and your application.

    My biometrics was reviewed which just double-checks your photo, signature and fingerprints are ok. I had to explain any scars or markings on my fingerprints which was recorded against my biometrics.

    The next thing he did was scan my current passport again, I did previously have both my latest and older passport uploaded to my application.

    Next he just quickly scrolled through what I had put in there, for example, you’ve put life in the UK test on here and a few other documents, but he didn’t check a single one of my documents.

    After that, he asked, “Are you happy with the application and the documents you’ve put in your biometrics?” You must state yes and then they will submit the application for you. That will trigger the decision process for your application.

    Next Steps

    The waiting game! There is no ability to track your application through UKVCAS or UKVI, you just have to wait for a decision to arrive. You can call UKVI to discussion your application if you want further confirmation.

    Hopefully, my experience has given you an understanding of what you could potentially expect. Make sure you keep up with the UKVCAS and UKVI websites to see if there are any changes.

  • A Helpful Guide to Applying for UK Citizenship by Naturalisation

    A Helpful Guide to Applying for UK Citizenship by Naturalisation

    The time has finally come where I can apply for my UK Citizenship and I thought I would document my process so you know what to expect when applying. The Indefinite Leave to Remain application prepared me for this phase of the process and I used some of the evidence I gathered for that in this application.

    Disclaimer: This is based on my experience (I’m not a lawyer or immigration advisor) and you should seek professional legal advice if you are unsure. Go to GOV UK to check if there have been any changes to the visa rule & fees.

    As things are changing (due 2020 events) with UKVCAS service please keep up to date with UKVI latest information and UKVAS.

    How Long Does It Take to Get British Citizenship?

    As the routes to citizenship vary this can either be a few years to over 10 years. For me to become a British citizen I have spent five years living here on a UK Ancestry Visa and one year living here on Indefinite Leave to Remain before I could apply for citizenship and now I am waiting for my application to be approved. The whole process will be about six and a half years.

    How Can I Apply for UK Citizenship?

    There are several ways to apply for British citizenship, the most common ways are:

    • If you were born in the UK
    • You have a British parent
    • You have indefinite leave to remain (ILR)
    • You have ‘settled status’ under the EU Settlement Scheme
    • You have ‘permanent residence’ status
    • You’re married to or are in a civil partnership with, a British citizen
    • A few other exceptions  

    If you are applying for UK citizenship through indefinite leave to remain (ILR), settled status, permanent residence or married to or in a civil partnership with a British citizen then the information in this article will be applicable.

    Before You Start Applying

    There are a few steps you should complete before starting the application, they are:

    • Pass your ‘Life in the UK Test’ also known as the citizenship test
    • Have two referees – one needs to be on the list of professional standing and can be of any nationality (see document section for more details)
    • Prove your English language ability (unless exempt)

    Make sure that you get the Life in the UK test and English language requirement done as soon as possible, these can take a bit of time to prepare for. I was lucky, I did my Life in the UK Test as a part of my ILR and Australia is exempt from the English language requirement. All I had to do was find two willing people to be my referees and find the confirmation that I have passed the ‘Life in the UK Test’.

    Documents You Should Read

    Here are all the documents I found useful when applying and explaining some of the rules and requirements. They are also linked in the sections where I used them as a guide to apply or meet a certain requirement.

    Applying Yourself or Using a Company For Your UK Citizenship?

    For this application, I applied by myself as it was pretty straight forward. If you feel more comfortable going via a company then definitely do it. If you have a complicated application you should look to getting advice from a lawyer or immigration advisor to help the success of your application.

    If at any point you are unsure do read the documents issued by the Home Office, contact the UKVI or hire an immigration lawyer.

    British Citizenship Application Form

    Prerequisite Information

    Before commencing the application there are several details I suggest you gather ahead of time. This will make the application a lot quicker than digging around that document’s cabinet each time a lengthy question pops up.

    Here is the evidence I gathered before filling out the application form (not in order):

    • Previous addresses for the past 5 years including the dates that you lived there from and to
    • National Insurance Number
    • Passport
    • Parent’s details like DOB and place of birth
    • Referee details which includes full name, addresses for the past 3 years, DOB, job title, phone number, email address and passport number
    • Tax reference which will be on your recent payslip
    • Work History (UK only) – 10 years – including start/end dates and address. This will be different if you run your own company
    • Previous application details – date applied, reference number, date of fingerprints
    • Time outside the UK (that was more than two days) with country, reason, entry and exit dates (holiday or work trips and I needed to provide 5 years)
    • Identity card (if you have one)
    • Degree information (if you have one)
    • English test information (if required)
    • Biometric details

    Filling in the Application

    To fill in the online application here.

    The paper version is for people applying from the Channel Islands, Isle of Man or a British Overseas Territory or you can use this form if you wish to post your application and documents.

    There is digital support for anyone needing help filling out the application (this is not for advice or questions).

    You should also read:

    The form itself is relatively simple to fill out once you have the information to hand. My fingers did get a little sore entering in all my holidays!

    One thing to note; my friend made a mistake when he was filling in his application in that he accidentally put an unrealistic date, say 2035 or similar, meaning the form showed that he had over 4,000 days outside of the country. There is no verification so if I put 1990 it still allows me to enter that date. Just make sure that you check that it’s the right date and year in your application. Otherwise, it will show you that you’ve had way too many days outside, but his application was still approved even though he did that.

    Here Is The Video Guide on Filling Out The Online Form

    In this video, I go into all the questions and answer that pop up in the form.

    Original or Copies?

    Let’s start with a question I get asked a lot! Do you need originals or can they be copies? It states in the application (copied directly from the document section):

    You must provide your documents after you submit your application, these can be originals or copies. Any passports provided must be originals.

    You will be able to upload copies of your documents on our commercial partner’s website, or you can take your documents to your biometrics appointment to be scanned and uploaded by our commercial partner for a fee.

    Your application may be rejected if you do not provide all mandatory documents. If your application is rejected due to documents not being provided, it will not be considered and an administration fee for each person included in the application will be deducted from your refund.

    Documentation Required

    Once you have filled in all the questions you will reach the documentation screen. The checklist will cover all of the information you need to provide based on your answers. For the most part it will be similar to mine, but they may ask you to provide other documents if you’re applying via marriage or civil partnership.

    All the titles and italics in this section of the article are the documents required by the Home Office for my application and what I have provided to meet these.

    On the application it states that you should tick each document to confirm that you have read the requirement, even if you cannot send it. If you are unsure about any of the evidence, read the guidance.

    This AN form guide will also give you information on evidence to provide as a part of your application and super helpful!

    The passport issued by Australia

    Easy, I will provide my passport.

    The Australian passport, identity card or official letter to prove the level of English language required

    Again, I will be providing my passport for this as Australia is exempt.

    Interestingly I have had a few comments from other people saying when they submit their degree information and are from an exempted country it is still prompting them to provide evidence. The advice is to click ‘NO’ to the degree to get around the NARIC prompt on the document list and then write a covering letter with the application to explain why this had been selected (glitch). Please check with UKVI beforehand.

    If you are someone that needs to prove this requirement, then UKVI will only accept English language qualifications from the Home Office approved list of acceptable qualifications.

    You can find more about the information here:

    Proof of freedom from immigration time restrictions

    • Your passport showing permission to remain permanently in the UK
    • The Home Office letter by which you were given permission to remain permanently in the UK

    For this one, I have my passport and Home Office letter when I was granted ILR.

    Just to note, the information in the checklist isn’t updated to reflect the BRP cards, here is a statement from UKVI:

    You’ll usually have applied for indefinite leave to enter or remain. You’ll have a stamp in your passport or a letter from the Home Office. You could also have a ‘vignette’ (sticker) or a biometric residence permit.

    Source: Gov.UK

    Therefore it was really my BRP card that I needed to provide for my application, at least it was included already!

    Life in the UK Test pass notification

    Previously completed as a part of my ILR so thankfully didn’t have to do the test again and just provided my pass notification.

    When you went for the test in the past your were issued with a pass letter, however, they now just issue you with a number that you enter into your application. This should be emailed to you roughly 10 minutes after you have passed the test.

    Current Biometric Residence Permit

    Easy, I have one this time!

    Proof of living in the UK

    • If you are married to, or in a civil partnership with, a British citizen, you must have been in the UK for the past 3 years.
    • If you are not married, or in a civil partnership with, a British citizen, you must have been in the UK for the past 5 years.
    • If you are an EEA National, you need to include letters from employers, educational establishments or other government departments, indicating your presence in the UK during the relevant 3- or 5-year period.
    • If you are a Non-EEA National, you need to include your passport to prove you have lived in the UK for the relevant 3- or 5-year period.
    • If you do not have your passport or it was not stamped when you entered the UK, you need to include letters (for example, from your employer or government department) as proof.
    • Bank statements or household bills are not suitable proof you have been living in the UK. I get asked this a lot and no you cannot provide these as evidence.

    I went a little over re the evidence for this one. I do have both my passports that were mainly stamped on all my entry and exits but I was worried that this wouldn’t be enough, so I included:

    • All my P60’s since living in the UK (6 in total). If you do not pay tax through Pay As You Earn (PAYE) arrangements, then provide your most recent HM Revenue & Customs Self-Assessment Statement of Account.
    • HMRC Letter stating the tax I paid from my ILR application.
    • Two employment letters, one from my ILR and a new one.

    To get an HMRC letter is really easy just 0300 200 3300, ask for 5 years’ worth of employment history to be sent to you in a letter. This is the same letter HMRC will provide you if you have lost your P60’s so if you have any gaps do this as soon as you can. It takes roughly a week to arrive.

    All of these documents prove that I have been living here, paying taxes and working. Plus, they are not bank statements or household bills.

    Two referee declarations

    The part of the application, in my opinion, is more difficult, before we get to the detail, I have two wonderful friends to be referees and they met certain criteria. I provided two signed forms and passport photos with my name/DOB on the back of the photo. 

    Details of Good Character requirement can be found here.

    Who can be a referee for British citizenship?

    At the time of applying the Nationality Policy: general information – all British nationals stated that:

    • One referee should be a person of any nationality who has professional standing.
    • One referee must normally be the holder of a British citizen passport and either a professional person or over the age of 25.
    • Known you for over 3 years. (To read more about the 3-year requirement, read page 10 of this document).
    • Willing to give their information such as passport, three years of addresses etc.

    The referee must also:

    • not be a relative.
    • not be a solicitor or agent representing you on this application.
    • not be related to the other referee.
    • not be employed by the Home Office.
    • not have been convicted of an imprisonable offence during the last 10 years (unless that conviction can be disregarded in line with the table shown in the Guide).
    • advise the Home Office of any reason why the applicant should not be registered.

    British Citizenship Referee Professional Standing

    Here is the Professional Standing list that one of your referees must be.

    British Citizenship Referee Form and Process

    I was searching for this form for ages, turns out even though documents page requests you tick the box the form will only be given to you in the next part of the application. You can also search online as well, here is a copy.

    The form states that you need to put DOB and name on the back of the photo but if you are applying online and uploading to UKVCAS portal then you just need to upload the form with a photo and no need to fill in the back of the photo. Hopefully this will be corrected on the form in the future.

    As a part of the application process, your referee will need to provide you:

    • Full name
    • Address(es) for last 3 years
    • Date of birth
    • Profession
    • Phone number
    • Email address
    • British passport number (if British)
    • How they know you

    These details need to be entered by you in the online application form.

    Frequently Asked Questions on Referees

    On my YouTube channel I get asked a lot of the same questions so I thought I would encorporate my answers into this post to.

    • Who fills in the form: the referee fills in the form.
    • Where do I put my referee details: You add the information in the online application. I show an example somewhere in this video around the 5:40 mark: https://youtu.be/RfIxdedOZJE
    • Why do I need to have 3 years of addresses and passport number of my referee? The online application form asks for this so I provided as requested.
    • Where do I upload my referee form: I uploaded this with my other documents on the UKVCAS portal. You can watch the video here: https://youtu.be/MRIchfmFW64
    • Can xyz professional be included: Contact UKVI if you are unsure if your referee meets the requirements.

    Evidence of identity

    You must include one of the following:

    • your passport
    • your national identity card
    • your Home Office travel document
    • your Home Office entitlement card
    • your Home Office ARC letter
    • your BRP card
    • your birth certificate
    • your driving licence

    You must include evidence you have legally changed your name if it is now different to the one on your supporting document.

    If you took the Life in the UK Test and used one of the above documents as evidence, you should use the same one here.

    I used my old passport as my proof of identity when I took my Life in the UK test, so I included that plus my most recent passport. Additionally, they need my BRP card to support another requirement so that should meet everything.

    Here’s The Video Guide Covering The Documents You Need For Your Application

    Declarations

    The next step of the application is the referee declaration which are the downloadable forms I mention above and confirming the information you provided is correct. Once you are happy, tick the boxes and you will be taken to the payments screen.

    Pay (British Citizenship Application Fee)

    Unlike ILR you will not get the option to speed up the process and it will be the standard service you choose. To become a British citizen by naturalisation will come to a total of £1,349.20 which is £1,330 for the application and £19.20 for the biometrics.

    You will get a warning/ bold statement at this point saying that once you pay there is no going back on the application.

    Next Steps

    The biometric appointment is the next phase of the application process, you can read more about it here. You can watch these videos on Citizenship Ceremony and applying from your British passport.

    Disclaimer: This is based on my experience (I’m not a lawyer or immigration advisor) and you should seek professional legal advice if you are unsure. Go to GOV UK to check if there have been any changes to the visa rule & fees.

    More UK Visa Articles

  • A Guide to Applying for Indefinite Leave to Remain (Via UK Ancestry)

    A Guide to Applying for Indefinite Leave to Remain (Via UK Ancestry)

    After living in London for just under 5 years I finally qualify for Indefinite Leave to Remain (ILR). I have been preparing for this since I first arrived! Saving all my bills, contract, payslips and whatever other documentation I thought would be useful for the application. Yes, I am a little intense thinking about this before I had even lived here for a couple of years.

    One of the most confusing things about applying for visas is the evidence. What on earth do they expect you to provide!? As it’s such a stressful process I have documented the information and steps I took to get my Indefinite Leave to Remain.

    As the process does change regularly make sure you go to the gov.uk website before applying. This is all based on my sisters and I information and when we have applied. I have linked to all the official documents we used so you can reference these as well.

    Disclaimer: This is based on my experience (I’m not a lawyer or immigration advisor) and you should seek professional legal advice if you are unsure. Go to GOV UK to check if there have been any changes to the visa rule & fees.

    Indefinite Leave to Remain Visa Criteria for Ancestry Route

    The criteria for the IRL is:

    • you’ve been living and working in the UK for 5 years with a UK Ancestry visa
    • you’ve spent no more than 180 days outside the UK in any 12 months of the last 5 years (known as ‘continuous residence’) – if you have then you will need to apply for an extension until you qualify.

    If you’re 18 to 64 years old when you apply, you must also:

    Before You Start Applying

    There are two steps you should complete before starting the application, they are:

    • Pass your ‘Life in the UK Test’ also known as citizenship test. There is no expiry date on the test so do this as soon as possible. Also, don’t lose the number, you will need it for your citizenship application!
    • Prove your English language ability (countries like Australia and New Zealand are exempt from this)

    When Can You Start Applying?

    For a Set O or UK Ancestry route to ILR, the earliest you can apply is in your final 28 days before your visa ends. For example; my visa expired on the 10th of September 2018 so the start of the 28 days would be the 13th of August. Therefore the 13th of August is the first day I was allowed to apply.

    You can see this stated at the start of the Set O application: Do not apply any sooner than 28 days before you complete your qualifying period.

    When I say to apply this doesn’t mean you can’t start your application in advance. You are able to start your application 70 days which allows you to prepare the application and any information you need to gather to support it.

    On the first day of your 28 days submit the application so when you get to the pay screen this where you cannot go back and change your application. Once paid you will be able to go to the next steps such as booking your biometric appointment.

    Indefinite Leave to Remain Visa Financial Requirements

    There is no listed financial requirements for the UK Ancestry route i.e. that you need savings in your account or give proof of income (just to clarify proof of income means that you need to prove you earn over a certain amount).

    There is a statement that you need to show that you can support yourself which I did by showing my savings accounts and various other documents (more in the documents section below).

    Visa Cost

    The cost for ILR in 2018 is £2,389 to apply online and £3,189 with Super Priority (i.e. 24-hour decision) and this cost is per person. For the latest fees check GOV.UK settle in the UK page. The fees generally change in April each year (the end of the tax year).

    Additionally, there will be £19.20 for the biometrics. There are free appointments available at the core centres but if you don’t manage to get one of these there can be additional costs.

    For my sister’s application, she went with the standard decision as super-priority is suspended. The cost for ILR in Dec 2020 is £2,389 for the visa, £19.20 for the biometrics and an express appointment at £75 as she couldn’t find a free appointment.

    You can pay the fees by debit or credit card. I paid the fee on my credit card, one to get the air miles and the second it allows me to show more savings in my bank account.

    Applying Yourself or Using a Company For Your ILR?

    I applied by myself this time around instead of using a company. This time around I put a lot more research into what I needed to do to evidence the visa and information I would need. I was confident that I would be successful.

    When I was at the Home Office there were a lot of applicants using companies so there will be plenty of places offering this service if you wish to choose this option. If you have a complicated application it’s a less risky option to go with.

    Arrival Date or Visa Start Date (which to use when applying for Indefinite Leave to Remain)

    Before we start the application process less answer the question I see all the time on communities! Arrival Date or Visa Start Date?

    Read page 8 Period between the issue of entry clearance and entering
    the UK
    of this document:
    https://assets.publishing.service.gov.uk/government/uploads/system/uploads/attachment_data/file/834928/calculating-continuous-leave-v19.0ext.pdf

    It basically says that as long as you arrive within 180 days after your visa starts and don’t go over the continuous period (i.e. 180 days in a rolling year) you can apply for ILR.

    Application Process 

    The best way to get to the right online form is to use the ‘find out if you can apply tool‘. This will direct you to the right application for your visa status.

    With the new process, appointments will be available up to 28 days in advance. Gov.uk says on the initial Set(O) application page “Do not apply any sooner than 28 days before you complete your qualifying period.” A recommendation from UKVCAS is that you book your appointment within 5 days of submitting your applications. You will be reminded in 15 days if you have not done so.

    As everyone needs to enrol their biometrics with their visa application you will need to book an appointment.

    In this video, I run through all the questions and my answers in detail. Please note the end form doesn’t display all the questions you are asked within the application.

    Submitting Your Application

    At the end of the application process you will be provided with three options to submit your application, only two are a viable option which is:

    For this application, I decided to go with the premium service (this is now super-priority) instead of posting the application. When I was reading about the troubles others had with keeping jobs whilst waiting for their visa to be approved it sparked concerns. I didn’t want to go through the same troubles so I paid the extra for the ease.

    Additionally not having my passport up to 6 months means that I won’t be able to travel so if something happened at home I wouldn’t be able to go. Plus not having an international holiday for 6 months!? That would be a struggle for me.

    My sister has had to go with the standard process as this is all that is offered currently and won’t be allowed to leave the country until a decision is made on her application.

    Booking Your Appointment

    Once you complete your online form and pay you will be sent to a further actions page. On this page click the book biometric appointment and this will trigger an access code for the UKVCAS site. Once received you can set up your account with a password.

    To read the full guide on biometrics appointments for UK Visas the UKVCAS process is explained, here.

    With the UKVCAS process you need to bring the following to the appointment:

    • Confirmation of your appointment, this can be just the document on your phone
    • Passport
    • I also brought all my documents to the appointment just in case

    Evidence Required for Indefinite Leave to Remain Application

    As my sister is applying in December 2020, I’ve updated the sections below to include what we both submitted and the updates for UK Ancestry. That way you can compare both our evidence provided and what we thought would meet the criteria.

    I find lots of threads asking whether the documents must be originals or copies can be supplied. As of the latest checklist in December 2020 it states:

    • You should use your supporting documents checklist as a guide to what documents you need to self-upload or take to your appointment.
    • You will be able to upload copies of your documents on our commercial partner’s website, or you can take your documents to your biometrics appointment to be scanned and uploaded by our commercial partner for a fee.
    • You do not need to send any physical documents to the Home Office or UK Visas & Immigration unless you are advised to do so.

    The checklist also states:

    If you do not provide any of these documents, we may not be able to make a decision on your application. Please note that we may occasionally ask you to provide other documents in addition to those listed.

    Your application may be rejected if you do not provide all mandatory documents. If your application is rejected due to documents not being provided, it will not be considered and an administration fee for each person included in the application will be deducted from your refund.

    All the titles and italics in this section of the article are the documents required by the Home Office for my application and what I have provided to meet these.

    ILR documents
    The stack of documents I provided to prove my ILR

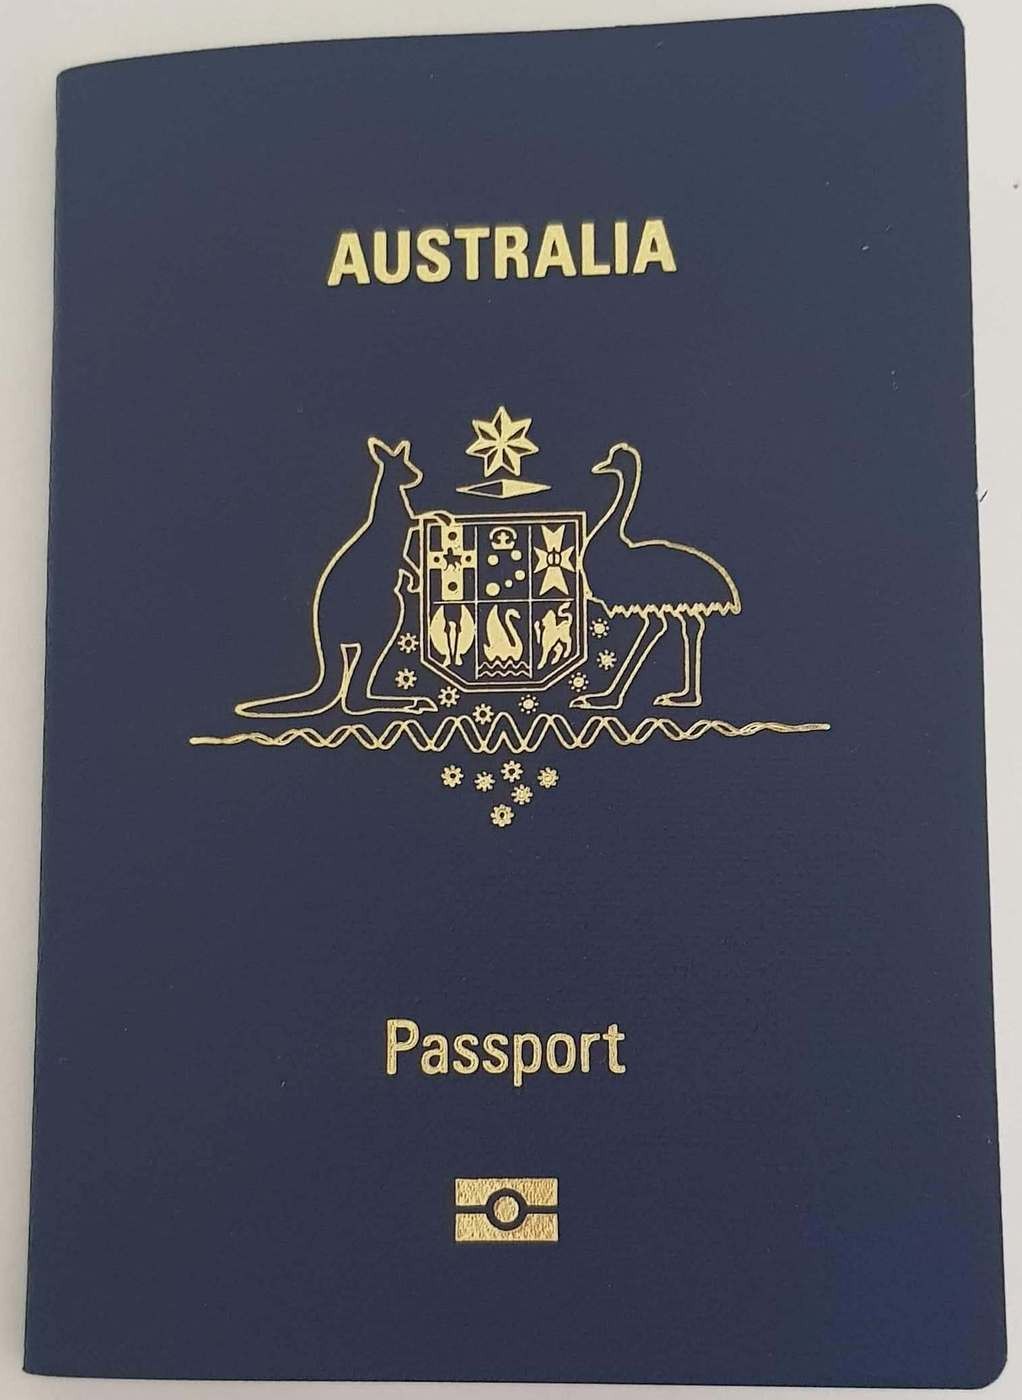
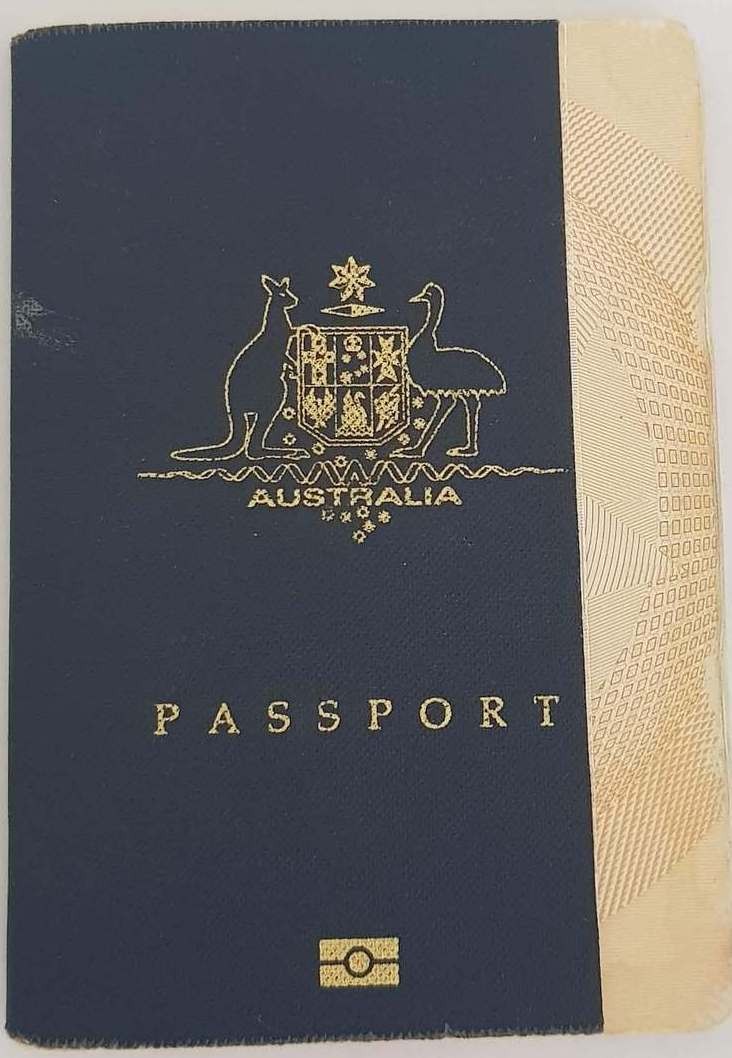
    The passport issued by Australia

    Ok, pretty easy this one! I just included my current passport.

    New-Australian-Passport

    Evidence of UK Ancestry

    Evidence that you have a grandparent who was born in the UK or Islands (including the Channel Islands, Isle of Man and Ireland (if they were born there before 31 March 1922) such as:

    • your full birth certificate
    • the full birth certificate of the parent through whom you are claiming UK ancestry
    • the birth certificate of your grandparent who was born in the UK or Islands
    • if you, your parent, or grandparent have changed name since birth, evidence of this, for example, marriage or civil partnership certificates

    For my sister’s application, she included her birth certificate, our mum’s birth certificate (the parent we have UK Ancestry) and our granddad’s birth certificate (mum’s dad). As you can trace the heritage via our birth certificates she didn’t include those.

    There is another checkbox that says ‘Applicants’ birth certificate showing their parents’ names which is included in my sisters birth certificate.

    This was not clear at the time of my application so I brought the documents just in case and then they said it was a must to include.

    Evidence of immigration status in the UK

    For this, we both provided this for our visa’s. Mine was a photocopy of my visa in my passport and my sister was a copy of her UK Ancestry BRP card/ the initial vignette. Plus the above documents to prove our UK Ancestry connection.

    Again like the requirement above it just requires a form to be signed.

    The consent forms are included in the application documents. If you have joints accounts with your partner or anyone else then they will need to sign this. The sponsor will also be required to fill out a consent form. No joint accounts or sponsors then this isn’t required.

    Employed Evidence

    • If you are employed at the date of application, please provide a letter from your current employer which confirms they will continue in their current job with that employer.
    • Documents to show you are employed, such as recent wage slips.
    • If you are self-employed, please provide one of the following: business and/or company accounts official letter from a registered accountant which confirms self-employment official tax documentation.

    Unemployed Evidence (plus gaps in working history)

    •  If you are unemployed at the date of application, please provide alternate evidence to show your employment record throughout the five year period in this category of leave, and of any attempts to make and find work.
    • If you have been unemployed for long periods over the five years, you must provide reasons why you have failed to find work and evidence to show you have been looking for it.
    • You must also provide evidence of how you can support yourself without a regular income.

    For my application, I included every employment contract, 5 years worth of payslips and a letter stating I was employed.

    For my sister’s application, she included the current employment contract, a letter from her company stating that she was employed and 6 months worth of payslips.

    Also to back this up, my sister and I provided P60’s and a letter from the HMRC which also show employment and that we have been paying taxes.

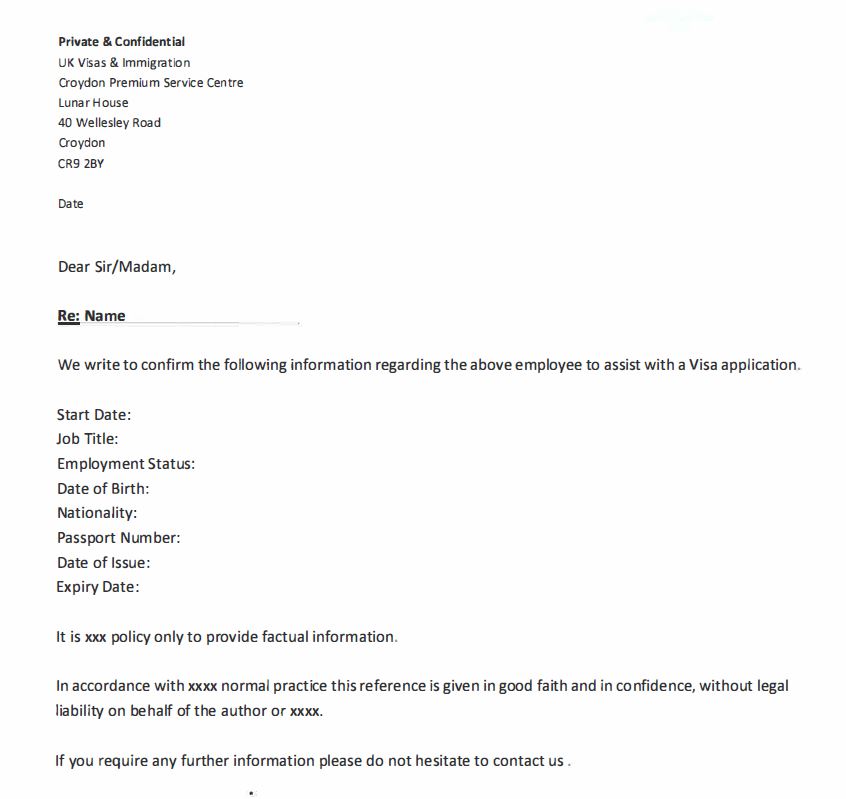
    Here is an example of the letter I provided from my workplace to support my application.

    Example Employment Letter for ILR
    Example Employment Letter for ILR

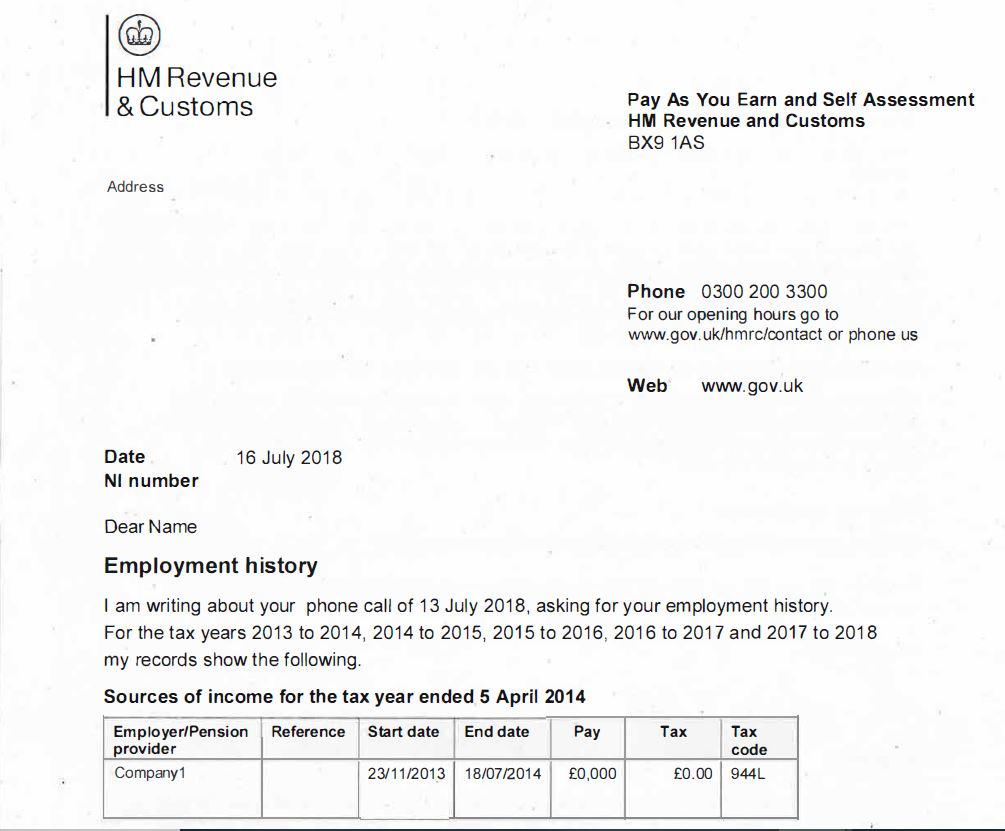
    Psstt… to get an HMRC letter is really easy just 0300 200 3300, ask for 5 years’ worth of employment history to be sent to you in a letter.

    HMRC letter
    Example of the HMRC letter I provided for my ILR to help support my application.

    Evidence of your finances. Bank statements, building society savings book(s), payslips or other formal documents

    • As evidence of your ability to maintain and accommodate yourself and any dependants without recourse to public funds. Note, we do not accept internet or cashpoint statements as evidence of finances.
    • If you claim that a relative or friend is providing you with financial support, in addition to evidence of your own finances, you must provide bank statements or other documents of the kind described above as evidence of their financial resources.
    • The documents showing the finances available to you and to any person supporting you should cover at least the last three months.

    I asked my banks to provide one year of statements to support this evidence, HSBC provided this with ease and cover letter, however, Lloyds only provide 3 months (this is the minimum evidence) printed at the bank which they stamp to validate the statement.

    I had four accounts I did this for plus I had a stack of old bank statements from 2013 until about 2015 which I included as additional evidence.

    I actually forgot one of my bank statements, however, it was a small saving account so in the grand scheme of things, I don’t think it would have added anything additional.

    For my sister’s application, she just included 6 months worth of bank statements.

    All previous passports, travel documents or national identity cards that you have used to travel to or remain in the UK

    If you have received a new passport since your last leave to remain application, and your visa is in your old passport, you must include both passports.

    I included my current passport and my old passport that was valid from 2008 until 2018, this had my initial visa in it too.

    Old Australian Passport

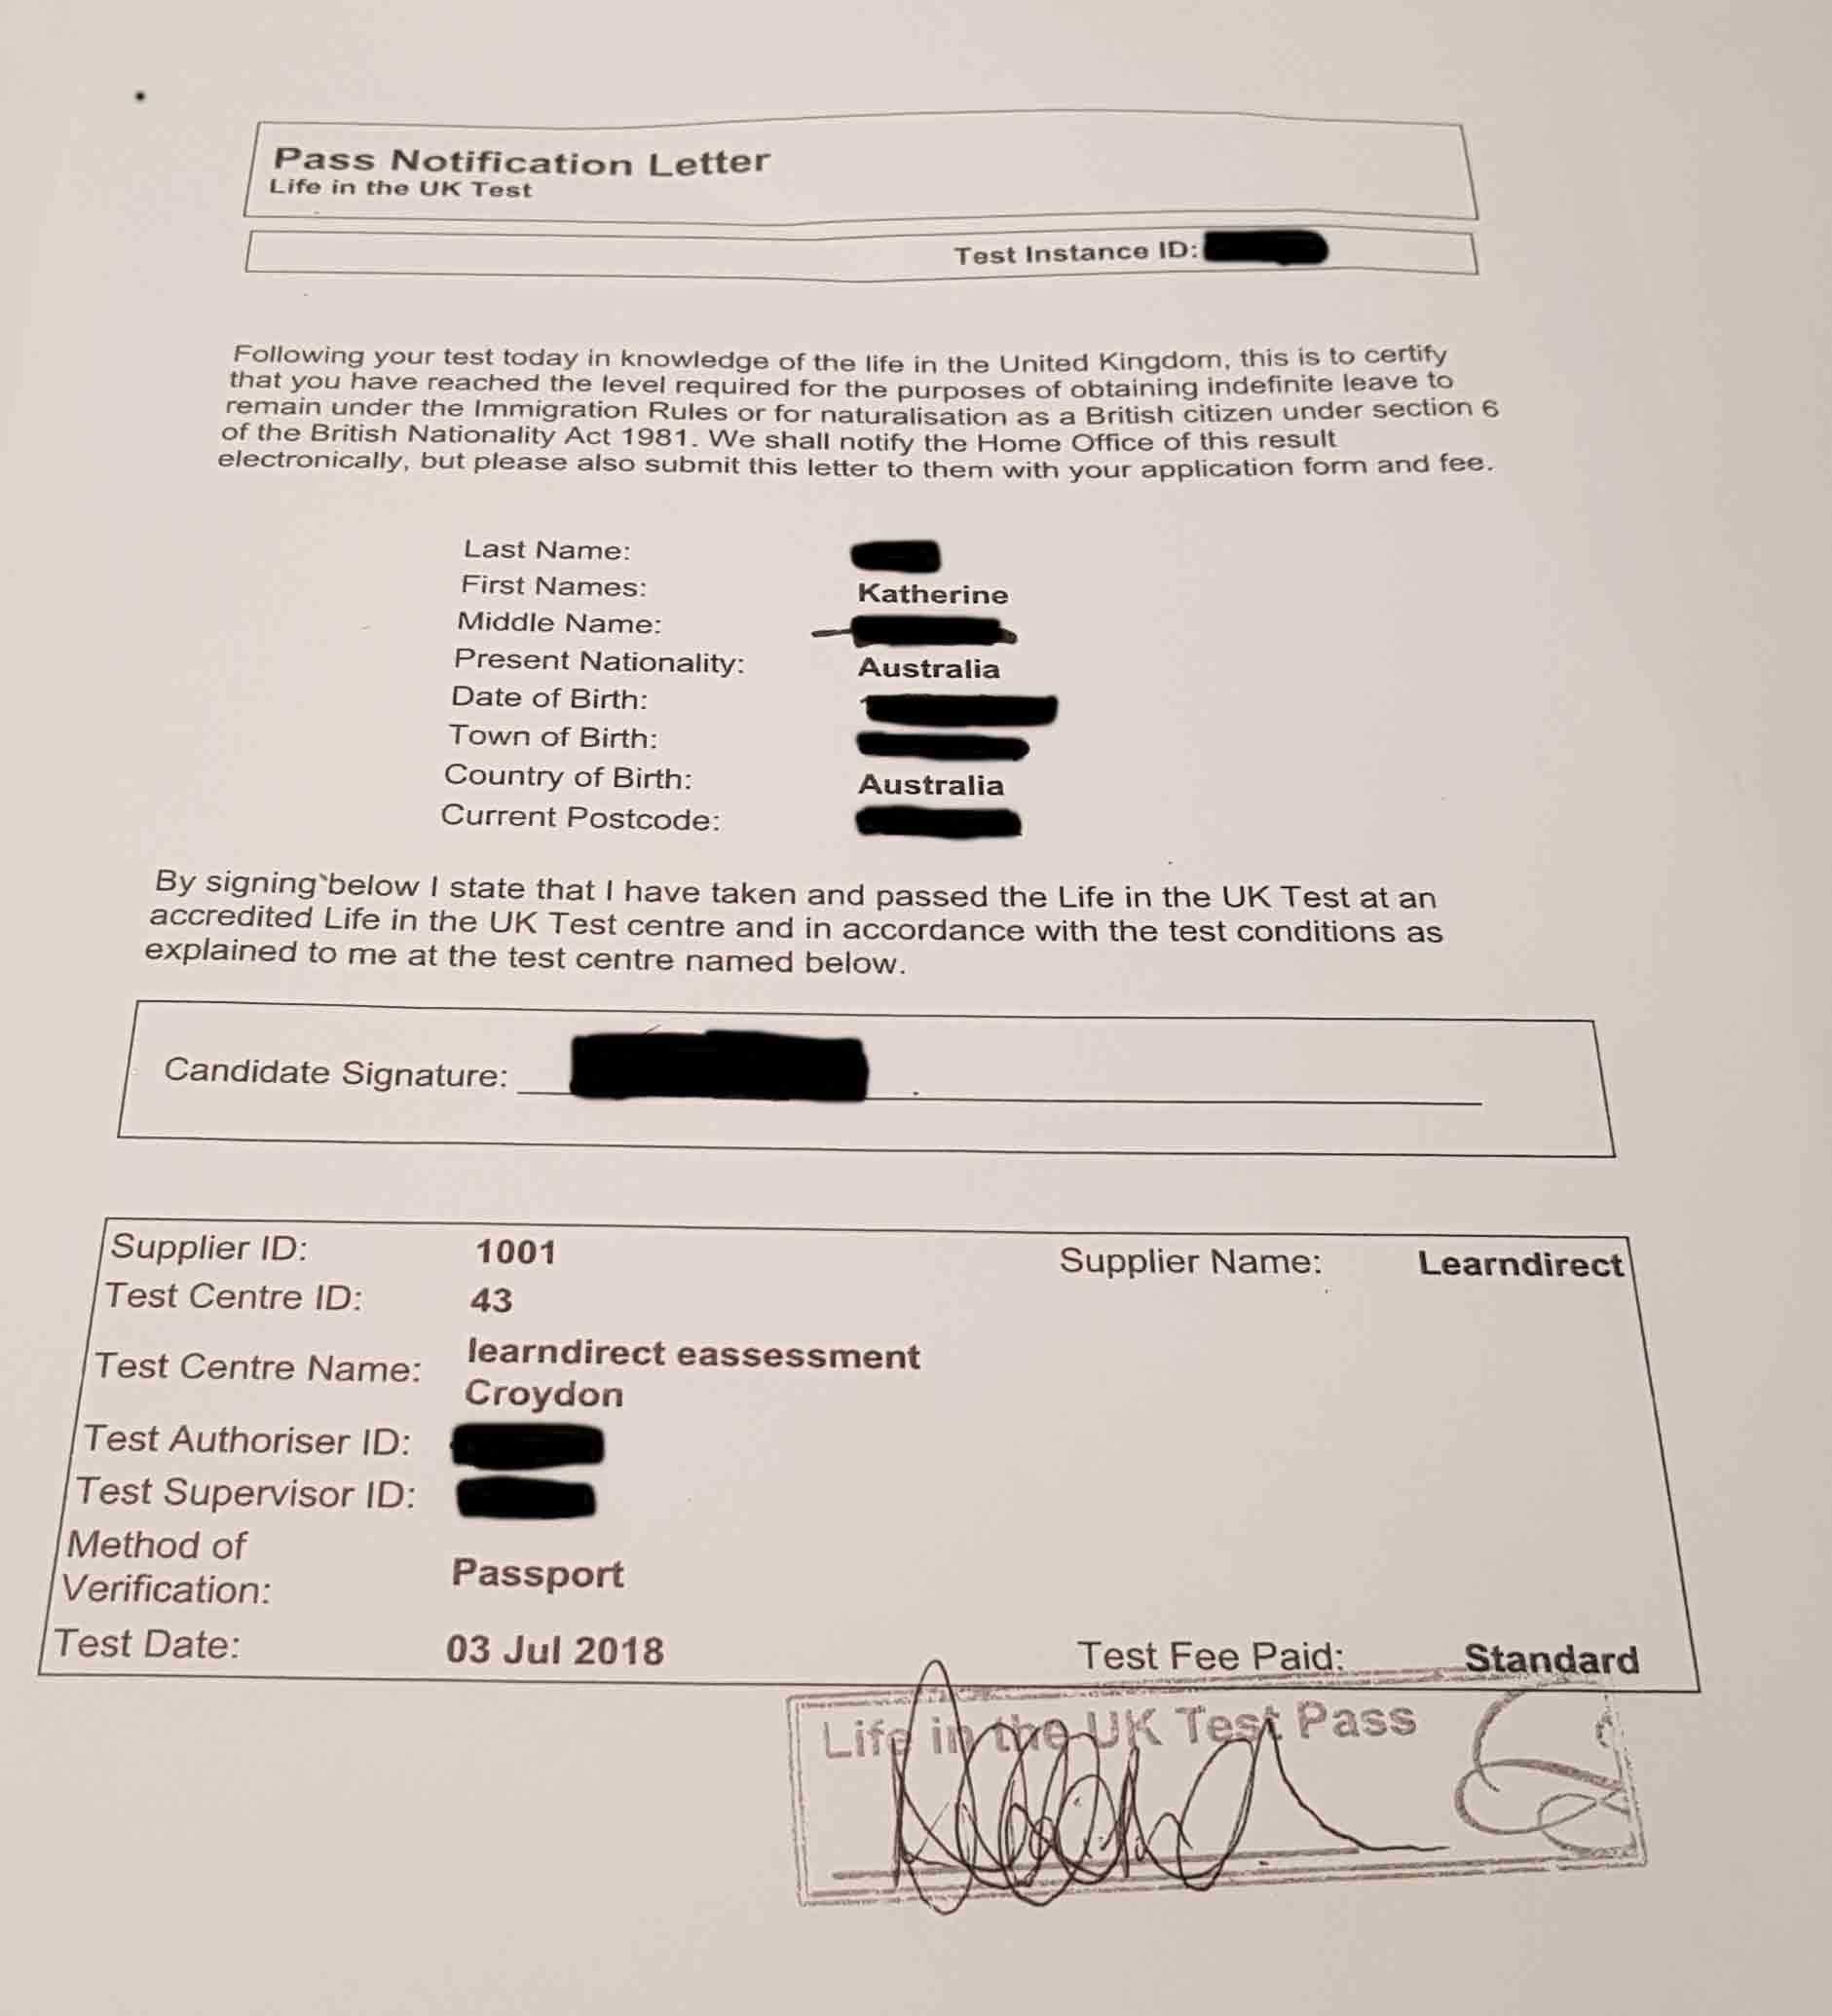
    Life in the UK Test pass notification (now electronic)

    When I applied you were still issued a life in the UK test pass letter and this is what I added as evidence to both my ILR and citizenship application.

    However, now you are issued with a number that you include in your application. This will be issued after you pass the test.

    Please, please, please don’t leave this to the last minute! Also, make sure your details are 100% correct. I have known people to get refused to take the test because their ID cut off their middle name or their country of birth was wrong. There is no expiry date so do this as soon as possible!

    Life-in-the-UK-Pass-Notification
    Make sure you keep your life in the UK test safe as you will also need it for Citizenship (if you plan on applying).

    Reasons for absences from the UK (additional information I provided)

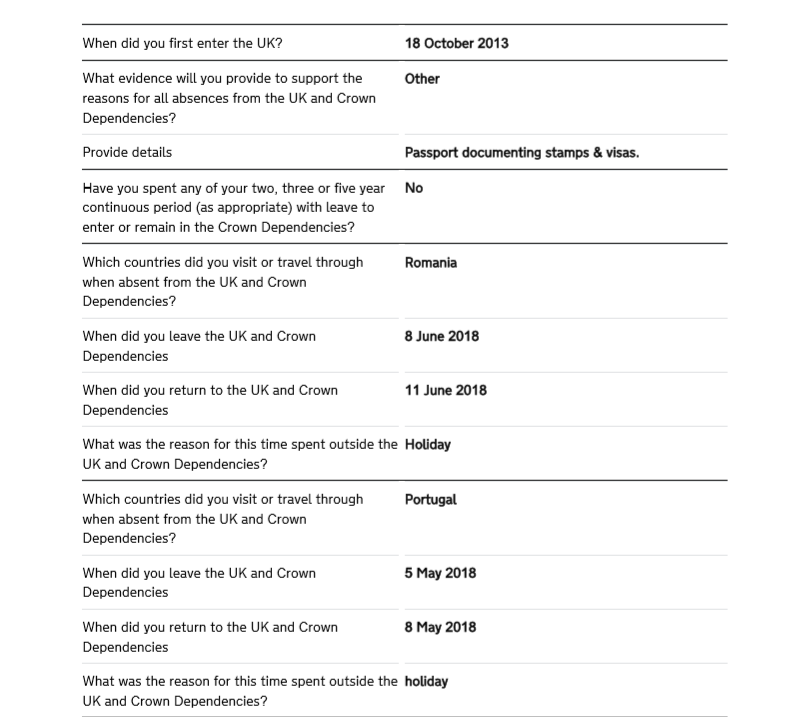
    I included a full list of absences, a tally of days outside of the UK and both passports to prove my absences. I have created a Google Docs spreadsheet as an example but you can also use the template to calculate your reason for absences. 

    Here is an example of my reason for absences in the application. I also provided the spreadsheet as I had over 30 lines worth of trips to enter.

    Prove the level of English language required

    Not stated as a requirement for my sister’s application so I assume that they are no longer stating this for exempt countries, as we are Australian. However when I applied it was simply providing my passport to prove this.

    Some nationalities will require to take an English test, the pass letter just needs to be included in the application. Find out more information here.

    Indefinite Leave to Remain Visa Processing Time

    The processing time has changed with the new UKVAS service, you should expect a decision within the following timelines:

    • Standard service – get a decision within 6 months
    • Super priority – currently suspended. Check the website for the latest information on this.

    Depending on the service you choose you should get an email from Home Office on that your application was approved or denied. If approved then you will receive by post your BRP and approval letter.

    Decision Time

    Once a decision has been made on your application you will be sent a letter stating whether you were approved or not approved.

    As it is now emailed/posted to you I am not sure whether the caseworker is meant to tell you the reasons why you are unsuccessful. You could call the UKVI Support Centre to find out more information.

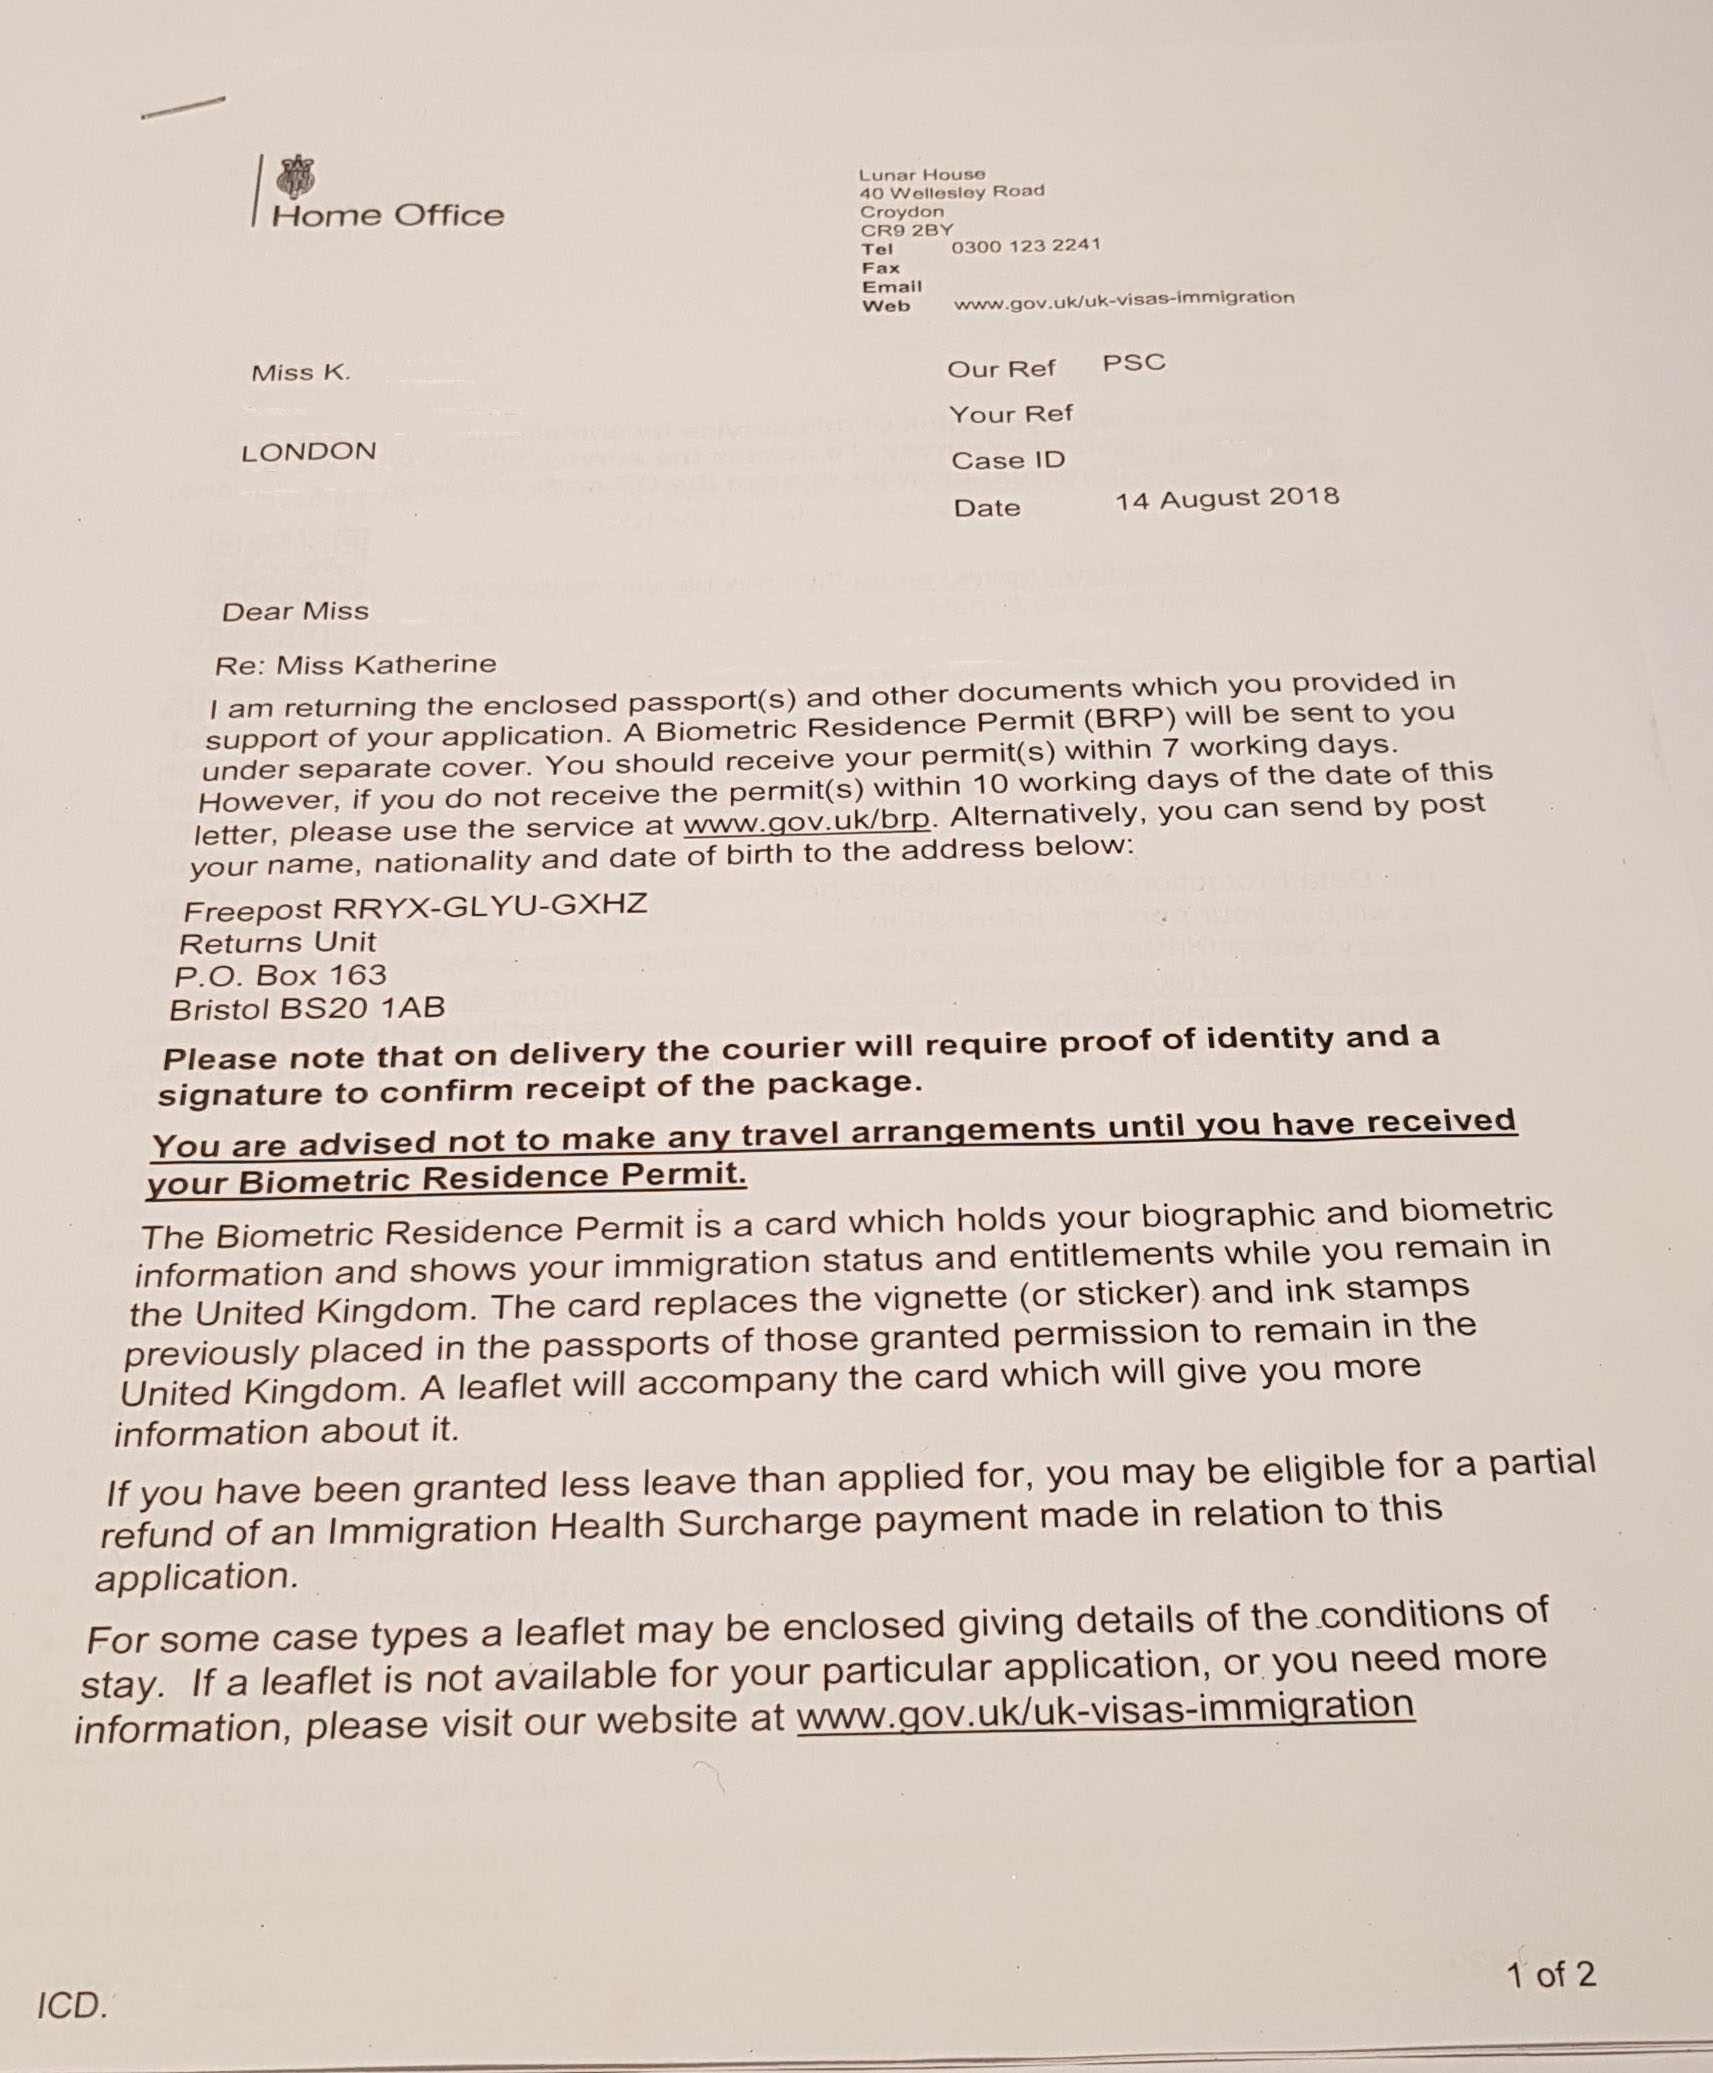
    Approval Letter
    Example of the ILR approval letter the Home Offices gives you

    Receiving Your Biometric Residence Permit (BRP)

    The letter advising you that your application is approved will state that a Biometric Residence Permit (BRP) has been ordered and sent to your address. If you completed the application yourself then it will be sent to your home, otherwise, it will be sent to the agency you used.

    The BRP card should arrive in 10 working days, there are details in the letter of what to do if your BRP doesn’t arrive. The letter will also include handy information about your BRP, what happens if it gets lost etc.

    The Home Office now just posts your BRP card so this will arrive in your letterbox at some point.

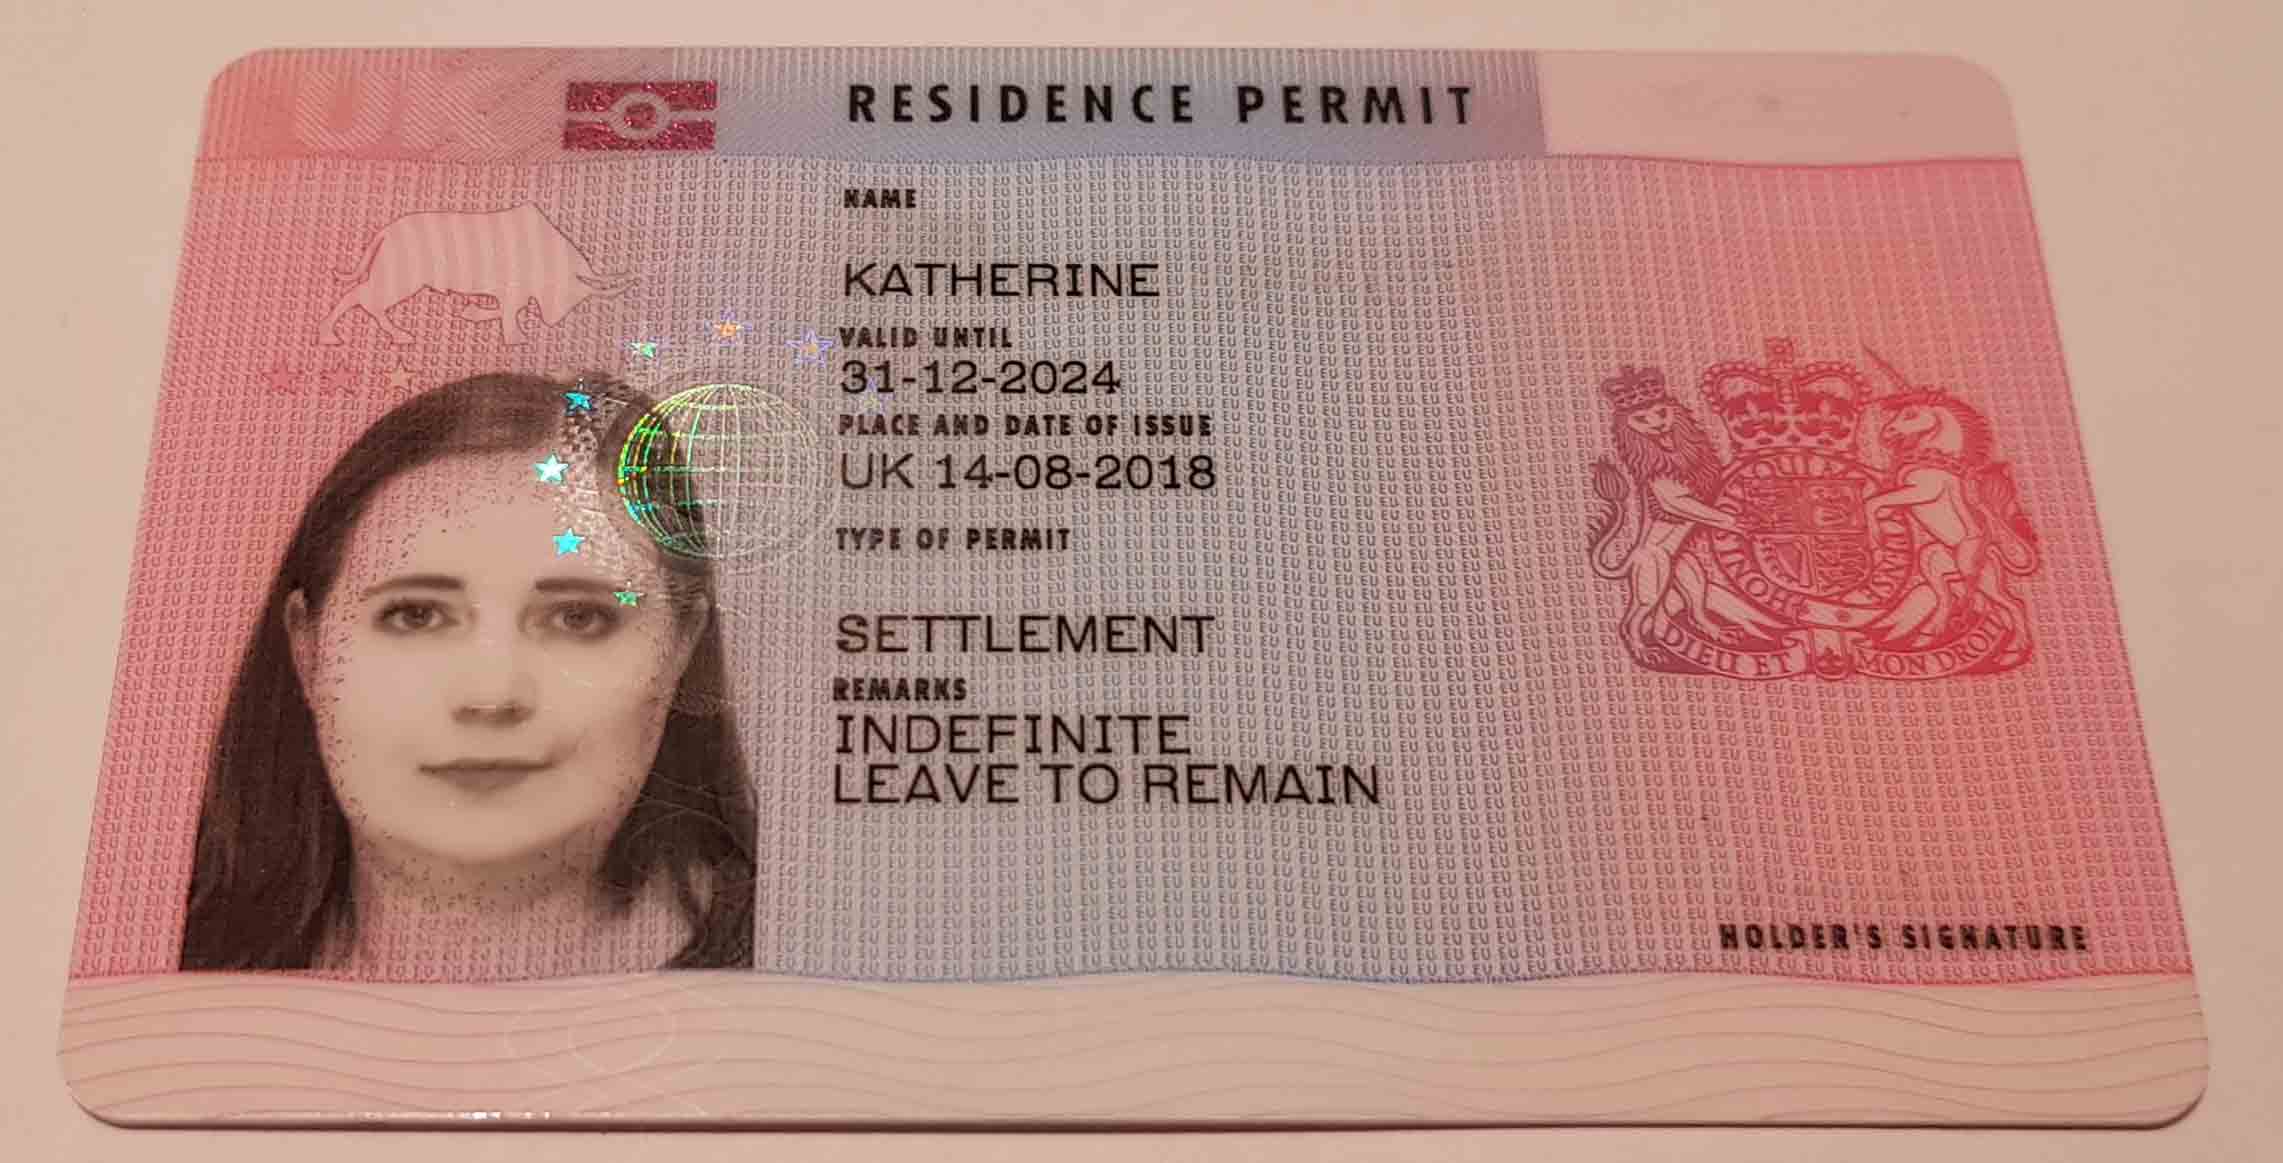
    Here’s what the Biometric Residence Permit looks like. The photo is so much better than my passport photo!

    Biometric Residency Permit

    Biometric Residence Permit (BRP) Has an Expiry Dates

    I had no idea that BRP had expiry dates until my card arrived! Turns out every 5ish years you will need to renew your BRP. I have read that others got 10 years on theirs my mine is weird 5 years 5 months until I need to renew it. You won’t need to reapply if you decide to progress down the citizenship path.

    Next Step, UK Citizenship

    Want to know how to apply for your UK citizenship? Here is a step by step on the UK citizenship application requirements and process. Finding helpful information can be a hassle so this article is here to help!

    Disclaimer: This is based on my experience (I’m not a lawyer or immigration advisor) and you should seek professional legal advice if you are unsure. Go to GOV UK to check if there have been any changes to the visa rule & fees.

  • UK Visa Super Priority Appointment (Tips and Process)

    UK Visa Super Priority Appointment (Tips and Process)

    As of the 5th of November, the whole service has changed and it’s no longer the same Premium Service offering by UK Visa and Immigration (UKVI). There is a new service called UK Visa and Citizenship Application Service (UKVCAS) which is run by Sopra Steria in partnership with UK Visas and Immigration. I have searched the internet, so you didn’t have to! Here is everything you need to know about the changes.

    Psstt.. You can read more about the application process and documents I provided for the Indefinite Leave to Remain Visa (Settlement) here.

    Super Priority service is currently suspended. As things are changing (due 2020 events) with UKVCAS service please keep up to date with UKVI latest information and UKVAS.

    Disclaimer: This is based on my research and you should seek professional advice if you are unsure. Go to GOV UK to check if there have been any changes to the visa rule & fees.

    5th November 2018 Changes to Appointments

    With the rollout of the UK Visa and Immigration new streamlined services there have been several changes introduced which include:

    • a streamlined online journey for most application types, with an intuitive form making it easier to apply and the option to purchase additional services;
    • a modernised, digital and more secure process to submit key evidence and personal information, with most applicants able to retain their passports and other valuable evidence rather than sending them separately to UKVI;
    • fast and convenient self-service with the ability to make applications and upload evidence directly;
    • more flexible on-demand, mobile application services accessible at third party premises;
    • enhanced support for vulnerable customers through a range of financial support for travel costs and mobile services.

    You can read more of the details UKVI issued on this here.

    Timeline of the Changes

    • From 5th November: the new UK VCAS centres will open and slowly rolled out until the 29th of Nov. They are opening 57 locations across the country to make the process easier.
    • During the period of 5th November – 29th November, the old and new service will run which means there will be access to the new biometrics/document upload centres and Premium Services.  
    • 29th November: Premium Service Centres will close
    • January 2019: Service and Support Centres will open, for use by a small number of customers who require more support with their application. These customers will continue to use the current process until January and the UKIV will issue more information on this process shortly so look out for it.

    Premium Service Appointment Booking

    In order to book the premium service appointment, you need to complete the online application (for my ILR I used the new visa immigration website), it will be the last stage of the online application process providing you with two options to submit your application. The two options are Standard and Super Priority service and the type of visa’s this service is offered to are:

    • Tier 2 or 4 visa
    • Tier 2 or 4 dependant – applying on your own
    • Tier 1 or 5 dependant – applying on your own
    • Remain in the UK with family – applying in the partner, family life as a partner or private life in the UK routes
    • Indefinite Leave to Remain
    • And a few more.

    What does this mean for you?

    This changes the way the visa appointments used to work so instead of the appointments opening 45 business days in advance they now open within 5 working days of making your application. They encouraged to go to an appointment as soon as possible and will receive a reminder after 15 working days if you have not attended an appointment.

    If you want to visit one of these service points you can book an appointment:

    • up to 28 days in advance
    • the same day
    • the next day
    • outside of standard office hours

    If your application included family members or dependents you will need to attend the appointment at the same time.

    What are the Decision Timelines for the New Premium Service?

    The changes have introduced a new timeline for when a decision is made on your application, the choices are:

    Example of the new application

    Visit Gov.uk to commence your application, depending on the visa type you will be directed to the appropriate form you need to fill out. Once you commence the application you will be presented with an information page about your visa which will detail information about; biometric information, healthcare Surcharge, before you start applying, what you need to know, how to apply and application fees.

    Example of Tier 2 Application page.
    Example of Tier 2 Application page.

    Once you’ve completed the application and declaration you will get to the payments section.

    The first step of this process is providing your evidence and biometrics information. Between 5th November and 29th November you will be offered the choice between the existing service or the new UK VCAS. This is still displaying on some applications. You will need to choose the new service as the existing service no longer exists.

    Example of page 2 of the Tier 2 application page for providing biometics.
    Example of page 2 of the Tier 2 application page for providing biometics.

    The next step is choosing the service, to recap the decision timeline is:

    • Standard service – get a decision within 6 months
    • Super priority – get a decision in 24 hours
    Example of payment page and options available.
    Example of payment page and options available.

    The moment of spending your money is now here! Put in those card details.

    Choosing your payment method on UKVI.
    Choosing your payment method on UKVI.

    The last page is further actions will cover booking appointment, downloading the checklist and application.

    Further actions page on UKVI which allows you to book an appointment with UKVCAS.
    Further actions page on UKVI which allows you to book an appointment with UKVCAS.

    Booking Your Appointment

    Once you complete your online form and pay the fees you will be emailed an access code. This is used to book an appointment through the online portal on the UKVCAS website.

    This is also the portal you will self upload your support evidence.

    What Locations Can You Get a Premium Service Appointment?

    Before the changes there only used to be 7 Premium Service Centres now there is now 57 UKVCAS centres across the UK:

    • 6 core service centres offering free appointments – Manchester, Birmingham, Glasgow, Cardiff, Belfast and Croydon.
    • 50 enhanced service centres offering charged appointments so it will be £60 for appointments between 10 am – 4 pm, £100 for weekday appointments outside of these hours, or £125 for weekend appointments.
    • 1 premium lounge for a fee of £200 (or £260 outside of10 am –4 pm hours). Choosing this service won’t improve your application processing time.

    To find your closest centre use the location tool here. When you are booking the appointments the location tool will also appear providing you with the 4 closest centres. If you wish to find another location then enter the postcode of that area and it will show you the centres to that area.

    For example, my closest centres in London are:

    • Croydon Core Service Point – Bedford Point, 35 Dingwall Road Croydon
    • Wimbledon Service Point – Wimbledon Library, 35 Wimbledon Hill Road London
    • Victoria Service Point – Regus, 52 Grosvenor Gardens London
    • Premium Lounge Service Point – 20 Mark Lane London

    Indefinite Leave to Remain Premium Service Fees

    The fee structure for the Premium Service was £800 which has now been transferred to Super Priority service (new arrangements).

    You can see the latest fee list here.

    Additionally, you can purchase the following services:

    Enhanced service points

    Basically, this is scanning and evidence checking services and cost £60 per person. I suggest doing this yourself instead of paying for the third party to do this on your behalf.

    Out of hours appointments

    This service was previously offered and is just appointments out of the core hours. Prices start from £100 per person on top of any other appointment-based fees.

    Next day appointments

    As the title states, they now offer next day appointments for £100 per person on top of any other appointment-based fees.

    Same day appointments

    For urgent applications you can now get a same day appointment. Prices start from £100 per person on top of any other appointment-based fees.

    How Long Does a Premium Visa Appointment Take?

    I would allow 30 to 60 minute for the appointment. The appointment will just the enrolment of your biometrics and a check supporting evidence has scanned correctly. If you have uploaded/scanned the documents, then it will be simply getting you biometrics done and you will be out the door.

    Once that is complete the decision process will be kicked off and should take 24 hours. I would allow up to three days and if you’ve not heard back by then you can call UKVI.

    Preparation for the Appointment

    The preparation before the appointment is just ensuring that you have your application completed, booking confirmation, checklist and all the documentation prepared. Make sure have certified translations of any documents that are not in English or Welsh.

    With the new service you will be told what you need to bring to your appointment when you submit your application, this will include:

    • appointment confirmation
    • passport or travel document
    • supporting evidence (bring the originals to the appointment)

    When I submitted mine there was no electronic way of uploading the information, so I brought mine all neatly separated into different files and categories to make it easier for the caseworker. It was all just placed in one folder, so it wasn’t necessary to prepare this. I would still put the documents in order as per the checklist to make it easier when someone is reviewing your case if you are bringing physical documentation.

    I’ve read horror stories with the new appointment service that their paper scanners didn’t work. Upload all the docs *before* the appointment and take the original documents to the appointment. No need to take photocopies of docs or passport photos.

    What to Expect During a Premium Service Appointment at the Visas and Immigration

    Since my appointment, the process has changed (I have included that below), the new process will be:

    • show your appointment confirmation (you will get this as an email containing a QR code) and ID documents to confirm your appointment – even if you pre-upload the documents you still need to bring the originals to the appointment.
    • enrol your biometric information (fingerprints, photograph) and digital signature
    • submit your supporting evidence (unless you choose to self-upload this)
    • show your passport or travel document and have your identity checked
    • speak to a member of staff who will check that your biometric information has been successfully enrolled and your passport and supporting evidence has scanned correctly

    Afterwards you are supposed to get an email confirming you’re biometric was enrolled but I’ve never received any confirmation stating this.

    Later, depending on the service you choose you should get a letter from the Home Office on that your application was approved or denied. If approved then you will receive by post your BRP and approval letter.

    Video Update on UK Visa Premium Service Appointments

    Video on the UKVCAS Biometric Appointment

    More UK Visa Articles

    Let me know of your experience in the comments below!

  • Everything You Need to Know About the Life in the UK Test

    Everything You Need to Know About the Life in the UK Test

    The Life in the UK test is a key requirement if you plan on settling in the UK. After having gone through the test I thought I would share my experience, all the questions I had, what the process was, the experience on the day of the test and some suggested ways to learn about life in the UK.

    Psstt.. prefer to watch my experience? I’ve included a video at the bottom of the article.

    What is the Test There to Do?

    The test is to ensure we know something about the UK so basically covers the UK history, traditions, society, monarchy, government, values and culture.

    Who Can Take the Test?

    The test is for anyone that is between the ages of 18 to 65 who are applying for indefinite leave to remain (Settlement) or British citizenship (if you have not previously taken the test in the settlement process). You do not need to take the test if you:

    • are under 18
    • are 65 or over
    • have passed it before
    • have a long-term physical or mental condition (must be supported by a doctor’s note)

    Can I Take the Test After Applying for Settlement or Citizenship in the UK?

    No, it is a part of the evidence that you need to provide the certificate and is specifically stated on the required documents list. 

    When Can I Take the Life in the UK Test?

    As the pass certificate doesn’t have an expiry date it is possible to take the test anytime. I suggest not leaving it to the last minute as I did! I gave myself 1 month to study for the test which ended up being crammed in 3 days! It added unneeded stress to my application process and I was thankfully that I knew a lot about the UK anyway.

    How Do I Book My Test for Life in the UK?

    The only way you can book a life in the UK Test is by using the website. Simply go to the website above and create an account. You will then be given options to choose a test centre and you’re able to book with one of five closest test centres to your home address. Select a centre that suits you, choose a time and date and then be asked to pay for the test.

    When you’re creating an account and booking your test it’s very important to ensure that what is written on your ID is exactly what you’re putting in as your account name. When you turn up to the test centre they will be comparing your ID that you provided against the booking details. If you don’t have this correctly documented or provide the ID, you booked with then you may not be able to take the test and you lose your payment.

    What’s the Official Website for the Test and Books?

    Here is the official website for the life in the UK Test.

    I bought the following books for my Life in the UK test, Life in the United Kingdom: a guide for new residents, Life in the United Kingdom: Official Practice Questions and Answers and Life in the UK Test: Study Guide 2018: The essential study guide for the British citizenship test.

    I would recommend purchasing the first book, a guide for residence, then purchase the online test instead of the other books. In my opinion, the test will give you more practice on the questions to expect and has 1000’s stored in the database to keep you in dated with new questions.

    Life in the United Kingdom: a guide for new residents
    Life in the United Kingdom: a guide for new residents

    The https://lifeintheuk.net/online-tests/ is where I mainly spent my time practising the test! You can get a years subscription for £6.

    Psst… this contains affiliate links, I will earn a small commission if you buy one of these products at no extra cost to you :). 

    How to Postpone Life in the UK Test

    To postpone the test, you need to log back into your account on the official website and simply reschedule the date this can only be done 3 days before your test date if you don’t do this then you will lose the fee you have paid.

    How Many Questions Are There? How Long Does the Test Last?

    There are 24 questions with either true/ false or 4 multiple answers available to choose from. The questions will be different for each test, however, all the questions will all be from the Life in the United Kingdom book.

    The Test lasts for 45 minutes but in general will take between 10 to 20 minutes. If my computer didn’t glitch during the test I would have been out in 10 minutes.

    What Score Do You Need to Pass Life in The UK Test?

    You will need to get a 75% pass rate which means 18 questions right out of 24.

    Did you know that Megan Markle also had to take the Life in the UK test to become a resident of the UK? Turns out even Royals can’t get away without taking the test. 

    How Do I Prepare for the Life in the UK Test?

    Preparing for the life in the UK Test is like taking any test and will vary on the way you learn to what best suits you.

    All the questions in the test will be based on the Life in the United Kingdom handbook so make sure you purchase a copy. This way you’ll know what to expect test wise on the questions. There are another two books that you can purchase (insert) but the main book will give you all the information that you need.

    The official book also has a website which I found helpful to do the practice tests. Not only does this give you the structure of the question and answers but tests your knowledge. I spent a great deal of my time practising for the test using the practice questions!

    Find out more ways to learn about life in the UK at the end of the article.

    Do I Need to Take Any Identification with me to the Life in UK Test?

    Yes, you will need to take two forms of identification, they will even send you a reminder. It needs to be the ID that you booked with and a document verifying your address, the following documents can be used.

    Your main identification should be the photo ID which you registered with so:

    • a passport (from your country of origin)
    • UK photocard driving license, full or provisional (if you use your license identification evidence than you will need a different proof of postcode)
    • Biometric Residence Permit

    Proof of postcode (must be originals and this cannot be any older than 3 months prior to the date of the test):

    • gas/electricity/water bill
    • a council tax bill
    • bank or credit card statement
    • UK photocard driving license
    • a letter from the Home Office with your name and address on it

    When Will You Get Your Results?

    The result will be provided on the day, you will be told to wait in the waiting room after your test and then be called up by the receptionist who will tell you whether you have passed or failed.

    Will I Get a Certificate If I Pass?

    Life in the UK Pass Notification
    You will get one of these bad boys if you pass! 

    The test centre will issue one copy of your pass certificate so keep it safe! If you lose that copy you will need to call the Home Office to get another copy.

    If I Need to Re-sit the Test Will I Have to Pay Again?

    Yes, unfortunately, every time you fail the test you need to pay for another test. Additionally, if you forget your ID you registered with, your ID doesn’t match the booking detail or you forget your proof of address.

    How Many Times Can I Resit the Test If I Fail How Do I Book a Test?

    There is no limit on how many times you can take the test. It is more a case of how many times are you willing to pay for the test? The only rule in place is that there must be a minimum of 7 days before you can book another test if you fail.

    What to Expect When You Arrive at the Test Centre?

    My test was scheduled at 10 am on Tuesday and as with anything like this I arrived 15 minutes before the scheduled test time. When I arrived at the test centre I was greeted by the security guard.

    The guard asked me for my name and asked if I wanted to go to the bathroom I was a bit confused because they didn’t understand it initially when he asked me at the time. Basically, as soon as you all registered with the front desk you’re unable to go to the bathroom. I guess it is just ensuring you’ve not got someone hiding in them giving you answers.

    Once I was a ticket off the sheet I was given a laminated sheet explaining the details of the test process. I was surprised to see that the sheet said that it would be roughly an hour and a half to two hours at the test centre, thankfully this was not the case.

    After 5 minutes of waiting I was called by the receptionist to verify my booking details against my passport. I was asked to confirm my first and last name, birthplace and nationality. Therefore, it’s important that your ID matches your booking information as I mentioned above, fail to meet this and the test centre will not allow you to take the test.

    Once I was all checked-in a locker was provided for me to put all my belongings in. Everything apart my passport needed to be in the locker.

    When I entered the room, the supervisor checked my ID again and logged me onto a computer. The centre provided a headset so you can have the program read you the questions and multiple-choice answers if you need.

    Starting the test, I was given four questions to practice and these answers were not included in my results. Once I passed those four questions the test then proceeded to give me the 24 questions and started the 45-minute timer to complete the test. My version was a bit glitchy so I was worried that I might lose my test results during the process but thankfully that was not the case! Just needed to press f5 every time it froze.

    After completing the test I then head to back to the waiting room and collected my things from the locker.

    An anxious 5 minutes waiting until the receptionist called me up to tell me whether I passed or failed. Whilst I was waiting there was a lady arguing with the receptionist about her first and last name. It went on for some time! For some reason she put her first and last name back to front so the booking and ID did not match. Luckily for her the receptionist was trying to put a note on her file to allow her to take her test!

    Finally, the moment came and I was told I had passed! That sigh of relief was so real in that moment. I was given a pass certificate, requested to sign it and advised that this will be the only copy I get. Consciously keeping it safe and constantly checking that it was there until I got home. Now it’s safely sitting with my Indefinite Leave to Remain evidence.

    Other Useful Ways to Learn About Life in the UK

    The other way I find I learn more is by going out and exploring. This way you can get knowledge by just soaking up the history and facts. If you’ve not had a chance to explore it will give you more of an opportunity to see the UK and there is no shortage of places you can choose to visit! Here are a few sites to consider visiting or things to try:

    Stonehenge (Paid)

    Stonehenge is a great place to visit to learn about Englands history for the life in the UK test.
    Stonehenge is a great place to visit to learn about Englands history for the life in the UK test.

    Learn about the history of the UK before the Romans, I highly recommend going to Stonehenge! You will get a free audio guide during your visit which will bring you up to speed on all the things you need to know.

    You will learn about the history of early Britain when the first farmers arrived in Britain 6000 years ago. In later years Stonehenge continued to grow during the Bronze Age where people-built roundhouses and buried their dead in tombs called round barrows. The people of the Bronze Age era were also accomplished metalworkers who made many beautiful bronze and gold objects this included ornaments and weapons.

    Tower of London (Paid)

    The book will expect you to know some of the places of interest to visit in the UK and history of the Monarchs. The Tower of London will cover William the Conqueror and much more. This is where the Crown Jewels are kept and you’ll get to see the famous Beefeaters.

    To make your visit to the Tower of London cheaper make sure you get there by rail and enjoy the 2for1 Days Out Guide offer (this isn’t available during July and August).

    National Portrait Gallery
    National Portrait Gallery

    The gallery covers the history of the Monarchs and eras like Victorian and Edwardian times. Pick up an audio guide (a small fee) for some additional information and history around the portraits or simply just wander around the National Portrait Gallery and see famous paintings of:

    • The Tudor and Elizabethan portraits
    • The Stuart portraits and the Civil War
    • Georgian and Regency portraits
    • Victorian and Edwardian portraits.

    British Museum (Free)

    British Museum

    The Life in the UK book expects you to understand the impact that the Romans had on British Society. The British Museum delivers you just that by their free daily eye-opening tours on Roman Britain or just visiting room 49.

    The room 49 tour will cover the Roman occupation of Britain, the diverse society, the wealth of the Romans, the laws, administration, currency, architecture and much more through the variety of objects and artworks on display.

    Museum of London (Free)

    The Museum of London offers a wealth of topics that are covered in the Life in the UK book from World War I, World War II, British Empire Exhibitions 1924-1925, Elizabeth II Coronation 1953, Great Plague 1665, Suffragette Campaign 1903-1918 and Great Fire of London 1666. It is a place you should add to your learning tour of the UK.

    Urquhart Castle (Paid)

    Urquhart Castle
    Urquhart Castle

    Every time I have visited Urquhart Castle I have thoroughly enjoyed my visit. The tour guides are so friendly and rich in knowledge about the history of Urquhart Castle and Scotland. On my last visit I learnt about how the castle played a key role in the Scottish fight for independence so make sure you to take the time to chat with them during your visit.

    Stirling Castle (Paid)

    Stirling Castle is one of the largest and most important castles in Scotland. The castle was one of the most used by the Scottish royal family and included crowing of several kings and queens including Mary, Queen of Scots and many others. The three-sided cliff face gave the castle a strong defensive position and strategic location during its time as a serving castle.

    Try Some Traditional Foods

    Food is a great way to get immersed in traditions and cultures. A few dishes you could try are:

    • In England try some roast beef served with potatoes, vegetables, Yorkshire puddings (which is a must with any English roast) and other accompaniments. For vegetarians, you can still try the tasty Yorkshire puddings!
    • In Wales try some Welsh cakes which a snack is made from flour, dried fruits and spices.
    • In Scotland, Haggis is the traditional dish which is made from a sheep’s stomach stuffed with offal, suet, onions and oatmeal. Not so friendly for the vegetarians out there! Instead pick up some Scottish Shortbread.

    • In Northern Ireland, Ulster fry is the dish to try. A fried meal with bacon, eggs, sausage, black pudding, white pudding, tomatoes, mushrooms, soda bread and potato bread. Just leave out the meat if you are a veggie and try the slices of bread!

    Get Involved in UK Events

    Guy Fawkes Night

    On the 5th of November, the UK hosts a series of events for Guy Fawkes Night. It is sometimes known as Bonfire Night and marks the anniversary of the discovery of a plot organized by Catholic conspirators to blow up the Houses of Parliament in London in 1605. Many people light bonfires and set off fireworks.

    Pancake Day (Shrove Tuesday)

    Shrove Tuesday is the day before Lent starts and traditionally where people eat pancakes which were made to use up foods such as eggs, fat and milk. I am not religious so to me it’s just an excuse to have pancakes for dinner!

    St Patrick Day

    Celebrated around the world by the Irish is St Patrick’s Day on the March 17. It particularly remembers St Patrick, one of Ireland’s patron saints, who ministered Christianity in Ireland during the fifth century.

    Remembrance Day

    On the 11th of November at 11 am, the UK commemorates those who died fighting for the UK and allies in the First World War. Everyone takes part in a two-minute silence and some buy poppies (the red flower found on the battlefield of WWI) to commemorate.

    Good luck! If you have study tips or links to the information you found helpful, share it below.

    Life in the UK Test – The Whole Process (Video)